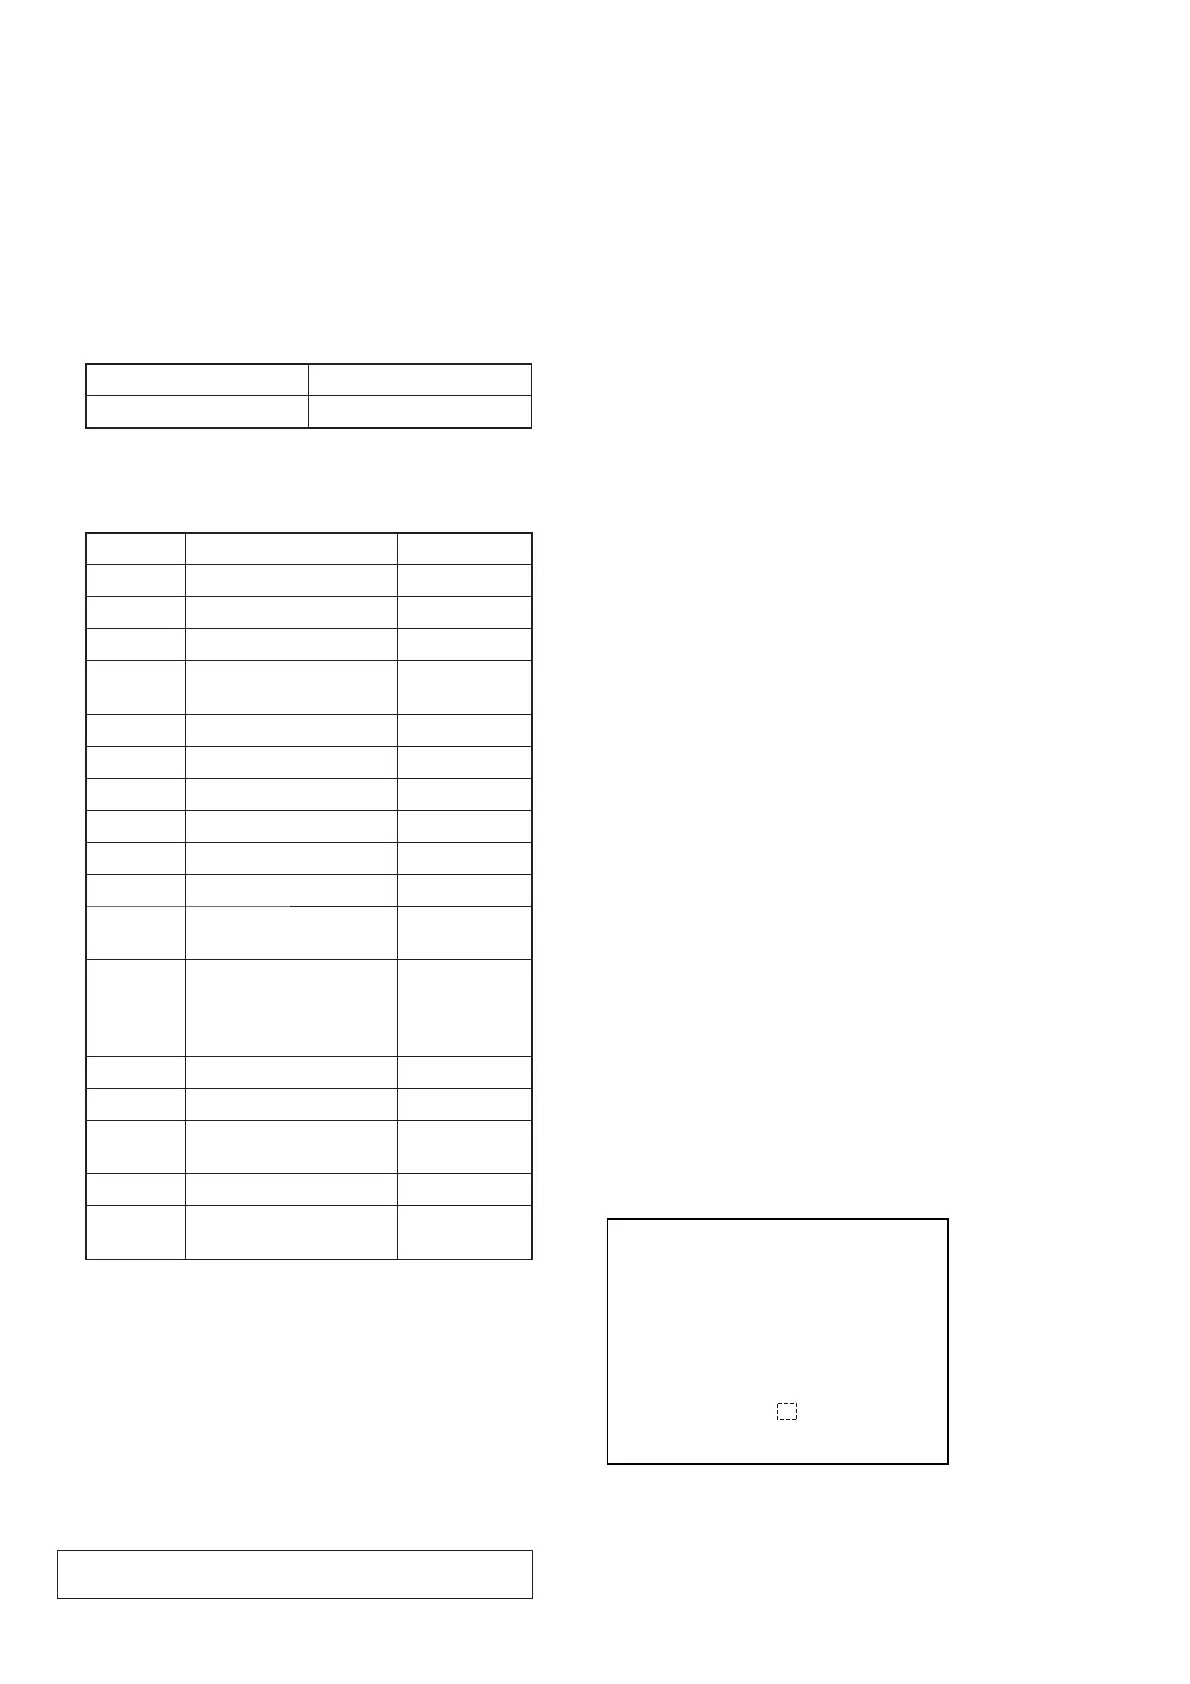
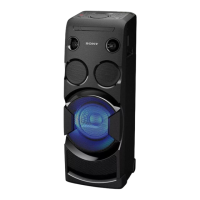
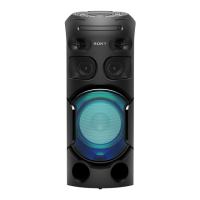
MHC-V3/V4D
28
Ver. 1.5
[MODEL & DEST WRITE MODE]
This mode is used to set software model & destination.
This mode is only available when no permanent model &
destination is stored.
Procedure:
1. Press [EQ] button and [OPTIONS]
*1
/ []
*2
button simultane-
ously and hold for 5 seconds.
2. Fluorescent indicator tube display will show “M XXXXX”.
3. Press [+] / [‒]
*1
or [+ PRESET +] / [‒ PRESET ‒]
*2
button to select the model based on the set’s model.
Product Code F. Tube display
SONY:MHC-V3 “M FSX0”
4. Press [ENTER] button.
5. Fluorescent indicator tube display will show “D XXXXX”.
6. Press [+] / [‒]
*1
or [+ PRESET +] / [‒ PRESET ‒]
*2
button to select the destination based on the set’s country.
Area Code Country F. Tube display
J1 Japan “D J”
JE1 Tourist “D JE”
U2/CA2 America, Canada “D NA”
CEL/CE1/
CE2
Europe (general) “D CE2”
CEK U.K. “D CEK”
RU1/RU3 Russia “D RU”
AU1 Australia “D AU”
CN1 China “D CN”
E12 India, Pakistan, Morocco “D E12”
E3/E15 Middle East, Iran “D E3”
E4/EA3/
E93/SA2
Saudi Arabia, Africa “D EA3”
HK1/
HK2/PL1/
SP1/SP2/
SP6/TH1
Hong Kong, Philippines,
Singapore, Malaysia,
Thailand
“D ASIA”
KR2 Korea “D KR”
TW2 Taiwan “D TW2”
E2, E32,
E51, AR2
Latin America (general),
Chile, Peru, Argentina
“D LATIN”
BR1 Brazil “D BR”
MX2,
MX4
Mexico “D MX”
7. Press [ENTER] button to confi rm the selection.
8. “RESET” appears on the fl uorescent indicator tube. After that,
the fl uorescent indicator tube becomes blank for a while, and
the system is reset.
9. Mode in [PANEL TEST MODE] again to confi rm on the
model & destination.
[DVD COLOR SYSTEM MODE]
• This mode let you change the color system of the video output
from PAL to NTSC or vice-versa.
Procedure:
1. Press the [\/1] button to turn on the system.
2. Press the [FUNCTION] button until message “DVD/CD”
appears.
3. Press the [X] button and [‒ PRESET ‒] button
simultaneously and hold for 3 seconds.
4. The message “COLOR PAL” or “COLOR NTSC” appears on
the fl uorescent indicator tube.
• To release from DVD Color System Mode
1. Once the color system has been selected, the mode is fi xed
there after. If you wish to change the mode again, perform the
above item 2 again.
[DVD SERVICE MODE]
• This mode let you make diagnosis and adjustment easily by
using the remote commander and the TV. The instructions,
diagnostic results, etc. are given on the on-screen display.
• TEST DISC LIST
Be sure to use the DVD disc that matches the signal standards
of your region.
• CD
YEDS-18 (Part No.: 3-702-101-01)
PATD-012 (Part No.: 4-225-203-01)
• DVD SL (Single Layer)
NTSC : HLX-503 (Part No.: J-6090-069-A)
HLX-504 (Part No.: J-6090-088-A)
P
AL : HLX-506 (Part No.: J-6090-077-A)
• DVD DL (Double Layer)
NTSC : HLX-501 (Part No.: J-6090-071-A)
HLX-505 (Part No.: J-6090-089-A)
PAL : HLX-507 (Part No.: J-6090-078-A)
• Procedure to enter to DVD Service Mode:
1. Press the [\/1] button to turn on the system.
2. Press the [FUNCTION] button until message “DVD/CD”
appears.
3. Press the [EQ] button and [ENTER] button simultaneously
and hold 3 seconds.
4. The message “SERVICE” appears on the fl uorescent indicator
tube.
The display of the “Model Name” of the “Remocon Diagnosis
Menu” change with the model and the destination appears on
screen display. Refer to below on the model name.
MHC-V4D: FSX0D
*1: Changes depending on destination
5. To execute each function, press its number by using numeric
button on the remote commander.
6. To release from this mode, press the [\/1] button to turn off
the system.
Remocon Diagnosis Menu
0. External Chip Check
1. Servo Parameter Check
2. Drive Manual Operation
3. Emergency History
4. Version Information
5. USB Test Mode Setting
Model Name
IF-con
Syscon
: FSX0D_ XX
*1
: Ver. XX.XX (XXXX)
: Ver. X.XXX
Note:
*1
V3 model
*2
V4D model