36
This section explains how to record analog
sound signals from the line output of an
external device or by using the built-in or
external microphones.
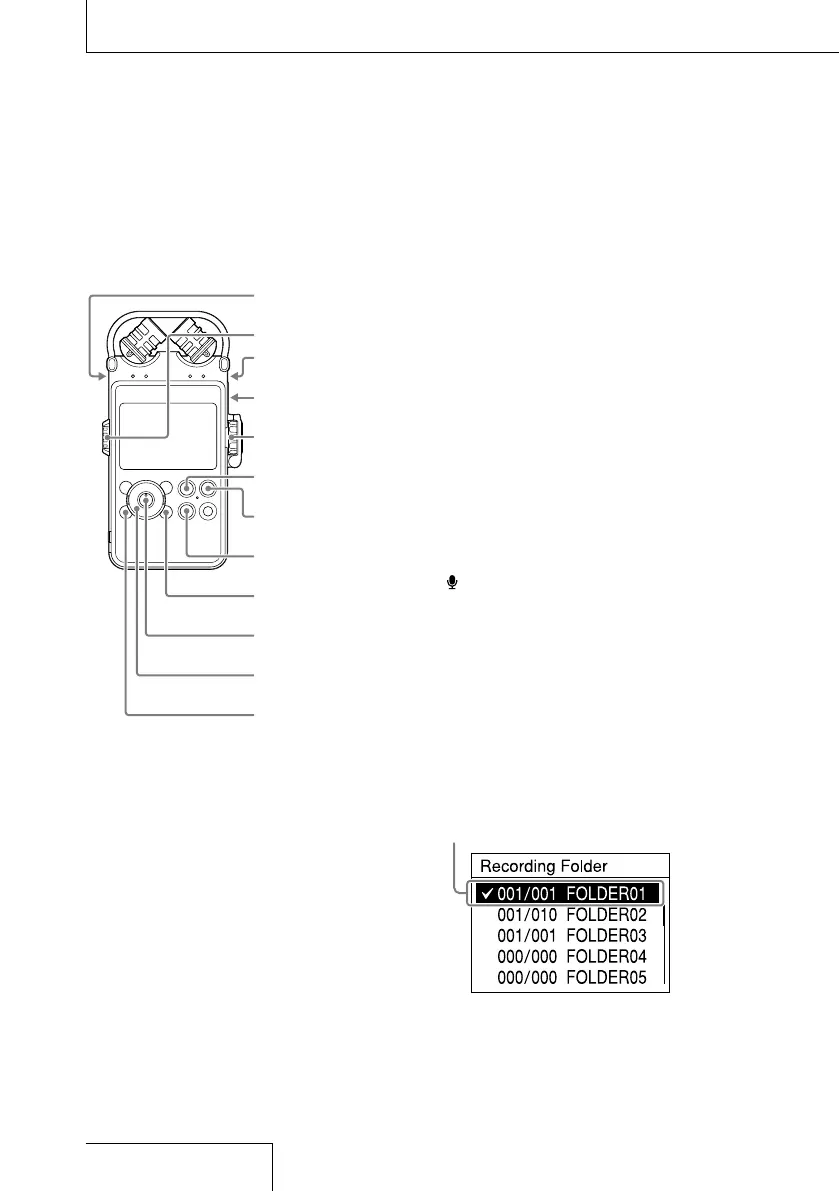
PAUSE button/
lamp
REC LEVEL dial
OPTION button
HOME/BACK
button
Volume dial
INPUT switch
REC button/
lamp
button
, , ,
LINE IN (OPT) jack
MIC jack
STOP button
Recording using the built-in
microphones
This sub-section explains how to record sound
sources in the built-in memory with the built-
in microphones.
To change the sampling frequency,
quantifying bit number, or memory drive for a
recording, go to the menu display.
The default sampling frequency and
quantifying bit number are “44.1kHz 16 bit.”
1
Position the linear PCM recorder and
the built-in microphones, referring to
“Preparation before recording” (page
33).
2
Set the INPUT switch to the “MIC”
(microphones) position.
3
Press and hold the HOME/BACK
button for 1 second or more, select
“
Record”, and then press the
button.
The recording stop mode window is
displayed.
If you do not change “Recording Folder,”
skip to step 6.
4
When you want to change “Recording
Folder,” press the OPTION button to
display the OPTION menu, then select
“Recording Folder,” and then press the
button.
The screen to select a folder is displayed.
Currently selected folder
Recording analog sound


 To Next Page