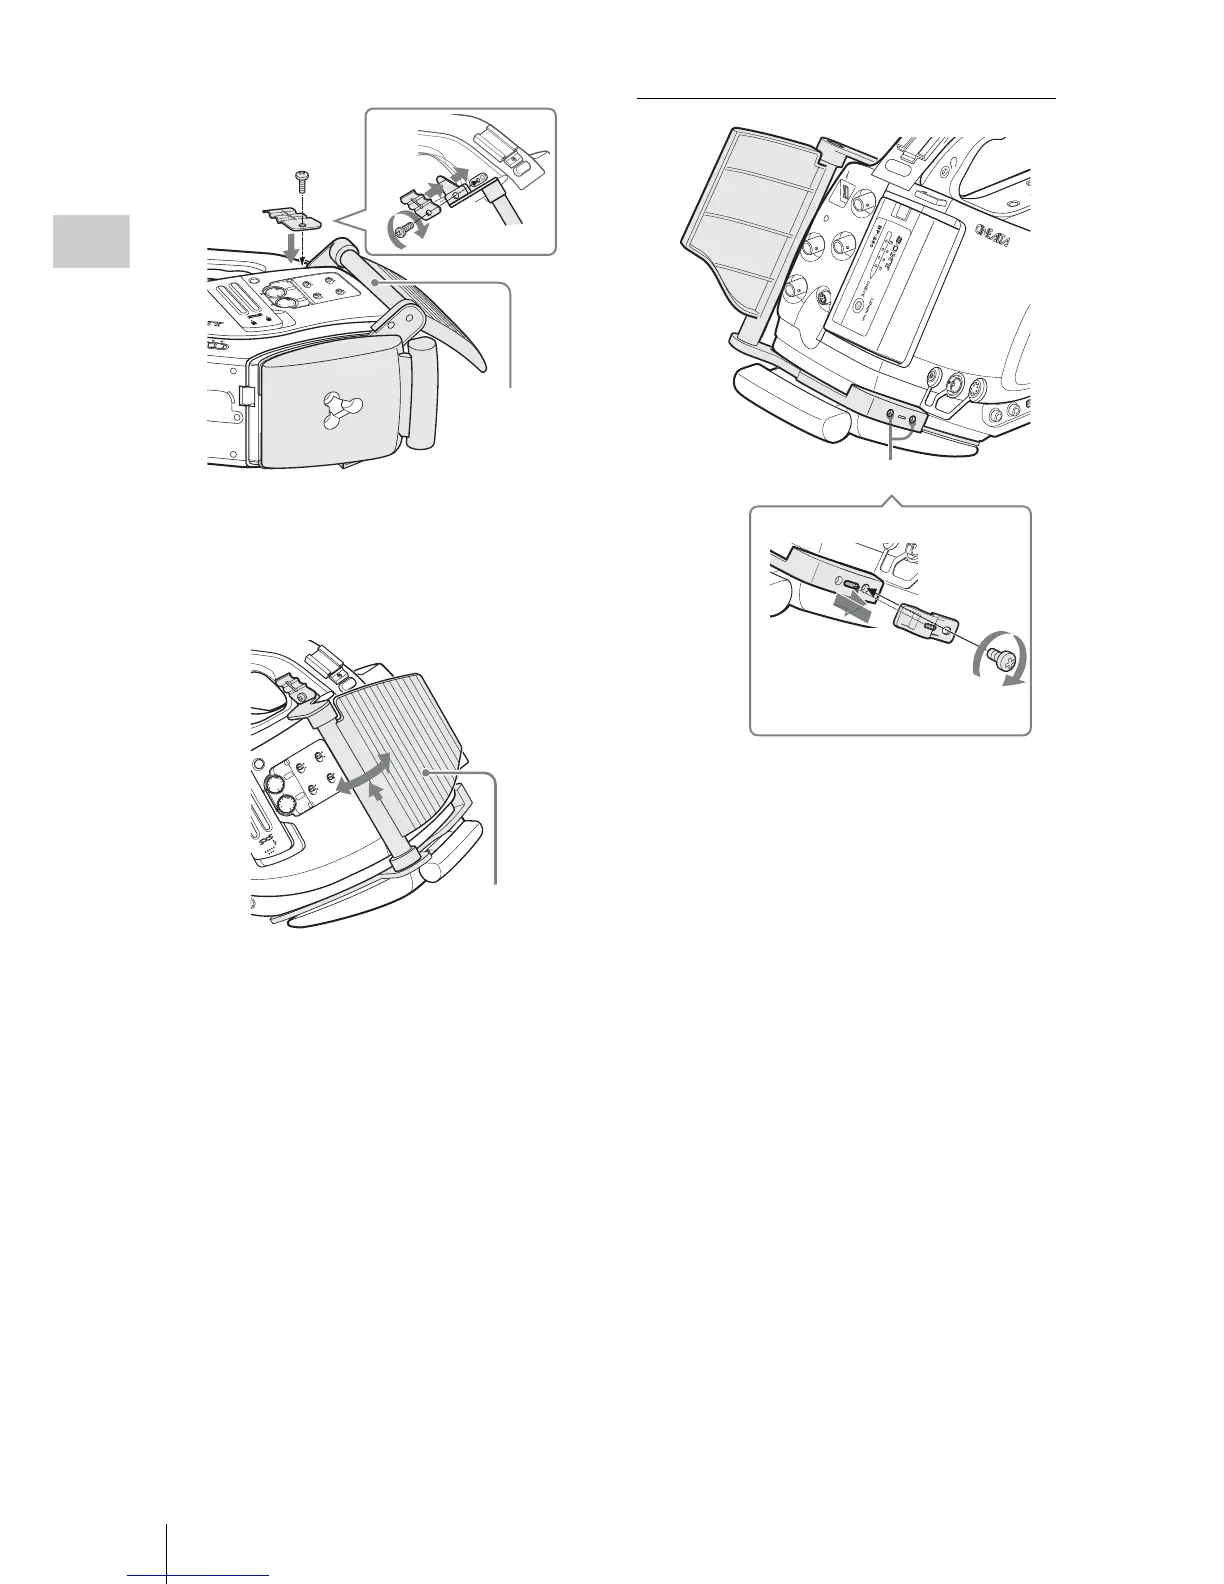
EasyManua.ls Logo

Sony PMW-EX3 - Page 38

Sony PMW-EX3
161 pages
Print Icon
To Next Page IconTo Next Page
To Previous Page IconTo Previous Page
Loading...
Using the Cheek Pad
38
Preparations
6 While holding the pole upward, flip the
pad toward the side panel of the
camcorder.
To attach the DC cable clamp
The supplied DC cable clamp can be attached to
the frame of the cheek pad at one of the accessory
screw holes on the opposite side of the pad.
The DC power output cable (page 27) of the BC-
U1 connected to the DC IN connector can be tied
down with the clamp.
1 Insert the cable clamp to the frame so
that the rear projection of the cable
clamp fits in the slot on the frame.
Adjust the position of the clamp by
sliding it so that the screw hole of the
clamp aligns with that of the frame.
2 Secure the clamp, using the supplied
screw.
R
A OFF MEDIA
SLOT SELECT
C
H
-1
AU
T
O
M
AN
UAL
INT
EX
T
A
U
T
O
MA
NU
AL
INT
EX
T
CH
-2
A
UD
IO
LEV
E
L
A
UDIO
S
ELEC
T
AU
D
IO
IN
A
B
AC
C
E
S
S
OP
E
N
P
M
W
-
E
X
3
Pole of the
cheek pad
Supplied screw
Cable clamp
E
DIA
SLOT
SELECT
PMW-EX3
CH
-1
A
UT
O
M
ANU
AL
IN
T
EX
T
A
UT
O
MA
NU
AL
INT
E
X
T
CH
-2
AU
D
IO
LEVEL
AUDIO
SELECT
A
UDIO
IN
OPEN
SDI O
UT
GENLO
CK IN
REMOTE
TC OUT
TC IN
HD
V
Cheek pad
S
D
I O
U
T
GEN
LO
CK
IN
R
EMOTE
TC
O
U
T
TC
IN
HDV
CO
M
DC IN
MONITOR
OUT
S V
IDEO
AUDIO OUT
CH-1
CH-2
ON
B
TC/U-BIT/DURATION
1
2
1
Accessory screw holes
DC output
cable clamp

Table of Contents

Other manuals for Sony PMW-EX3

Related product manuals