Adjustment Using the Menus
29
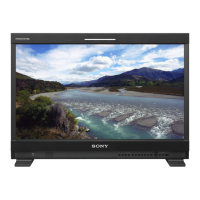
FOCUS SETTING
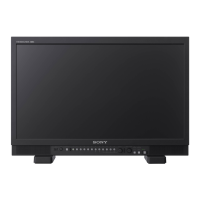
FUNCTION BUTTON SETTING
About the function assigned to the
function button
SCAN
Press the button to change the scan size of the picture.
With every press of the button, the picture switches in
the sequence NORMAL scan t OVER scan t
NATIVE. (see “Scan mode image” on page 30).
ASPECT
Press the button to set the aspect ratio of the picture, 4:3
or 16:9.
BLUE ONLY
Press the button to eliminate the red and green signals.
Only blue signal is displayed as an apparent
monochrome picture on the screen. This facilitates
“chroma” and “phase” adjustments and observation of
signal noise.
MONO
Press the button to display a monochrome picture. When
the buttons is pressed again, the monitor switches
automatically to color mode.
MARKER
Press the button to display the marker. Set the aspect
marker in the MARKER SETTING menu (see page 27).
H/V DELAY
Press the button to observe the horizontal and vertical
sync signals at the same time.
CLOSED CAP.
Press the button to display the closed caption. Set the
closed caption setting in the CLOSED CAPTION
SETTING menu (see page 31).
WFM/ALM/VS (WFM/ALM/VECTOR)
Press the button to display the WFM/ALM/vectorscope
display. Set the WFM/ALM/vectorscope display setting
in the WFM/ALM/VECTOR SETTING menu (see
page 27).
When LINE SELECT is set to ON and WFM is selected,
each time you press the button, the settings change in the
sequence WFM display activated t Line position
setting t WFM display deactivated. Turn the menu
selection control to move the line, when the line position
is selected.
When LINE SELECT is set to OFF, the WFM display
switches between activated and deactivated.
ZOOM
Press the button to zoom in the WFM/ALM/vectorscope
display. Set the ZOOM setting in the WFM/ALM/
VECTOR SETTING menu (see page 28).
Submenu Setting
FOCUS MODE Switches the focus mode.
• STD: An image with sharpened edges
is displayed.
• COLOR: Displays the intensified
areas of images with color
selected in COLOR below.
• OFF: FOCUS MODE is deactivated.
COLOR Selects the displayed intensified color
from white (W), red (R), green (G), blue
(B), and yellow (YL).
FREQUENCY Sets the center frequency of the edge
sharpening signal.
You can select from L, M, MH, H.
RANGE Sets the amount by which the level of
edge sharpening may vary.
You can set from 1 to 3.
GAIN Sets the level of edge sharpening.
You can select from 0 to 100.
Submenu Setting
F1 BUTTON to F7
BUTTON
Assigns the function to the function
buttons of the front panel and turns the
function on or off.
You can assign the function from among
SCAN, ASPECT, BLUE ONLY,
MONO, MARKER, I/P MODE, etc.
Factory setting
• F1 button: BRIGHTNESS
• F2 button: CONTRAST
• F3 button: CHROMA
• F4 button: SCAN
• F5 button: H/V DELAY
• F6 button: VOLUME
• F7 button: I/P MODE
FOCUS MODE: xxx
COLOR: xx
FREQUENCY: x
RANGE: x
GAIN: x
USER CONFIG – FOCUS SETTING
F1 BUTTON: xxxx
F2 BUTTON: xxxx
F3 BUTTON: xxxx
F4 BUTTON: xxxx
F5 BUTTON: xxxx
F6 BUTTON: xxxx
F7 BUTTON: xxxx
USER CONFIG –
FUNCTION BUTTON SETTING