24
Operation
Expert Mode--Creating a Custom Target Colorspace----cont.
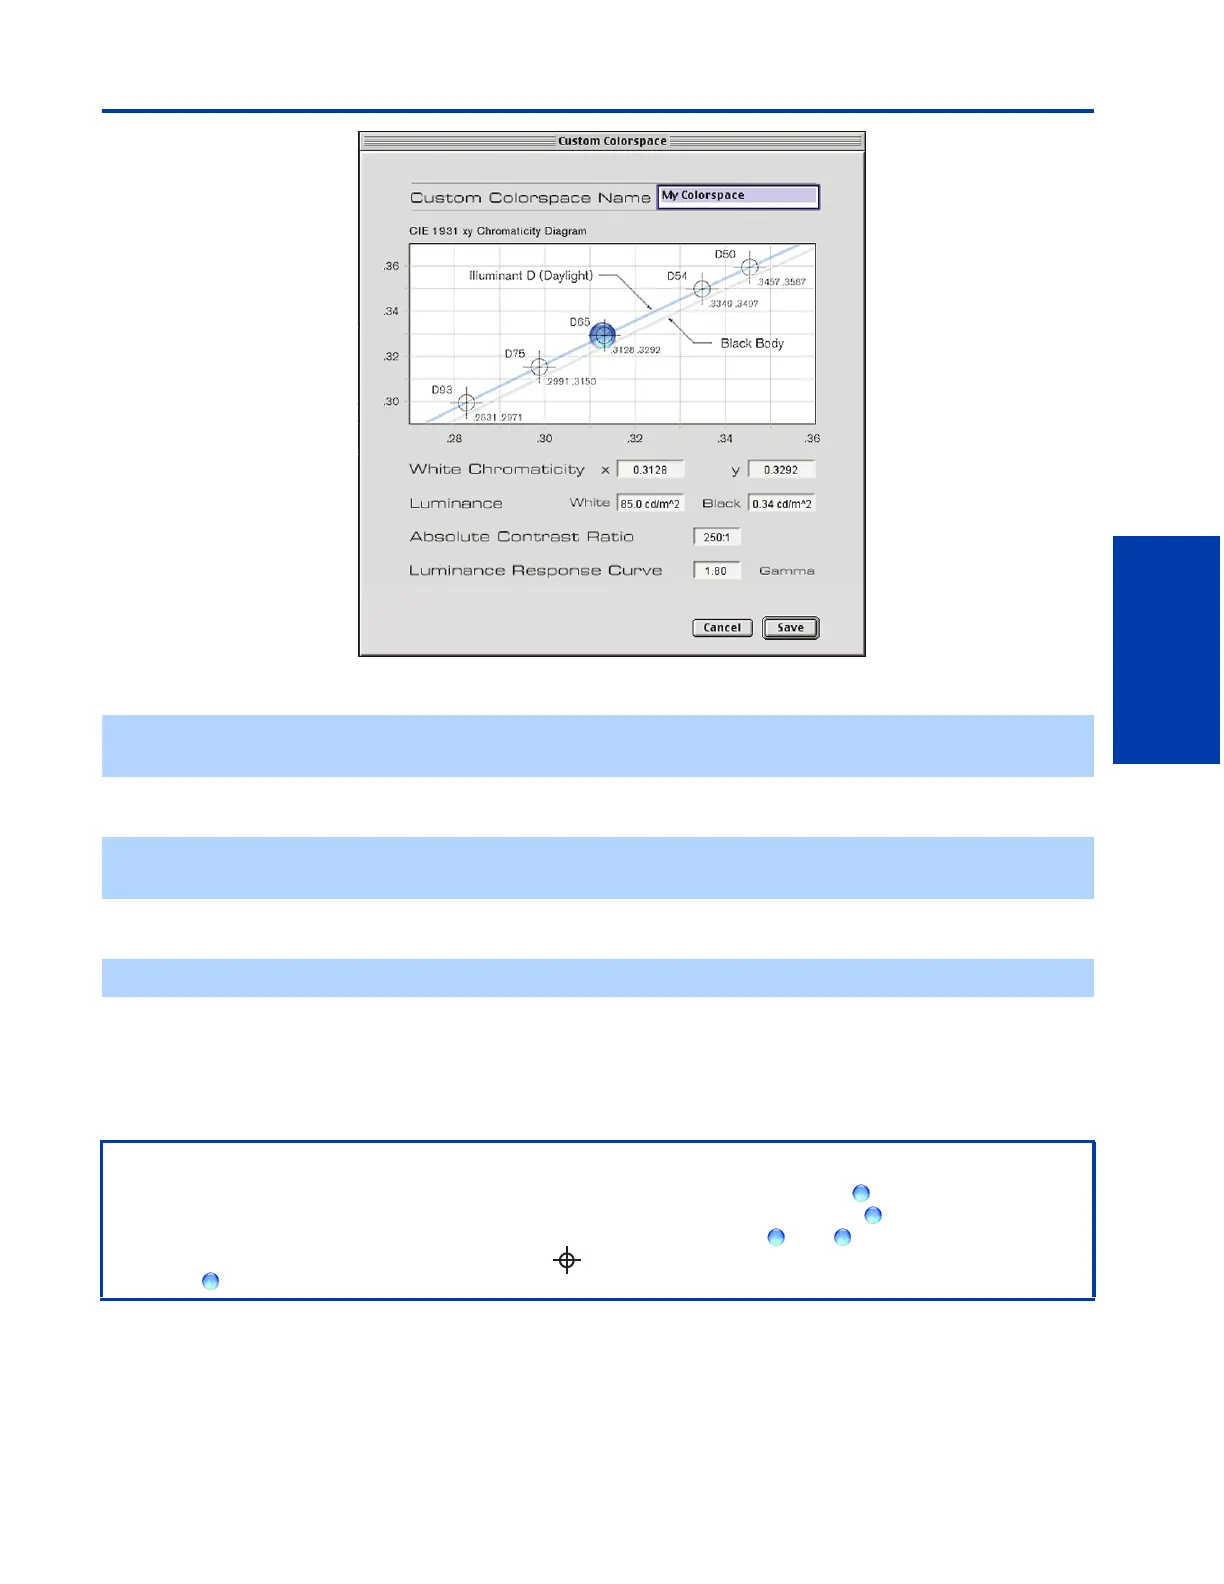
1 Use the dialogue boxes labeled “White Chromaticity” to set the x and y values of your new colorspace.
2 To set white Luminance values, use the dialogue box labeled “White”.
3 Use the dialogue box labeled “Absolute Contrast Ratio” to set the ratio of white luminance to black luminance.
4 Set the luminance response curve by entering a value between 1 and 2.6 gamma into the dialogue box labeled
“Gamma”.
5 Your new colorspace is now complete. To save the new colorspace, enter a name in the dialogue box at the top of the
Expert Mode interface, next to “Custom Colorspace Name”; then click “Save”.
✍ Values for x and y must range between .2700 and .3600. If a number outside of this range is inputted, the value will snap
to the lowest or highest possible value.
✍ The white luminance value will be constrained by the x and y values entered for white chromaticity. The range for white
luminance varies between 85 and 110 cd/m
2
.
✍ This will automatically enter the value of black luminance into the dialogue box labeled “Black”.
An Alternative Method for Creating a Custom Target Colorspace
Instead of entering exact values into the dialogue boxes, as described above, you can drag the in the graphical
representation of the Chromaticity Diagram to specify the values that you want. As you drag the around the Chromaticity
Diagram, the number in the dialogue boxes will change to match the location of the . The will “snap to” standard
colorspaces indicated on the Chromaticity Diagram by a ; to disable this feature, hold down the option key when you are
moving the .