Setup
Setup of the Unit
54
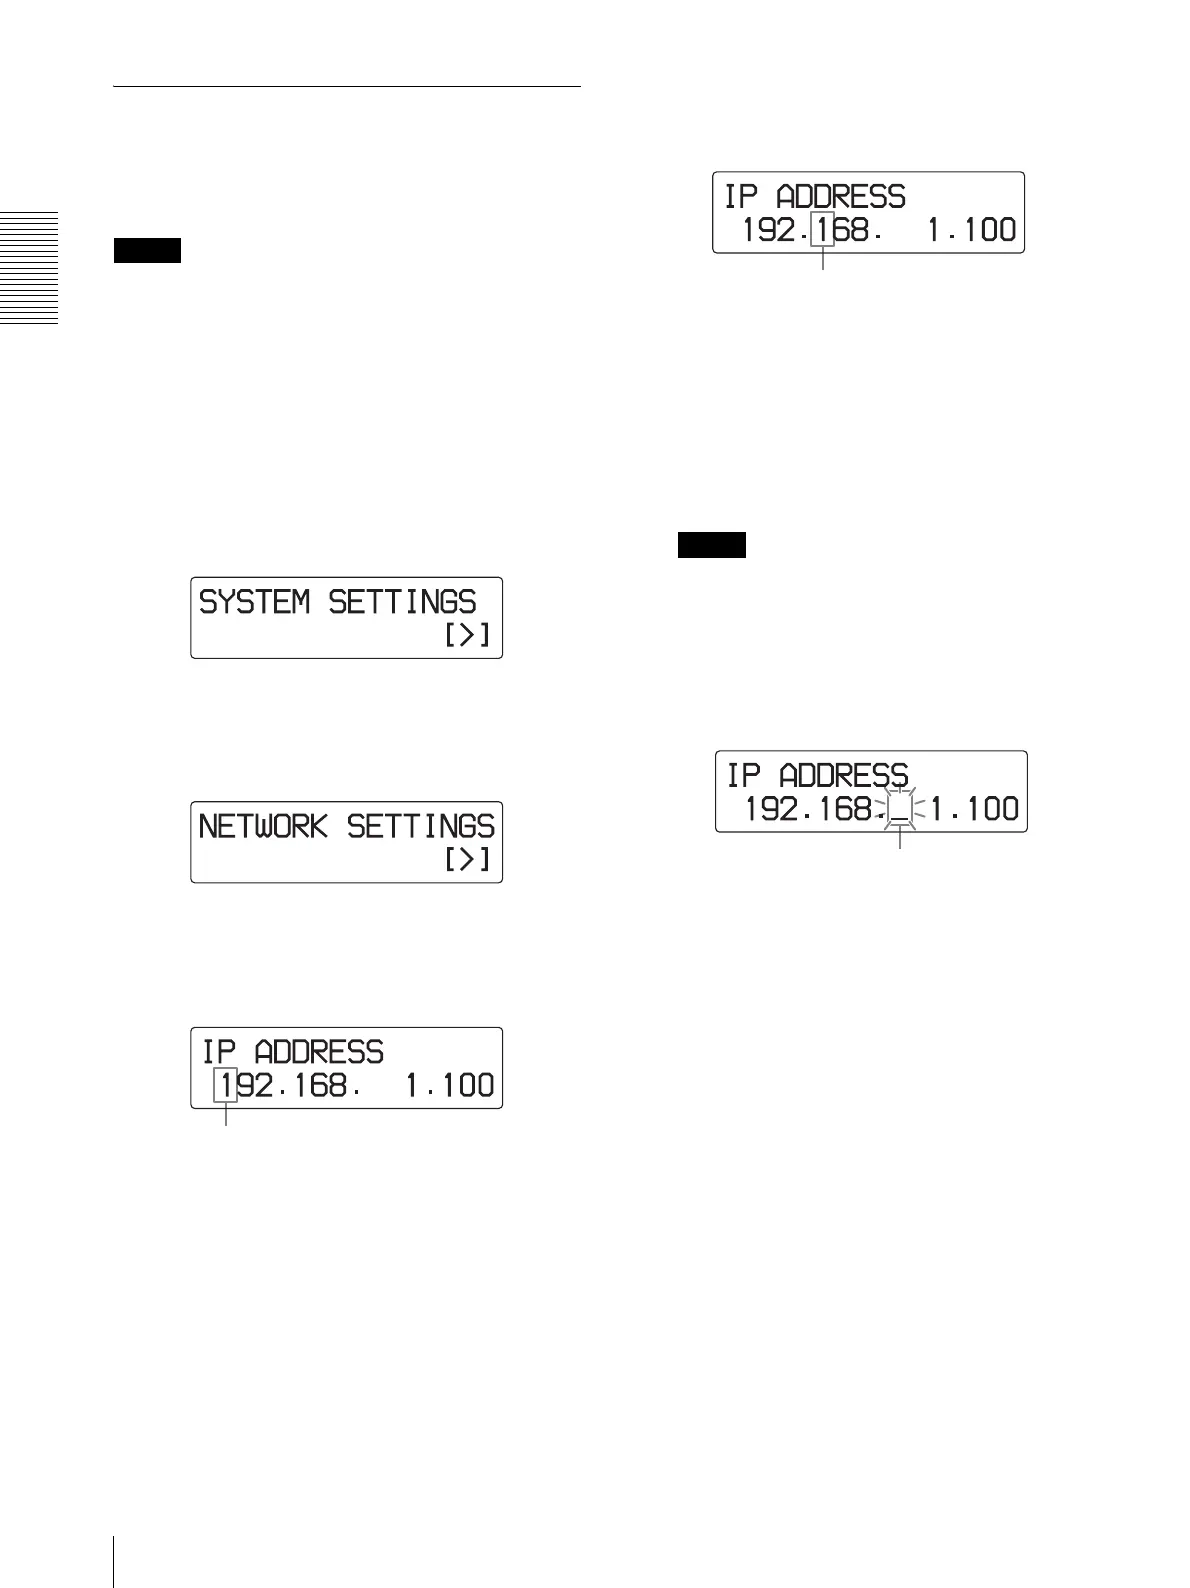
Setting the IP Address Using the
Menu
You can set up the IP address on the printer side. The
settings performed latest become effective.
Note
If you set the wrong IP address, sub-net mask, and
default gateway address, the printer cannot be connected
to the LAN network. Be sure not to change those
settings without consulting the system administrator.
When you need to change those settings, contact your
nearest Sony dealer.
1
Press the MENU button.
2
Display the SYSTEM SETTINGS menu by
pressing the F or f button.
3
Press the g button.
The unit enters the network setting mode.
4
Press the g button.
The IP ADDRESS setting window appears.
5
Set the IP address.
1 Move the blinking cursor to the digit to be
changed by pressing the G or g button.
2 Display the desired number by pressing the F
or f button.
Pressing the F button: Increases the numbers.
Pressing the f button: Decreases the numbers.
3 Set the remaining digits by repeating steps 1
and 2.
Notes
• The cursor skips over the period.
• The cursor does not move to the spaces even if
there are spaces at both right-most and left-most
ends of the display.
• When there are spaces among IP address digits,
you can move the cursor to that space.
The cursor blinks. This is the currently
selected digit.
Move the blinking cursor to the digit to be
changed.
The cursor blinks. You can change anything
in this space.