Do you have a question about the Sony VO-5800PS and is the answer not in the manual?
Overview of device features, safety precautions, and handling guidelines.
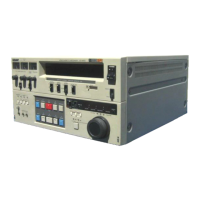
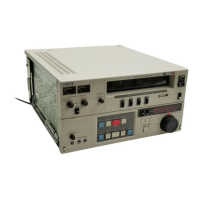
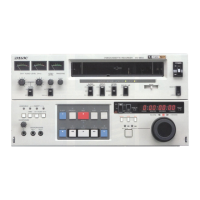
Detailed identification and description of front and rear panel controls and connectors.
Introduction to operations like time base correction, programmed playback, and timer functions.
Guide for resolving common issues and important safety warnings.
Features for automatic editing, smooth scene transitions, and audio dubbing.
Includes search operations, long pause mode, and moisture detection.
Details on time base corrector, logic control, and automatic signal level adjustments.
Covers dual audio tracks, audio limiter, and stable playback picture technology.
Essential safety rules for operating the unit, including power and environment.
Recommendations for proper installation, ventilation, and avoiding hazards.
Best practices for operating the unit and cleaning its exterior.
Guidelines for safely transporting and storing the video cassette recorder.
Step-by-step instructions for inserting and removing video cassettes.
Explanation of the recording format and the red button for protection.
Proper methods for handling, storing, and checking video cassettes.
Description of the power section and timer switch functionality.
Explanation of the SKEW control for tape tension and picture quality.
Adjusting tracking, audio levels, and using the audio limiter.
Selecting audio sources for monitoring and setting input types.
Detailed explanation of buttons like EJECT, REC, DUB, PAUSE, PLAY, REW, STOP.
Meaning of indicators like STAND BY, AUTO OFF, and SERVO.
Using the search dial to locate points on the tape.
Using the time counter, RESET, and MARK IN/B buttons for tape indexing.
Description of RF OUT connector and RF modulator compartment.
Connecting video signals via BNC and 7-pin dubbing connectors.
Connecting time base corrector and subcarrier input.
Connecting audio signals via LINE IN and AUDIO MONITOR jacks.
LINE OUT audio signals and AC power connection.
Connecting remote control units and grounding for hum reduction.
Selecting monitor type and video signal system (PAL/SECAM).
Connecting to TV monitors and using dubbing output.
VIDEO OUT connector and COLOR LOCK switch for picture adjustment.
Using the RX DATA Jack for data recording and reading.
Connecting a video camera for recording.
Connecting for duplicating tapes with or without a DUB connector.
Connecting the unit to a stereo system for audio input/output.
Connecting video monitors for recording TV programs.
Using headphones or audio monitor for listening during operations.
Connecting microphones for audio recording.
Steps for making necessary connections and setting up the unit for recording.
Detailed instructions on pressing buttons, adjusting levels, and starting recording.
Using the PAUSE button to achieve smooth scene transitions during recording.
Editing signals from two sources using the VIDEO-1/VIDEO-2 select switch.
Procedure for adding sound or commentary to existing recordings.
Connecting for duplicating tapes using DUB IN/OUT connectors.
Selecting audio sources to hear during recording or playback.
Procedure to erase recorded material without recording new content.
Instructions for playing back tapes and momentarily stopping playback.
Connecting and using a time base corrector for optimal playback.
Using the search dial to quickly locate points on the tape.
Playing back tapes using an external sync system connection.
Using MARK IN/B buttons to memorize and locate specific points on the tape.
Repeating specific parts of the tape using programmed operation.
Verifying memorized points on the MARK IN A and B buttons.
Setting up the unit and RF modulator to view playback on a TV receiver.
Step-by-step guide for installing the optional RF modulator.
Connecting the VO-5800PS with the RM-440 for automatic editing.
Setting up the player and recorder for automatic editing.
Searching for edit points, rehearsing, and executing the automatic edit.
Using an optional timer for unattended recording and playback.
Steps for cleaning the video heads using a cleaning cassette.
Adjusting SKEW and TRACKING controls for picture clarity.
Using the COLOR LOCK switch to adjust color and hue.
Utilizing the RX-353CE for segment locating and playback.
Information on rack mounting the unit and repacking procedures.
Detailed technical specifications for video, audio, and system parameters.
List of compatible and recommended video equipment and accessories.
Resolving issues related to moisture detection and non-functional buttons.
Troubleshooting problems with cassette insertion and tape not running.
Addressing issues with recording, playback, picture snow, color, and distortion.
Resolving problems with sound, and unexpected power-on behavior.