GB
8
Step 2: Connecting the Projector
Connections and
Preparations
Step 2:
Connecting the
Projector
When making connections, be sure to do the
following:
• Turn off all equipment before making any
connections.
• Use the proper cables for each connection.
• Insert the cable plugs properly; plugs that are not
fully inserted often generate noise. When pulling
out a cable, be sure to pull it out from the plug, not
the cable itself.
• When you connect your projector to PJ MULTI
INPUT, select the input signal with the INPUT-A
setting in the SET SETTING menu. (1 page
20)
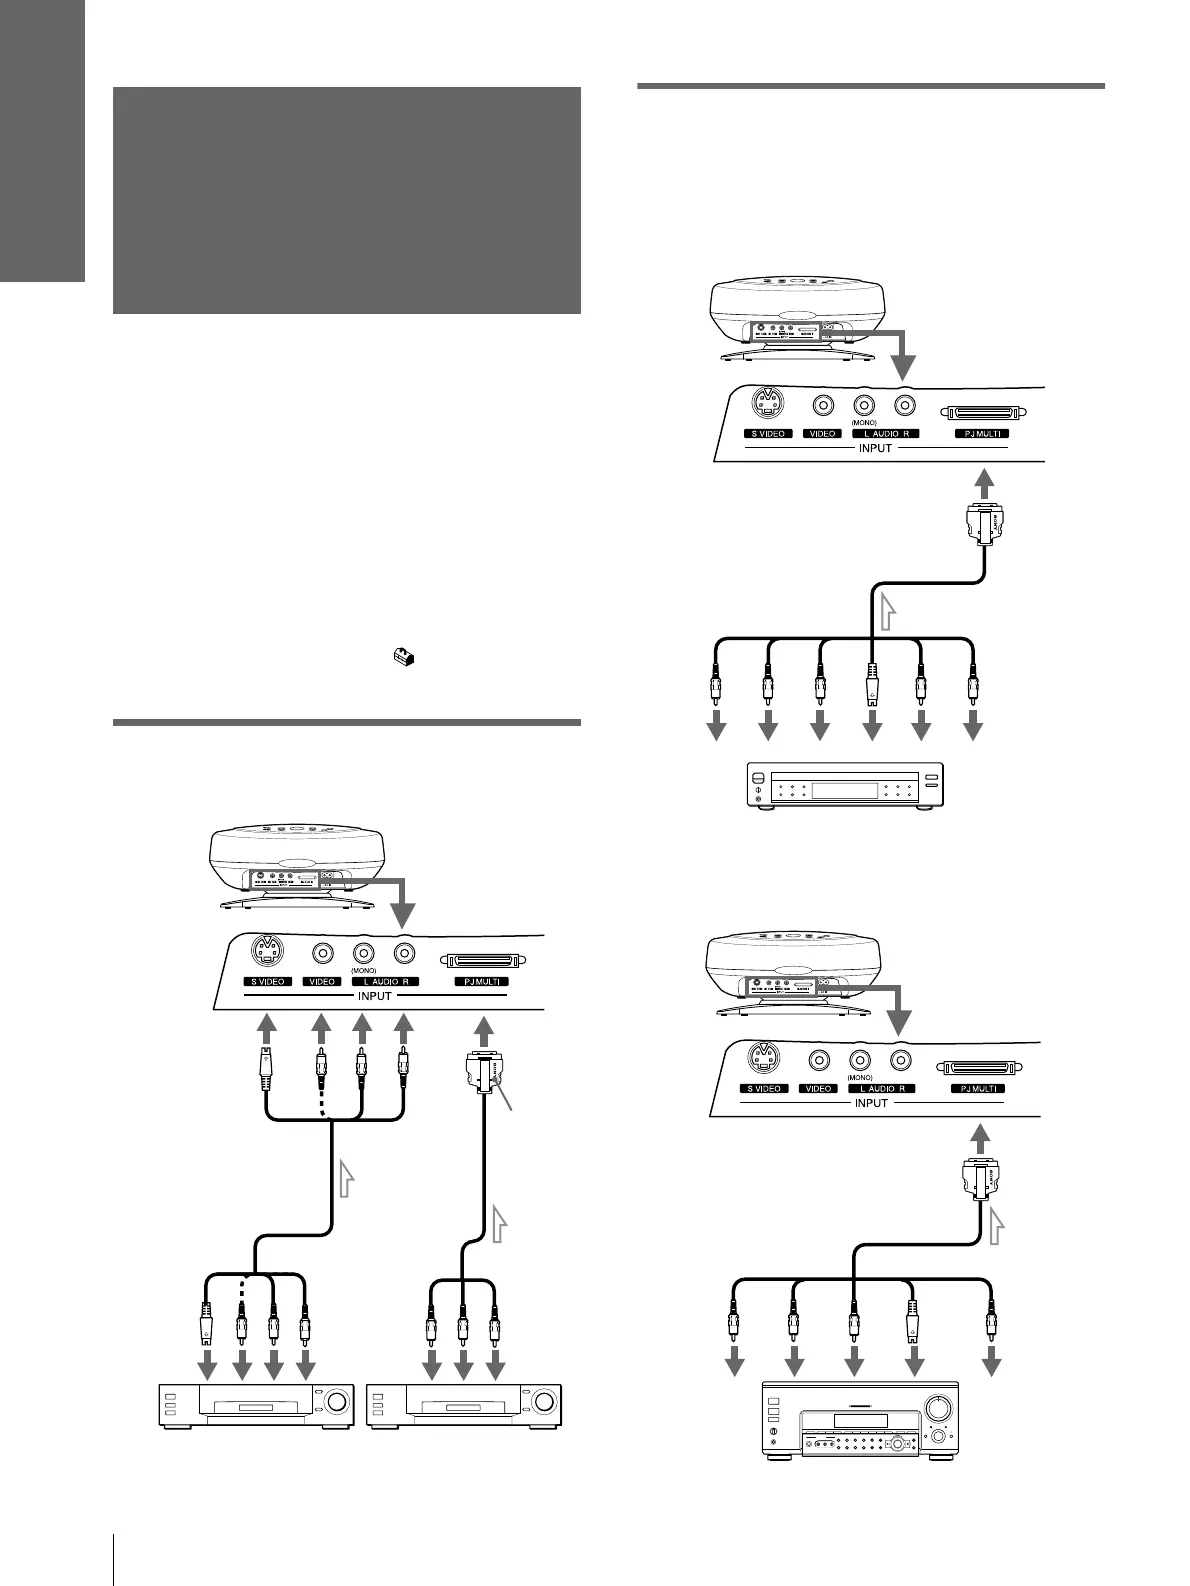
Connecting with video
equipment
Connecting Using the Optional
Signal Interface Cables
To connect with a DVD player with
component video connectors/digital
BS tuner
To connect with an AV amplifier
Rear of the projector
S video or video/
audio cable
(not supplied)
to S
video or
video/
audio
output
Signal
interface
cable
(supplied)
to video/
audio
output
Video equipment Video equipment
with
SONY
logo
upside
Signal interface cable SIC-HS20
(not supplied)
DVD player with component video
connectors, digital BS tuner, etc.
to audio
output
Rear of the projector
to RGB/component
output
Y
C
B
(PB)
C
R
(PR)
S
Video
Audio
R
Audio L
Signal interface cable SIC-HS40
(not supplied)
Rear of the projector
to component
video output
AV amplifier
Y
CB
(PB)
CR
(PR)
Video
S
Video
to video output