11
Sookook Corporation
1F. Burner Installation
Before installing the burner, review the type of gas, the calorific value (kcal/Nm3) and gas supply pressure If they do not match, set the
proper gas flow with the appropriate gas pressure or the maximum flow controller of the safety shutoff valve.
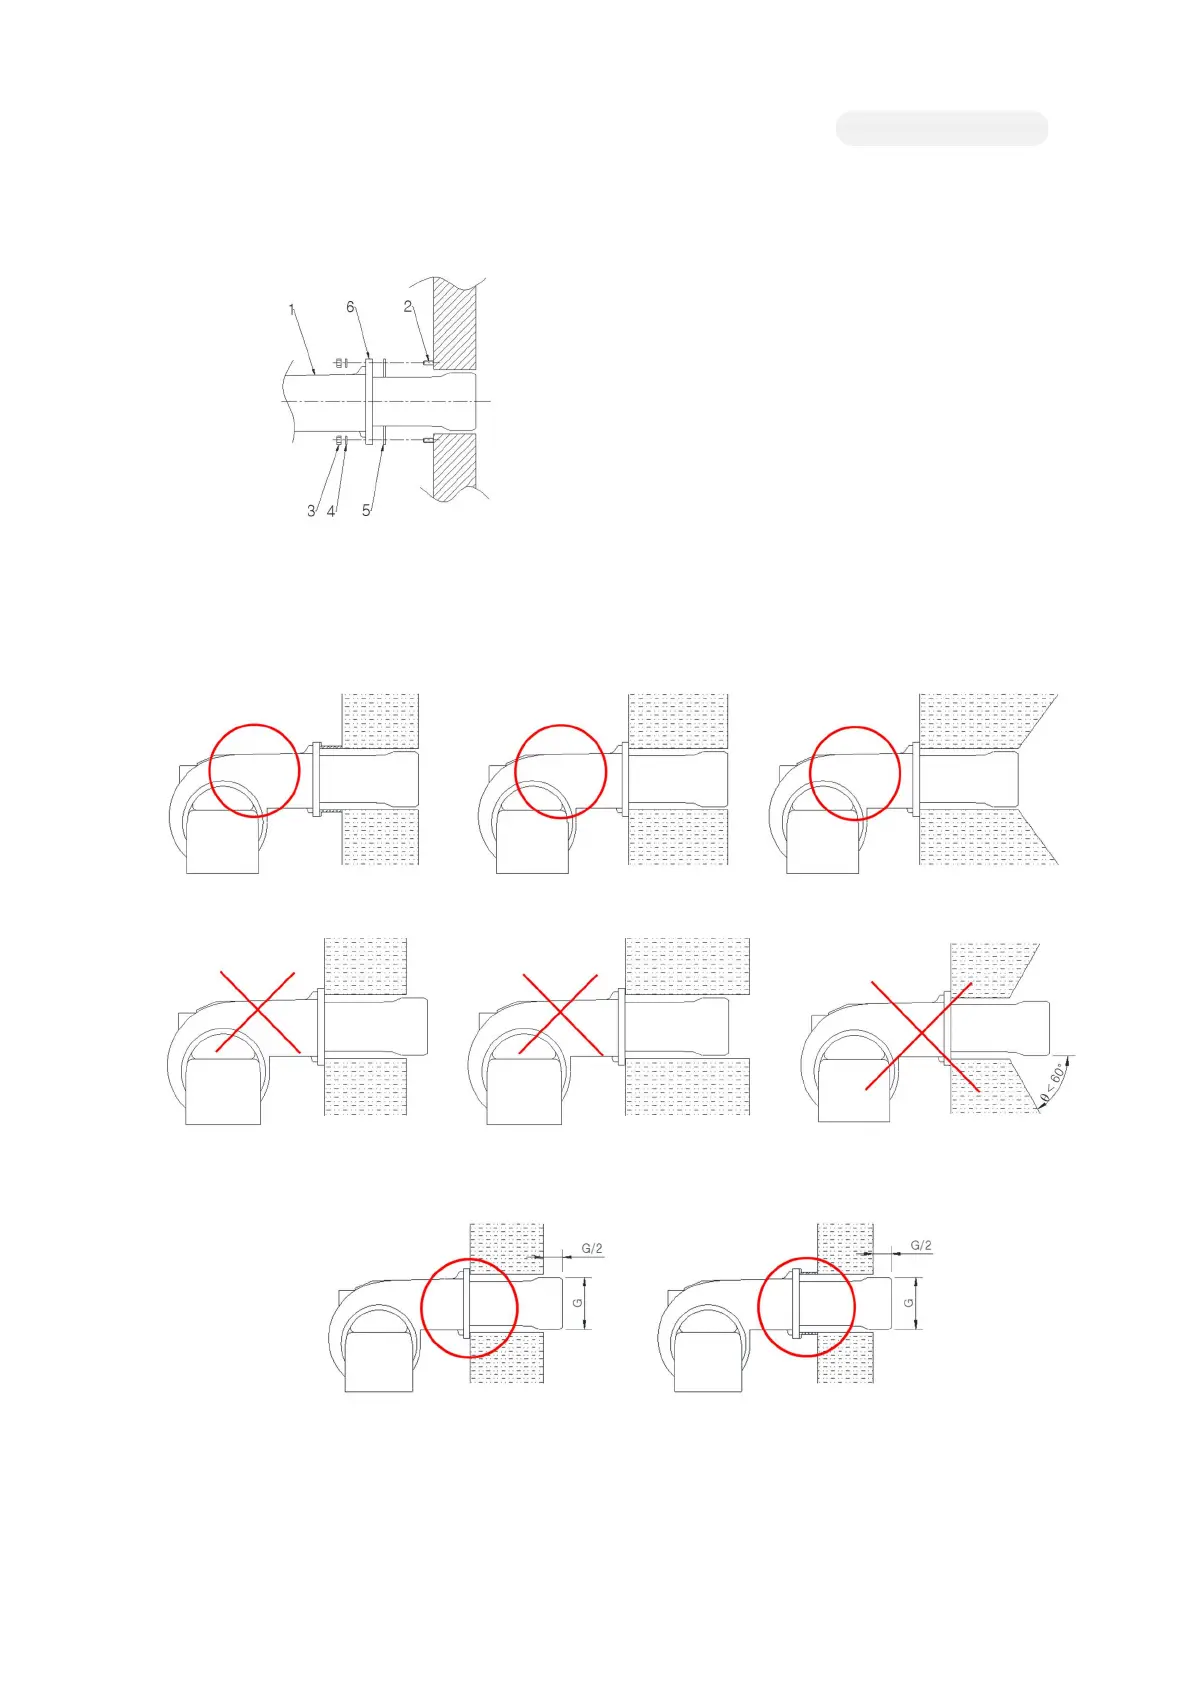
1. Burner
2. Bolt
3. Nut
4. Washer
5. Flange Gasket
6. Flange
[Figure 1F-A. Gas Burner]
If you connect the flexible gas hose between the manual shutoff valve and the gas filter, it is convenient for inspection and maintenance
of the burner.
If you attach the air purge cock in front of the manual shutoff valve, the air purge time in the piping can be reduced during commissioning.
[Figure 1F-B. Correct Installation]
If the blast tube is installed longer than the refractory wall, the blast tube penetrated into the combustion chamber is damaged by heat.
[Figure 1F-C. Incorrect Installation]
Install the Low-NOx burner with penetrating blast tube into combustion chamber by the half diameter of the tube for Low-NOx.
[Figure 1F-D. Low-NOx Burner Installation]
For P-type burner, the blast tube cannot be adjusted according to the depth of combustion chamber.