Version: 1
Revision Date: 02/2018
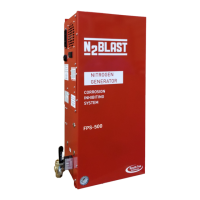
N
2-BLAST
®
FPS-500
O&M Manual
Page: 11 of 25
Contact us Toll-Free: (888) 526-6284
PRODUCT INSTALLATION
5.1 MOUNTING
Mount the N
2-BLAST
®
FPS-500 on a weight-bearing wall that can support the system’s weight
as specied in this manual. Always install the FPS-500 indoors and upright away from accidental
damage by water or moving equipment. Install it in an environment between 40° and 105° F.
Leave at least 6” on the left side of the cabinet for ventilation. 36” of space is recommended for
access to the control panel, tube/pipe connections, and the front cover. There is a ¼” OD tube
drain port on the bottom right of the cabinet. Plumb this to the nearest site drain.
There is a wall mounting bracket kit (STS Part #: A05-TYP1-RD), that allows you to mount the
system on a standard 16” wall stud width. Otherwise, use the mounting holes on the cabinet for
mounting the FPS-500 securely and level, directly to wall or to existing rack.
Wall Mounting Bracket Kit Procedures:
1. All N
2-BLAST
®
FPS-500 mounting holes and wall mounting bracket holes are
for ¼” screws/anchors (not provided).
2. All brackets must be installed in orientation as shown to work correctly.
3. Install the cabinet-mounting brackets on the N
2-BLAST
®
FPS-500 first with the
provided bolts/lock nuts.
4.
Optional: If wall studs are not 16” center to center, reinforce the mounting area with
a ½” or thicker plywood prior to hanging the system. Use best general practices to
ensure that the wood and system will secure the system at its full weight. Remember
that it will be vibrating with the compressor running.
5.
Locate the 18” wall-mounting bracket without the rectangular cutouts. Install it
leveled on the wall at the desired height. Mount the bracket directly to the wall
studs using the 16” center to center holes. See the figure below and use the
appropriate hardware (not included) for the type of wall material (wood, sheet metal,
masonry, etc.). Once securing the 18” wall bracket, hang the fastened 12” bracket on
the cabinet’s top flange (from step 3) to the 18” wall bracket. Reference the figure
below to see how to orient the angles to the back of the cabinet in comparison to
the wall.
a. Use the supplied carriage bolts and nuts to attach the 18” lower bracket to the
bottom flange, but do not tighten the nuts yet. After installing the system,
position the unit using the rectangular slots. Once the final location is determined,
tighten the nuts.
5
Cont.
 Loading...