23
vehicle illuminates the RED LED.
• If the triggers, disarm and rearm the alarm until the adjustment is complete.
Do not set the sen sitivity too high as this ma y result in false triggering.
• Ensure, when leaving your vehicle, inertia seat belts are fully retracted and all
windows and sunroof are closed. Pets must not be left in the vehicle with
alarm armed.
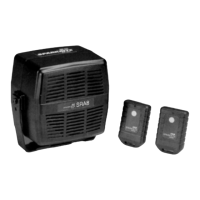
Complete the installation by securing all wiring and the main ultrasonic control unit
neatly.
IMPORTANT:
Finally ensure that all wiring is neatly secure d/insulated where necessar y and fuses
etc. are checked for safety.
Install the window warning labels on the drivers and passenger windo ws and make a
note of your remote control seria l number in th e space provided on page 28.
Installing the Waterproof Rubber Boot
To protect the a larm from water ingress, the rubber boot must be finally installed using
Silicone Sealant (supplied) and shou ld be applied as follows:
CAUTION:
Uncured sealant irritates e yes. In case of contact wash with water and consult your
doctor.
Avoid prolonged skin contact. Acetic acid fumes are released during curing, ensure
adequate ventilation is provided.
Firstly, clean all surfaces thoroughly. Apply a thin even bead of silicone around the
outer lip of the back alarm moulding, The remaining silicone will now be applied down
the narrow section of the rubber boot. The silicone shou ld be w orked between and