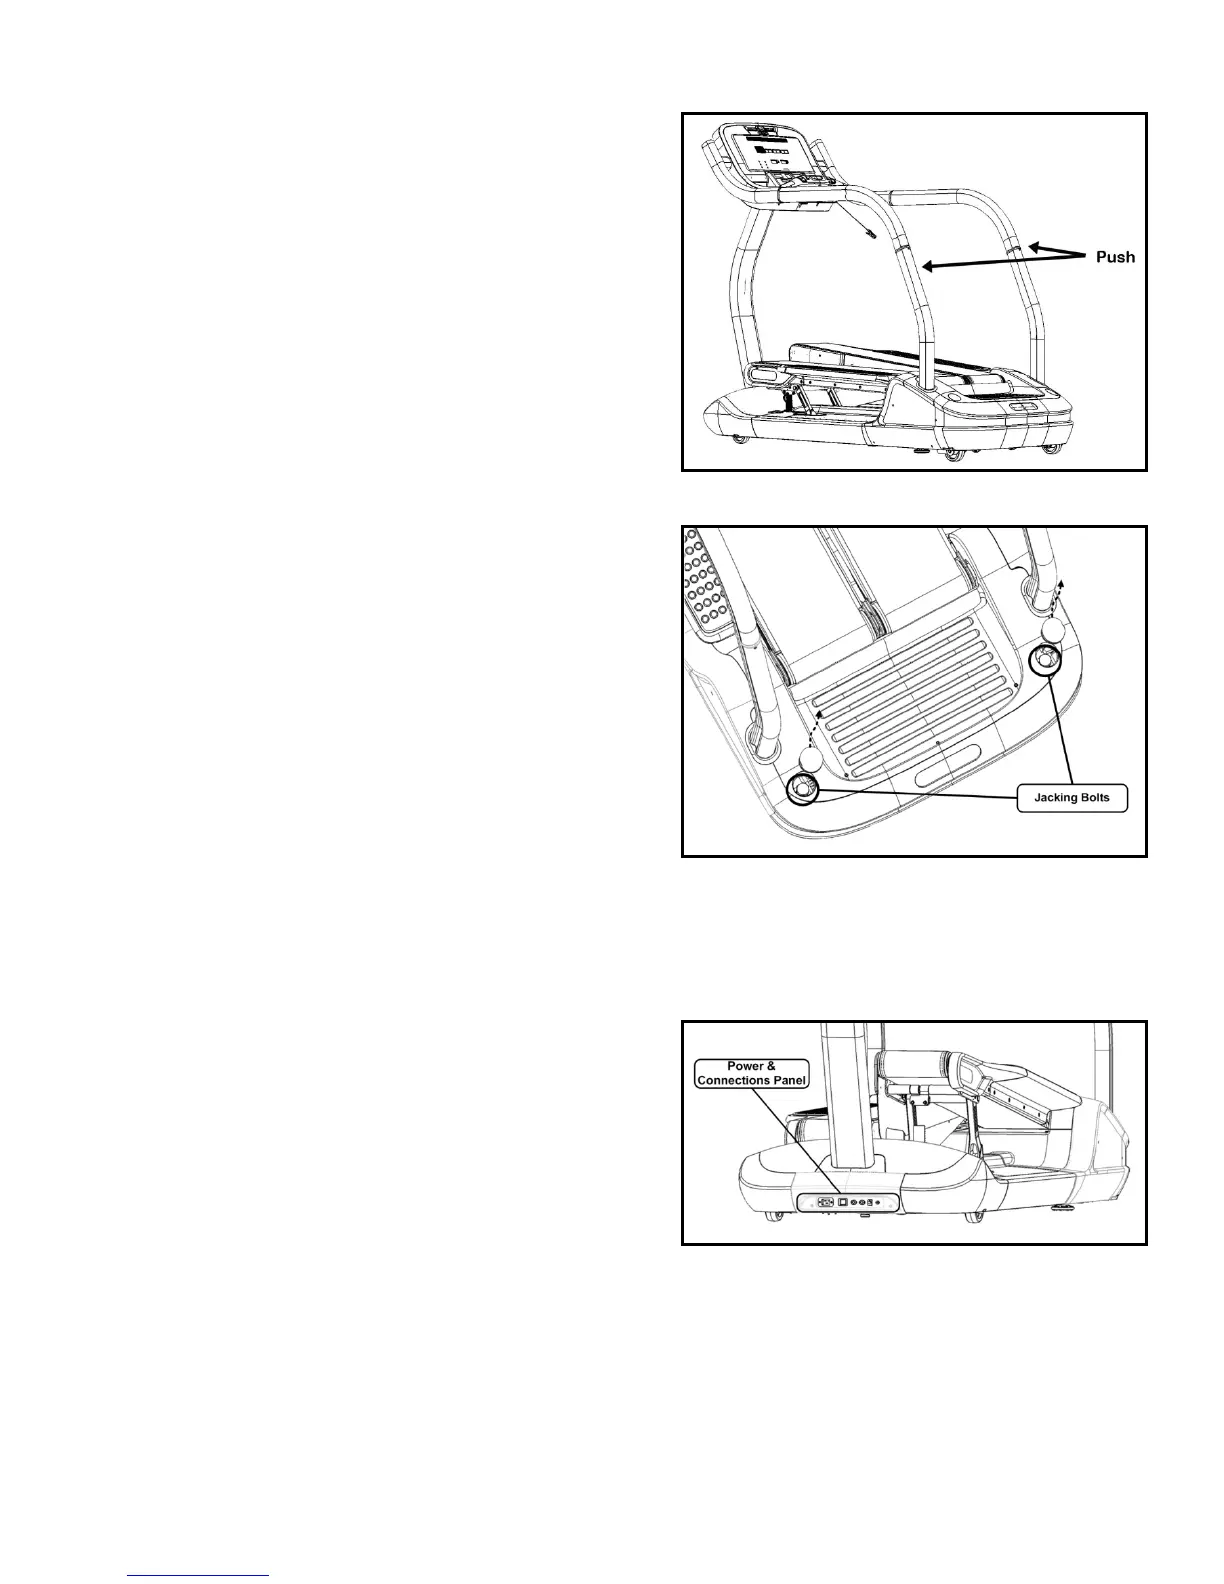
28. Transport/push (Fig. 30) the TreadClimber
®
to its final
location by rolling it into position.
29. Dislodge the rear step plugs (Fig. 31) to expose the
wheel jacking bolts. Turn the bolts in a counter clock
direction to retract the rear wheels into the base and
rest the machine on the rear stabilizing feet.
30. Wedge the cover plugs back into the rear step shroud
once the TreadClimber
®
is resting on the stabilizing
31. Plug the power cord into the power & connections
panel located at the front of the machine (Fig. 32).
32. Power on the machine and enter into “Maintenance
Mode” to process a “Motor Calibration” procedure.
Once “Motor Calibration” is complete; the
®
is ready for initial use (See p. 41).