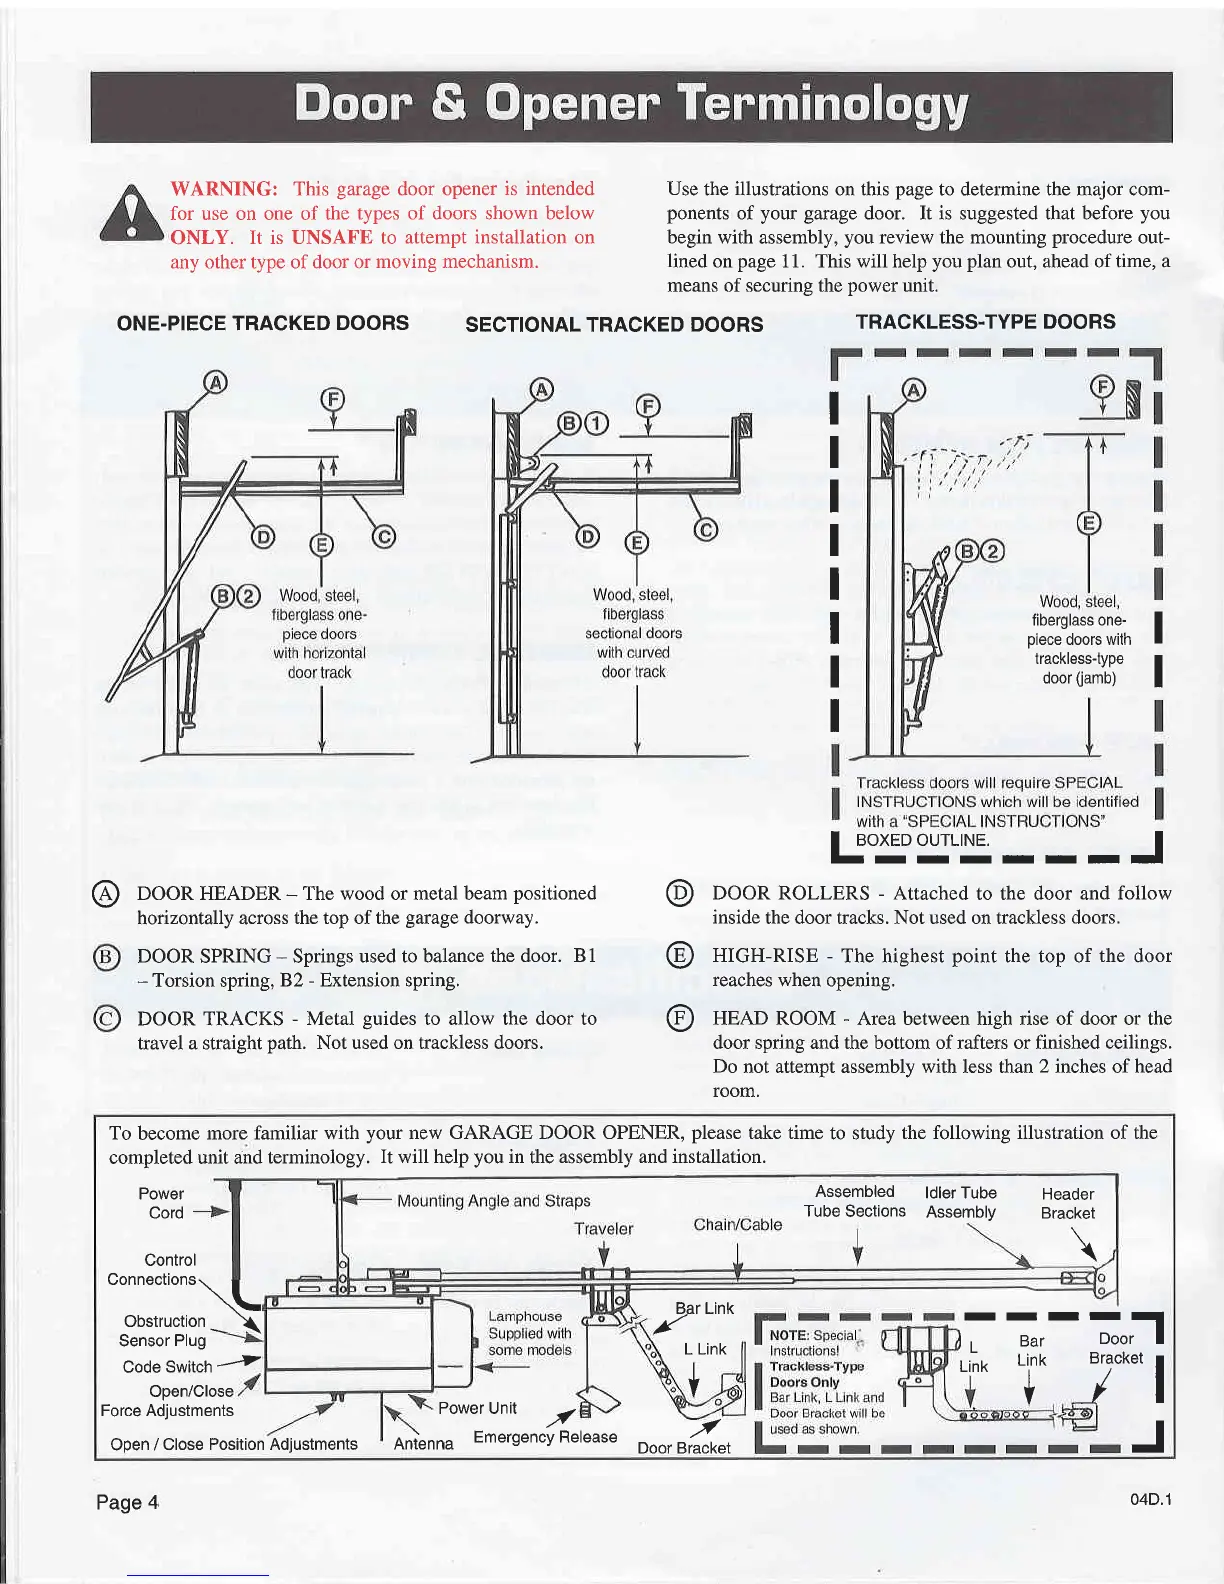
WARNING:
This
garage
door opener
is intended
for use on one of the
types of doors shown below
ONLY.
It is UNSAFE to
attempt installation on
any other type of door or
moving mechanism.
ONE.PIECE TRACKED
DOORS
SECTIONAL TRACKED
DOORS
Use
the
illustrations
on this
page
to determine the major com-
ponents
of
your garuge
door. It is suggested that before
you
begin with
assembly,
you
review the mounting
procedure
out-
lined
on
page
11. This will help
you plan
out, ahead of time, a
means of securing the
power
unit.
TRACKLESS.TYPE
DOORS
I
I
I
I
I
I
I
I
,i:::',x:iJlh
I
'T:5ff:;l',!'
I
@
DOOR HEADER
-
The wood or metal beam
positioned
horizontally across
the top ofthe
garage
doorway.
DOOR SPRING
-
Springs
used to balance
the door. 81
-
Torsion spring,
82
-
Extension spring.
DOOR TRACKS
-
Metal
guides
to allow the door to
travel a straight
path.
Not used on trackless doors.
@
@
@
I
aoxeo ourLrNE.
I
-IIIIIII
DOOR ROLLERS
-
Attached to the door and
follow
inside
the door tracks. Not used on trackless doors.
HIGH-RISE
-
The highest
point
the top of
the
door
reaches
when opening.
HEAD ROOM
-
Area between high rise of door or the
door spring and the bottom ofrafters or finished ceilings.
Do not attempt assembly with less than
2
inches of head
room.
To
become
more familiar with
your
new GARAGE DOOR OPENER,
please
take time
to study
the following illustration of the
completed unit and
terminology.
It will help
you
in
the
assembly and installation.
Control
Connections
Power
Cord
Sensor
Plug
Code
Switch
..-i
Open/Close
Force Adjustments
power
Unit
./
Open /
Close Position Adjustments
RnLnna
EmergencyRelease
/tiltguuvtto\
Obstruction
_ \
Bar Link
.f'
-
-o*ll
_y*
l
J
L Link
I
Bar
Link
I
Y
I
l1
Link
V
-./
BracketDoor
Assembled
ldler Tube
Tube
Sections
Assembly
Header
Bracket
\
Page
4
04D.1