17
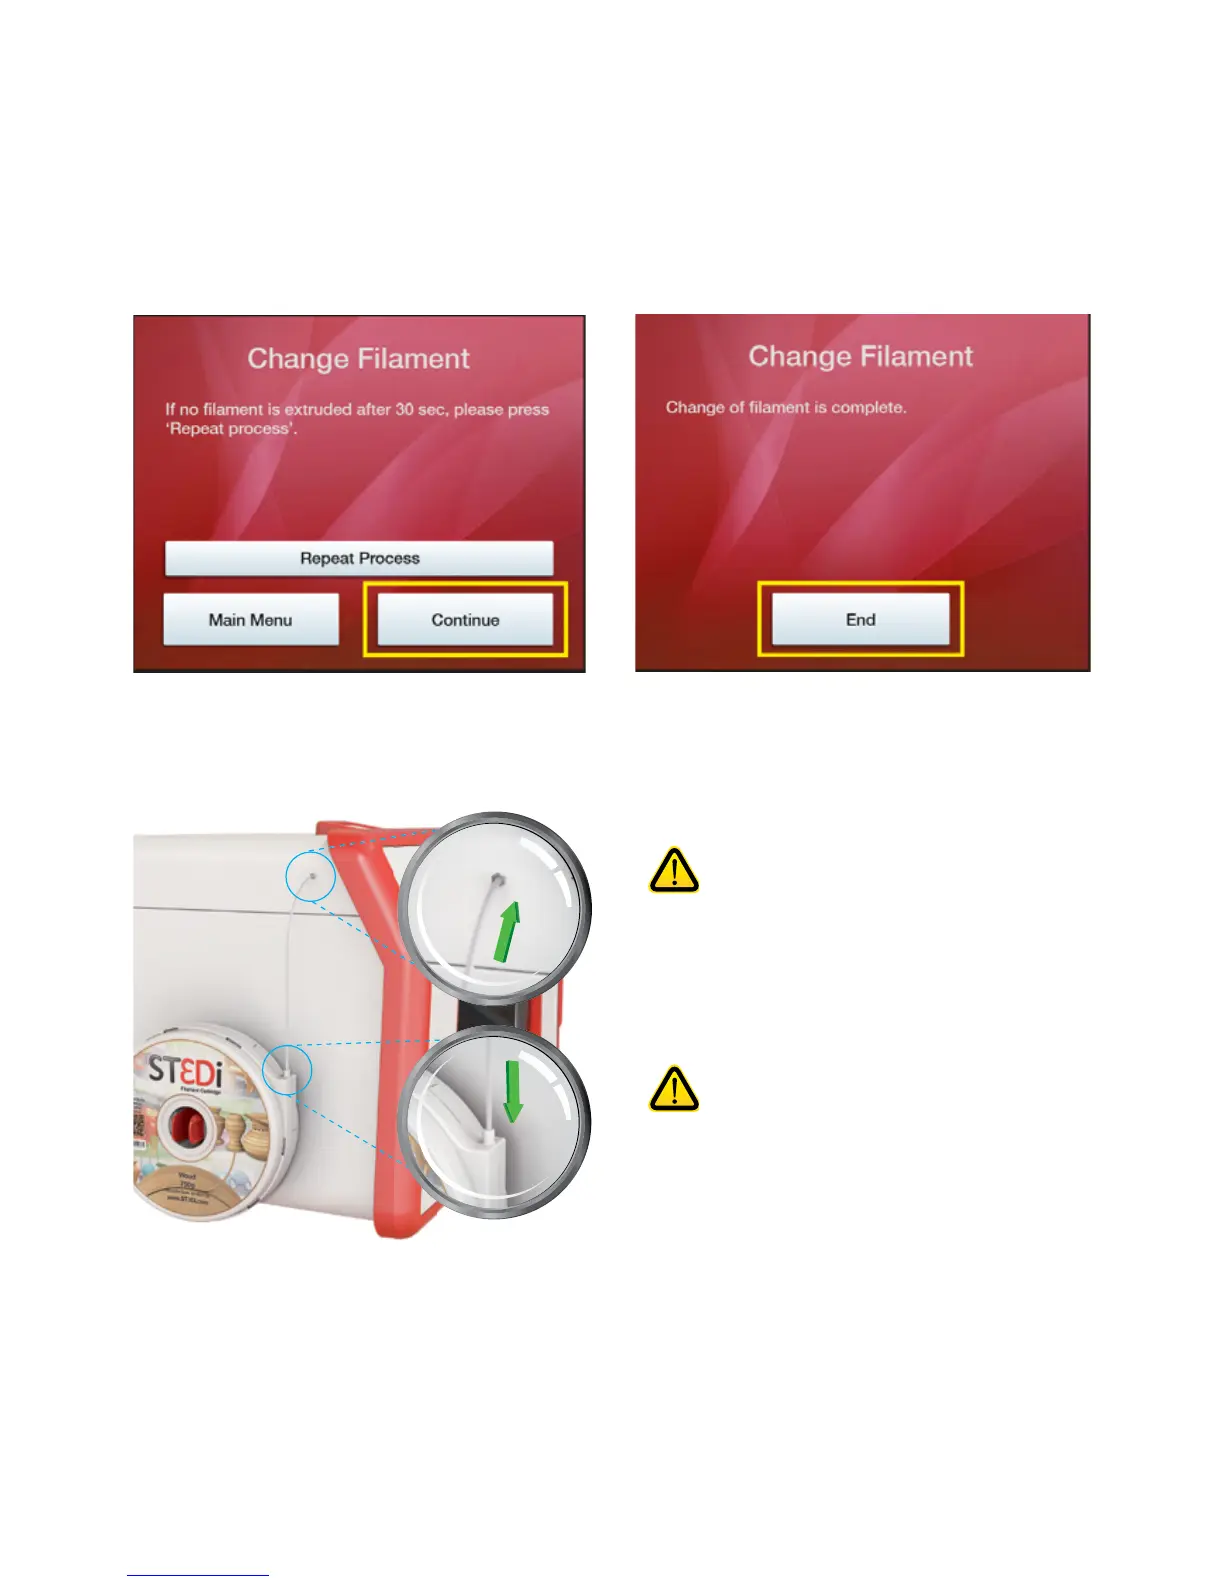
Whilst maintaining pressure, please press the on-screen ‘Connue’ buon which will start the extrusion process
to ensure that the lament has been fed all the way through correctly.
You should then see lament being extruded through the nozzle. When this is complete the ‘Connue’ buon
will become acve and you can complete the process.
If no lament is extruded, ensure that the lament has been pushed all the way through and whilst maintaining
pressure please push the ‘Repeat Process’ buon.
Once the lament has been installed, push the end of the lament tube onto the top of the cartridge and into the
ng on the side of the printer, ensuring that no lament is exposed.
If removing a part-used lament, please
ensure that you do not push the end of the
lament back into the cartridge casing as
this means that you will then not be able
to aach this cartridge to the printer again
for prinng.
Please note that if using a PVA cartridge
this material needs to be kept air-ght
when not in use, in order to ensure the
quality is maintained for future prints.
Therefore please ensure that you store the
cartridge in an air ght bag or container
when not in use.
 Loading...