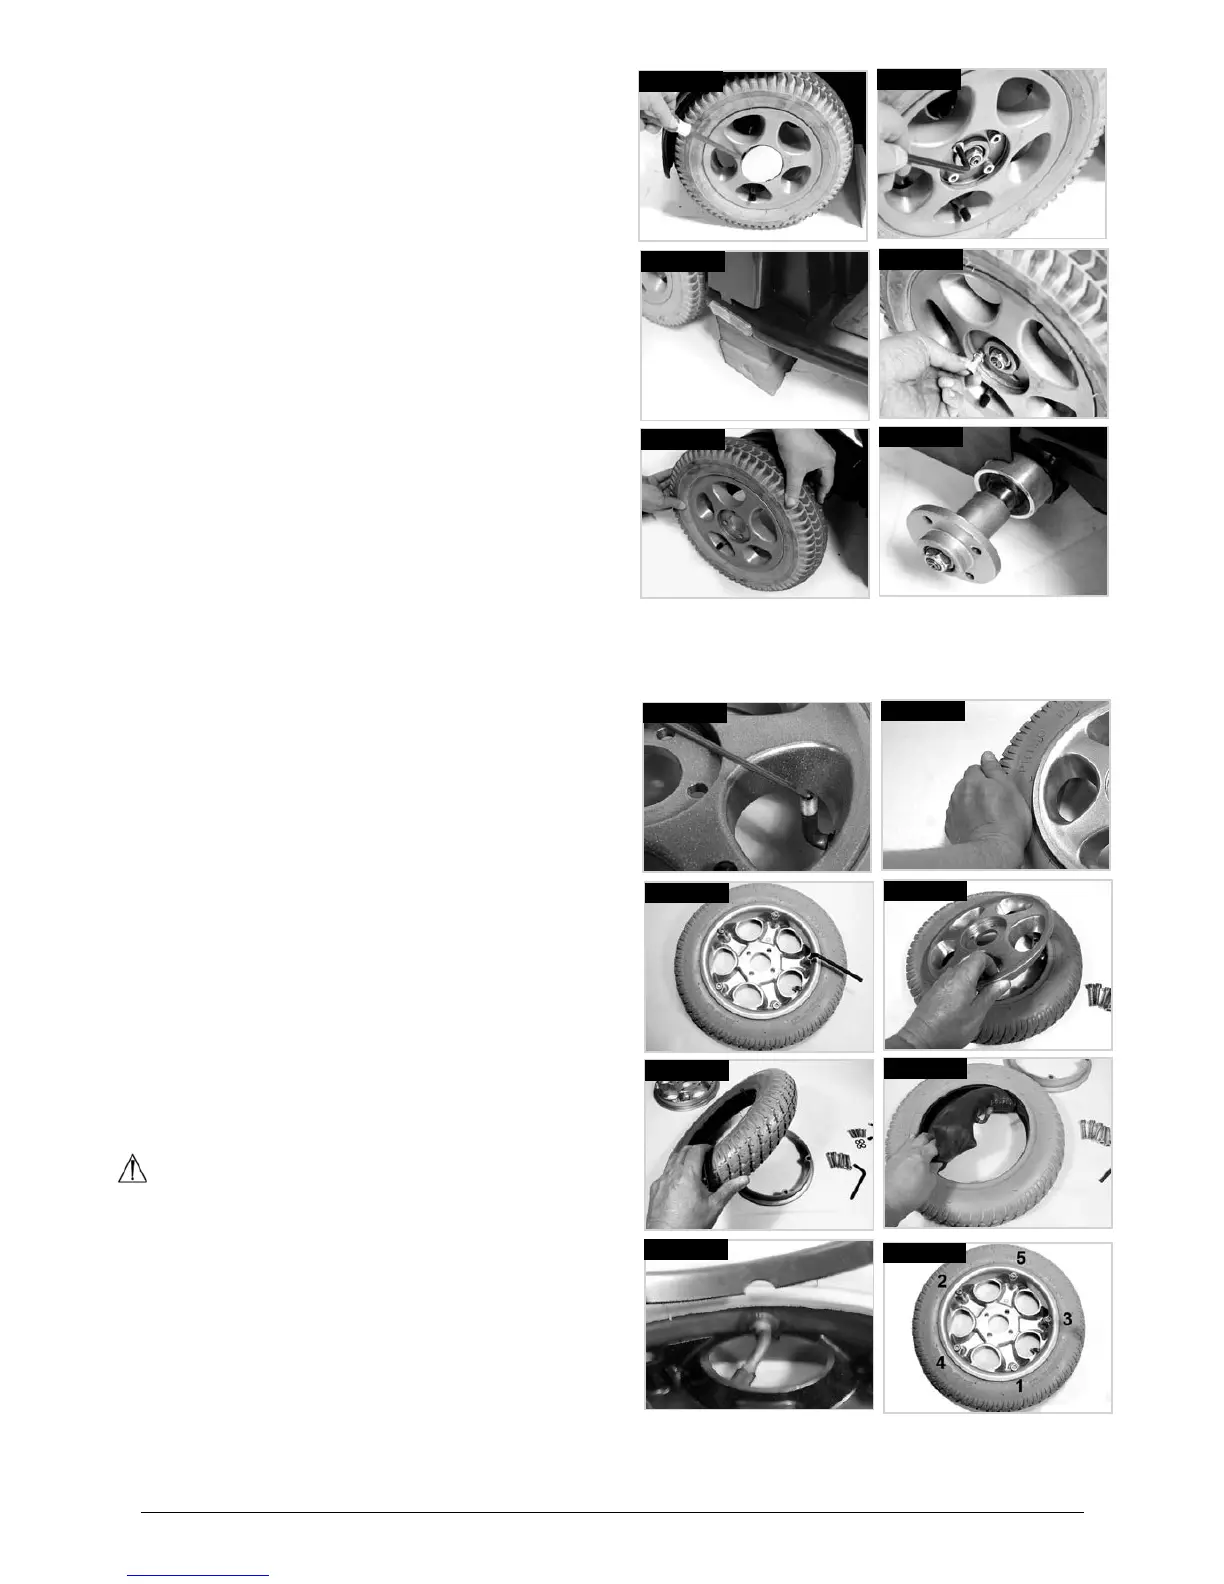
18.2.3 Elite
2
Plus Rear Wheel Removal
Use a flat bladed screw driver to carefully lever off •
the hub cover, (Fig.18.26).
With the wheel still on the ground: use a 6.0mm Allen •
key to loosen the 4 rim studs, but do not release the
studs more than two turns, (Fig.18.27).
Elevate the rear wheel by placing a jack under the •
relevant jack points, then secure with
blocks,(Fig.18.28).
Use the Allen key to finish releasing the studs.•
Remove the studs and washers, (Fig.18.29).•
Carefully remove the wheel, (Fig.18.30).•
Do not remove the drive hub from the drive shaft, •
(Fig.18.31).
Fig.18.27
Fig.18.26
Fig.18.29
Fig.18.28
Fig.18.31
Fig.18.30
Fig.18.33
Fig.18.32
Fig.18.35
Fig.18.34
Fig.18.37
Fig.18.36
Fig.18.38
Fig.18.39
18.3 CHANGING THE INNER TUBE (ALL)
Ensure any remaining air is expelled by pressing the•
valve with a small screwdriver and squeezing the
tyre, (Fig.18.32 - 18.33).
Use a 6.0mm Allen key to undo the FIVE rim studs,•
(Fig18.34).
Lift the outer rim off, (Fig.18.35).•
Lift the tyre of the inner rim, (Fig.18.36).•
Gently get hold of the inner tube just behind the •
valve.
Carefully feed the tube out of the tyre, (Fig.18.37).•
NOTE: Solid tyres are chemically bonded to the wheel
rims. These must be changed as a complete assembly.
To refit:
Place the tube inside the tyre and rest it on the outer •
rim.
Align the valve stem with the cut out on the rim, •
(Fig.18.38).
Face the valve stem outward, (Fig.18.38).•
Place the inner rim over the tyre, tube and outer rim.•
Align the cut out to fit over the valve stem and match •
it up to the cut out in the outer rim, (Fig.18.38).
Make sure the stud mounts are in line on both rims.•
Tighten the studs evenly in the sequence shown, •
going around once to close the rims and then again
to tighten fully taking, care not to pinch the tube,
(Fig.18.39).
Slowly inflate to the appropriate pressure. •
WARNING!
Do not use high pressure air delivery systems such •
as those found on garage forecourts, to inflate the
scooter tyres.
Always use a new inner tube.•