26 |DCE 11/13 www.stiebel-eltron.com
INSTALLATION
Installation
10.2 Anti-scalding protection/ temperature limit
WARNING Burns
When operating with preheated water, the set anti-scald-
ing protection may be ineffective.
In this case, restrict the temperature at the upstream
central thermostatic valve (see chapter "Installation/
Appliance description/ Accessories").
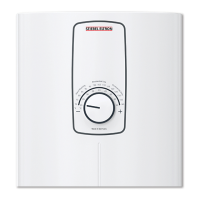
DCE 11/13
The anti-scalding protection "max. 43°C" is activated by moving
the plug on the circuit board in the appliance cap.
60 °C
43 °C
D0000039995
1 2
1 Anti-scalding protection not set
2 With anti-scalding protection 43°C
Remove the electronic PCB from the programming unit on
the appliance cover. Be careful with the snap-on hooks.
Set the plug to the "43°C" position.
Refit the electronic PCB, ensuring the snap-on hooks click
into place. Observe the positions of the push-button and
shaft.
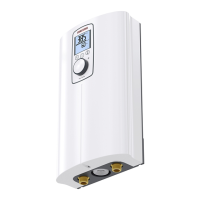
DCE 11/13 RC
The anti-scalding protection "max. 43°C" is activated by changing
the setting of the DIP switch in the appliance.
60°C
43°C
D0000043533
1 2
4 3
1 DIP switch for anti-scalding protection
2 Without anti-scalding protection = 60°C
3 With anti-scalding protection = max. 43°C
4 Green LED indicator permanently illuminated when an-
ti-scalding protection is active
10.3 Installation options
Conversion for power connection from below
D0000043440
21 3 4 6
25 3 41
7
1 Connecting cable
2 Cable grommet
3 Strain relief
4 Mains terminal
5 Marking for hole
6 Plug
7 Wire guide
Remove the strain relief, the power cable and the cable
grommet.
Seal the top opening in the back panel using the enclosed
(sealed) plug. Protection rating IP 24 (splashproof) can only
be guaranteed with a correctly fitted plug.
Reposition the mains terminal in the appliance from the top
to the bottom. Ensure that the mains terminal clicks into
place.
Brake out the opening for the power cable. For this, use a
suitable tool to push the plastic in the circular marking out-
ward (working from the inside of the back panel). If neces-
sary, use a file.
!
Material losses
If the appliance back panel is damaged, replace it.
Fit the cable grommet in the new back panel.
Route the power cable through the cable grommet in the
appliance back panel. Connect the power cable to the mains
terminal (see chapter "Installation/ Specification/ Wiring
diagram").
Lay the control wires under the wire guide.
Fit the strain relief.
 Loading...