27
Concluding the installation
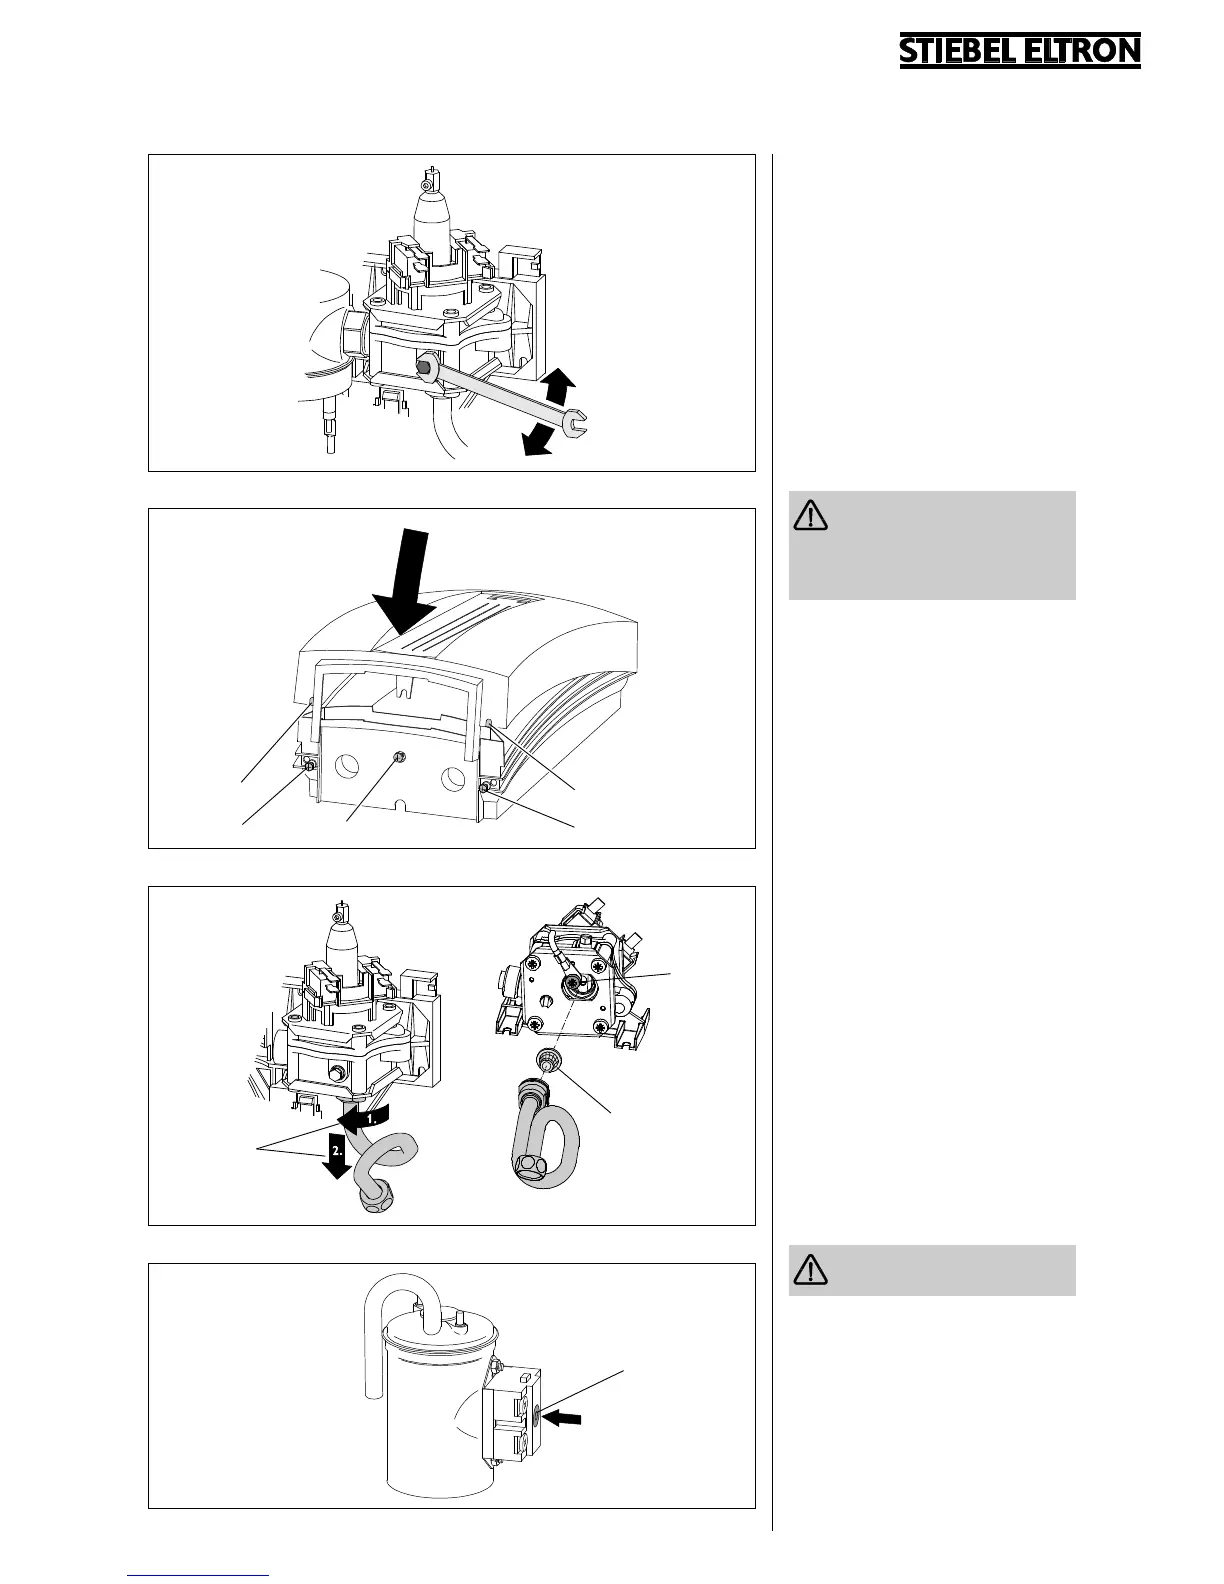
(Fig. 19)
Fit the cover, and secure it with the centre
screw (Item 1).
With DHC 3 U and DHC 6 U, the cover
can also be secured as an alternative with
the hexagonal-headed screws provided
(Item 2), in the event of only a small gap
pertaining between the unit and the floor.
To do this, the marked parts of the cover
(Item 3) are to be broken through.
First start-up
(may only be carried out by a qualified
installer)
Before screwing in/switching on
the fuses, all the hot water valves
connected are to be opened sufficiently
for the pipe network and the unit to be
rendered free of air.
– Check that the small instantaneous
water heater is functioning properly.
Adjusting the flow rate (Fig. 18)
In the event of the desired temperature
not being attained, the flow rate can be
limited by means of the adjustment screw
(take note of the data in Table 1). The
flow rate is to beadjusted in such a way
that an outlet temperature of 35 – 40 °C
is reached.
Handover of the unit
Explain to the user how the unit works,
and familiarise them with its operation.
– Advise the user about possible hazards
(danger of scalding).
– Hand over these instructions to be kept
in a safe place.
Servicing instructions
Applicable to all maintenance work
disconnect unit from the mains circuit.
– Clean the filter, Fig. 20
Release the earthing screw (Item 4,
approx. 2 turns), unscrew the cold water
connection pipe from the differential
pressure switch (Item 5) turn 90 °, and
remove it downwards. Clean the filter
(Item 6). Assemble in reverse order.
Ensure that the earthing screw
(Item 4) is properly tightened.
– Activate the safety thermal cut-out,
Fig. 21
Once tripped, the safety thermal cut-out
can be reactivated after the fault has
been rectified by means of the reset
button (Item 7). The current to the unit
must be disconnected.
Fig. 19
Fig. 18
7062.01
7063.01
6
7
Fig. 21
Fig. 20
7064.017065.01
3
2
1
3
2
4
5
 Loading...