WWW.STIEBEL-ELTRON.COM WPL E | WPL COOL| 11
INSTALLATION
APPLIANCE INSTALLATION
10. Appliance installation
10.1 Handling
Pay attention to the appliance’s centre of gravity when trans-
porting the appliance.
- The centre of gravity is in the area where the compressor is
located.
- Lifting slings for handling the standard appliance can be
hooked in anywhere on the frame at the bottom.
Protect the appliance against heavy impact during transport.
- Only allow the appliance to be tilted during transport for a
short time to one of its longitudinal sides.
- The longer the appliance is tilted, the greater the distribution
of refrigerant oil in the system.
Wait approx. 30minutes before starting the appliance after it
has been tilted.
10.2 Siting and connecting the appliance
Note
- Two screws are available at the top of the appliance
frame to secure the cover.
- In the frame at the bottom, one screw is available on
each side to secure the side panels.
Wind the sixscrews out of the appliance frame and keep
them safe.
WPL cool
!
Damage to the appliance and environment
With these appliances, the heating circuit flow and re-
turn lines must be insulated with vapour diffusion-proof
material.
10.2.1 External installation
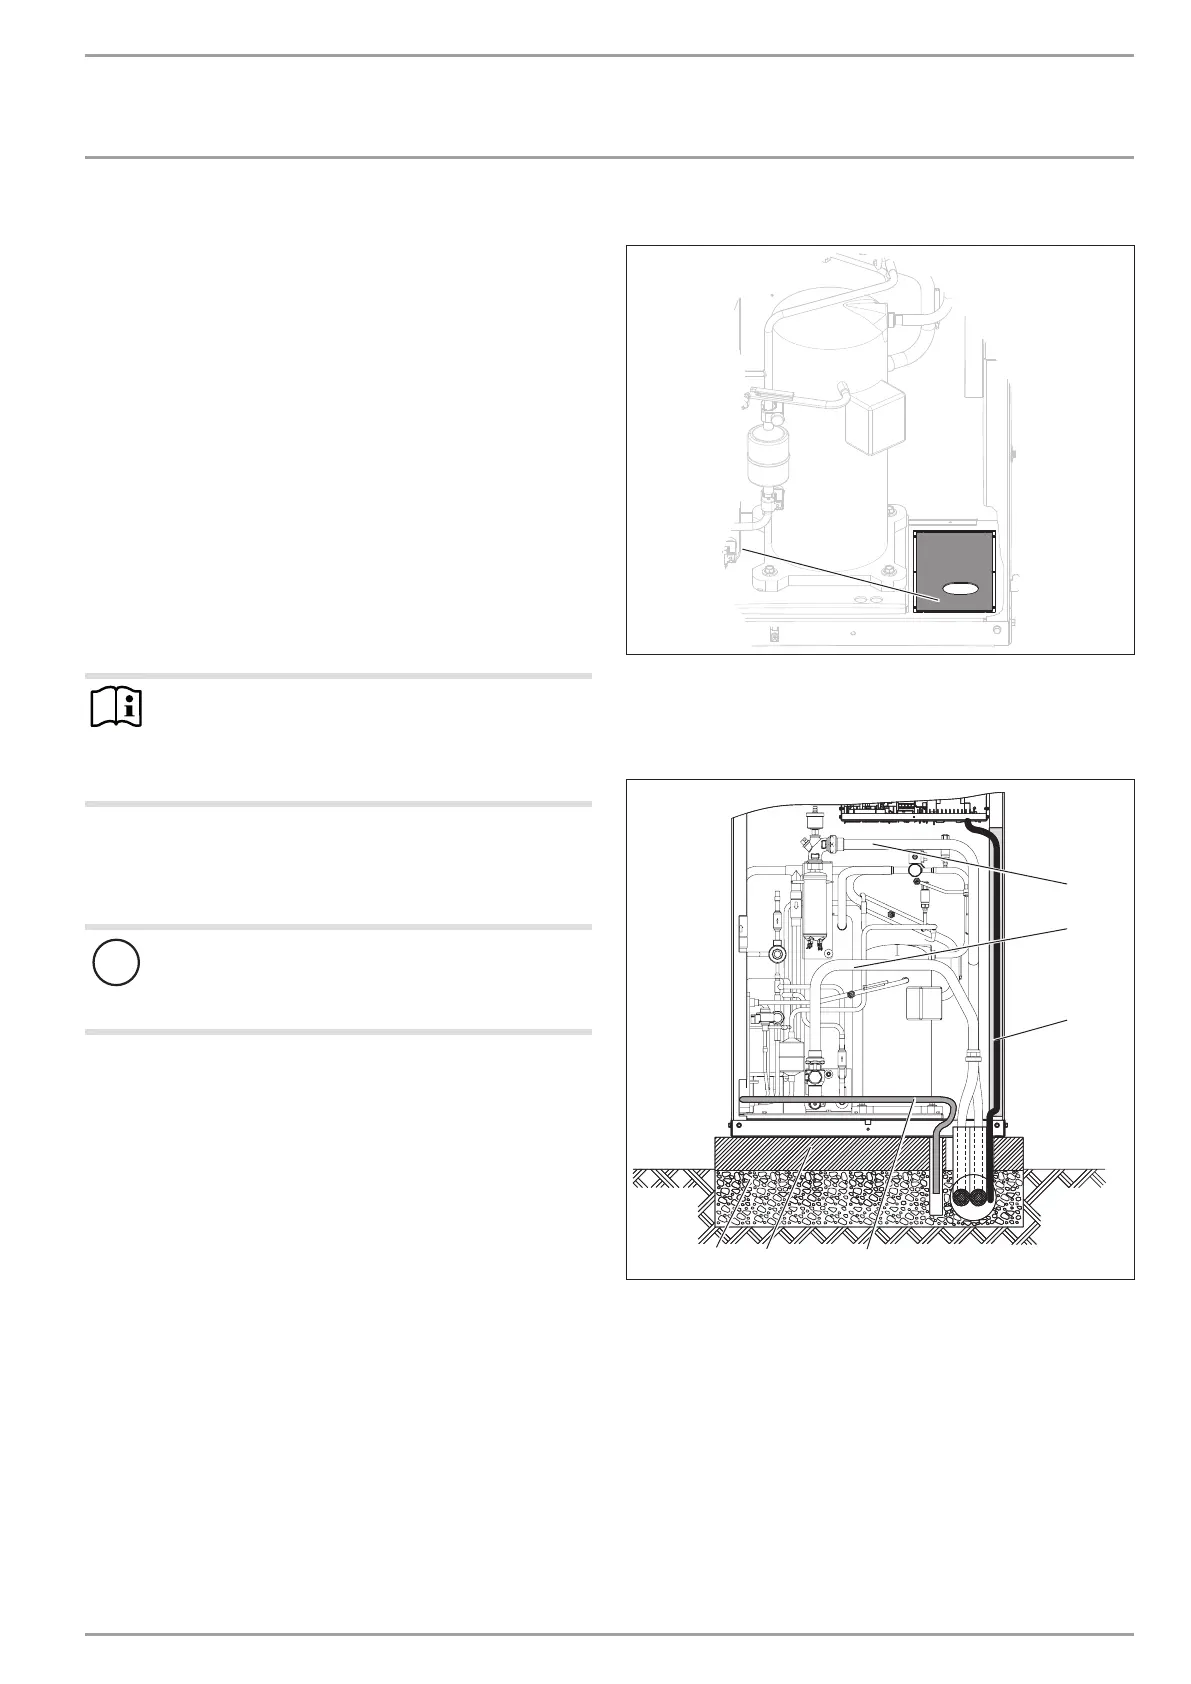
26�03�01�1727�
1
1 Knock-out "outlet for supply pipe/cable"
Remove the knock-out "outlet for supply pipe/cable" in the
bottom of the appliance.
Position the standard unit on the prepared substrate.
26�03�01�0958�
1
3
2
6
5
4
1 Pipe bend for heating circuit flow
2 Pipe bend for heating circuit return
3 Cable duct
4 Condensate drain hose
5 Concrete foundation
6 Coarse gravel back filling
Fit the pipe bends "heating circuit flow" and "heating circuit
return".
Route the supply pipes/cables from below through the knock-
out in the bottom and into the appliance.
Route the electrical cables in a cable duct.

 Loading...


