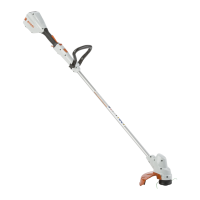
FSA 90 R
English
22
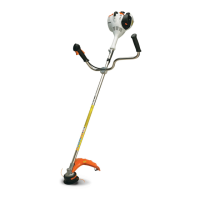
Controls
1 Trigger switch lockout
2 Trigger switch
3 Retaining latch with positions ‚
and ƒ
4 Set wheel – limits travel of trigger
switch – see "Function of set wheel".
Function of set wheel
The set wheel (4) enables the travel of
the trigger switch to be preset for any
motor speed:
– Turn the set wheel (4) in direction of
– for shorter trigger switch travel and
a reduced motor speed.
– Turn the set wheel (4) in direction of
+ for longer trigger switch travel and
a higher motor speed.
– You can override the preset stop by
pulling the trigger switch firmly to
accelerate the motor up to
maximum speed – the preset stop
remains unaffected. The original
setting is restored when the trigger
switch is released.
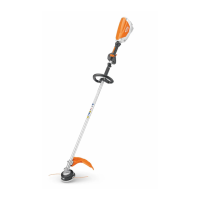
Fitting the Battery
A factory-new battery is not fully
charged.
Recommendation: Fully charge the
battery before using it for the first time.
N If necessary, remove the cover from
the battery compartment before
fitting the battery, i.e. depress both
locking tabs to unlock and remove
the cover.
N Insert the battery (1) in the power
tool – the battery slides into the
compartment – press it down
carefully until it snaps into position –
the battery must be flush with the
top of the housing.
Switching On
N Make sure you have a secure and
firm footing.
N Stand upright – hold the power tool
in a relaxed position.
N Make sure the cutting attachment is
not touching the ground or any other
objects.
N Hold your trimmer with both hands –
right hand on the control handle.
N Unlock the power tool by moving the
retaining latch (2) to ‚.
Switching On
 Loading...