StoneL publication 105431revC
7 PI 70 en Prism PI | 21
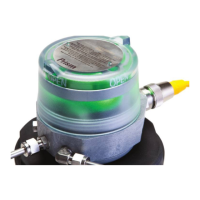
Bench test procedure and sensor setting instructions
To test sensors, use a 24VDC power supply. No series load resistor is
required.
1. Apply power across the ASi+ and ASi- terminal points.
2. Operate actuator to the CLOSED position.
3. Press and hold SET CLOSED button until red LED is lit (2seconds).
Release button.
4. Operate actuator to the OPEN position.
5. Press and hold SET OPEN button until green LED is lit (2 seconds).
Release button.
6. Setpoints are retained even after power is removed.
A functioning AS-Interface network is required to test
communications and solenoid.
WARNING
Do not apply external power to the output terminals. This will
cause permanent damage to the unit.
4.2.3 VCT with AS-Interface communication and extended addressing (97S & 97W) continued
Expanded dead band setting feature
The Prism PI sensing module has the capability of changing the dead
band of the open sensor from the factory setting of 30% of stroke
to an expanded setting of 45%. It may be necessary to perform this
procedure for applications in which the valve stroke varies between
normal batch processing and SIP/CIP evolutions.
1. Ensure the open and closed sensors have been set before running
this procedure. Valve can be in either the open or closed position.
2. With power applied to the Sensing Module press and hold both
SET OPEN and SET CLOSED buttons until the red and green LEDs
ash (ve seconds). Release buttons.
3. Press and hold SET OPEN button until the green LED is lit (one
second). Release button. Open sensor now has a 45% dead band.
4. To revert back to the factory default of 30% dead band, press and
hold both SET OPEN and SET CLOSED buttons until the red and
green LEDs ash (ve seconds). Release buttons.
5. Press and hold SET CLOSED button until red LED is lit (one second).
Release button.
6. Settings are retained even after power is removed.
Caution: Performing this procedure will cause the sensor
inputs to change states. Performing this procedure is not
recommended during a live process.
Power/Fault LED status
AS-i status LED Fault description
LED o Device does not have power
Solid green Normal operation
Flashing red/green Output shorted
Flashing red/green No magnet detected
Flashing red/green Internal sensor fault - sensor may need replacing
Flashing yellow/red No data exchange (device address = 0)
Solid red No data exchange
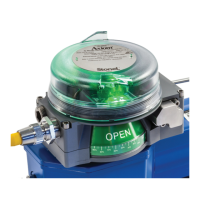
AS-Interface Wink feature
This feature provides the capability of setting the CLOSED and OPEN
LEDs to simultaneously ash or “wink”. This feature aids in physically
locating the unit on the network.
1. AS-Interface communications are required in order to set
the “Wink” feature. The unit must be addressed and correctly
congured to be recognized by the Control System or the
AS-Interface Gateway/Master.
2. Wink feature bit settings dier for 97S and 97W.
a. For 97S units, set Output Bit 1 (DO2) to “1” in the desired
unit. Once the correct unit has been physically located on
the network, indicated by the “winking” of the CLOSED and
OPEN LEDs, set Output Bit 1 (DO2) back to “0”. Performing
this function will not change the Closed and Open sensor
setpoints.
b. For 97W units, set parameter Bit 0 to “1” in the desired unit.
Once the correct unit has been physically located on the
network, indicated by the “winking” of the CLOSED and
OPEN LEDs, set parameter Bit 0 back to “0”. Performing
this function will not change the Closed and Open sensor
setpoints.
Specications for Wireless Link
Communication Bluetooth® technology; single mode
(not compatible with Bluetooth® Classic)
Frequency band 2.402-2.480 Ghz
Transmit power 4dBm or ~2.5 milliwatts
Data rate 1 Mbit/second; eective information transmit rate
~10 Kbits/second
Range Up to 100 meters (330 feet) in free space. Range is
reduced by obstructions between handheld device and
Wireless Link VCT. Line of site is not necessary.
Registrations FCC, IC, CE
CE compliance Exceeds industrial compliance standards
VCT identication VCTs in range will be displayed in order of signal
strength
VCT link One device accessed at a time between client (hand-
held device) and server (VCT). Each server accessed by
one client at a time
Application StoneL Wireless Link available from the App store
Hand-helds Compatible with iPhone® and iPad® with iOS 8 or later
 Loading...