5 Operating instructions
5.1 Strapping
Preconditions
● The tool is adjusted to the width of the strap to be used (Section 5.3).
● The charged battery is inserted (Section 4.1.2).
● The desired operating mode is set (Section 4.2.). In this description it is assumed that the selected
operating mode (default mode) is “SEMI” (semi-automatic).
● Desired tension force is set (Section 4.3).
● Desired welding time is set (Section 4.5).
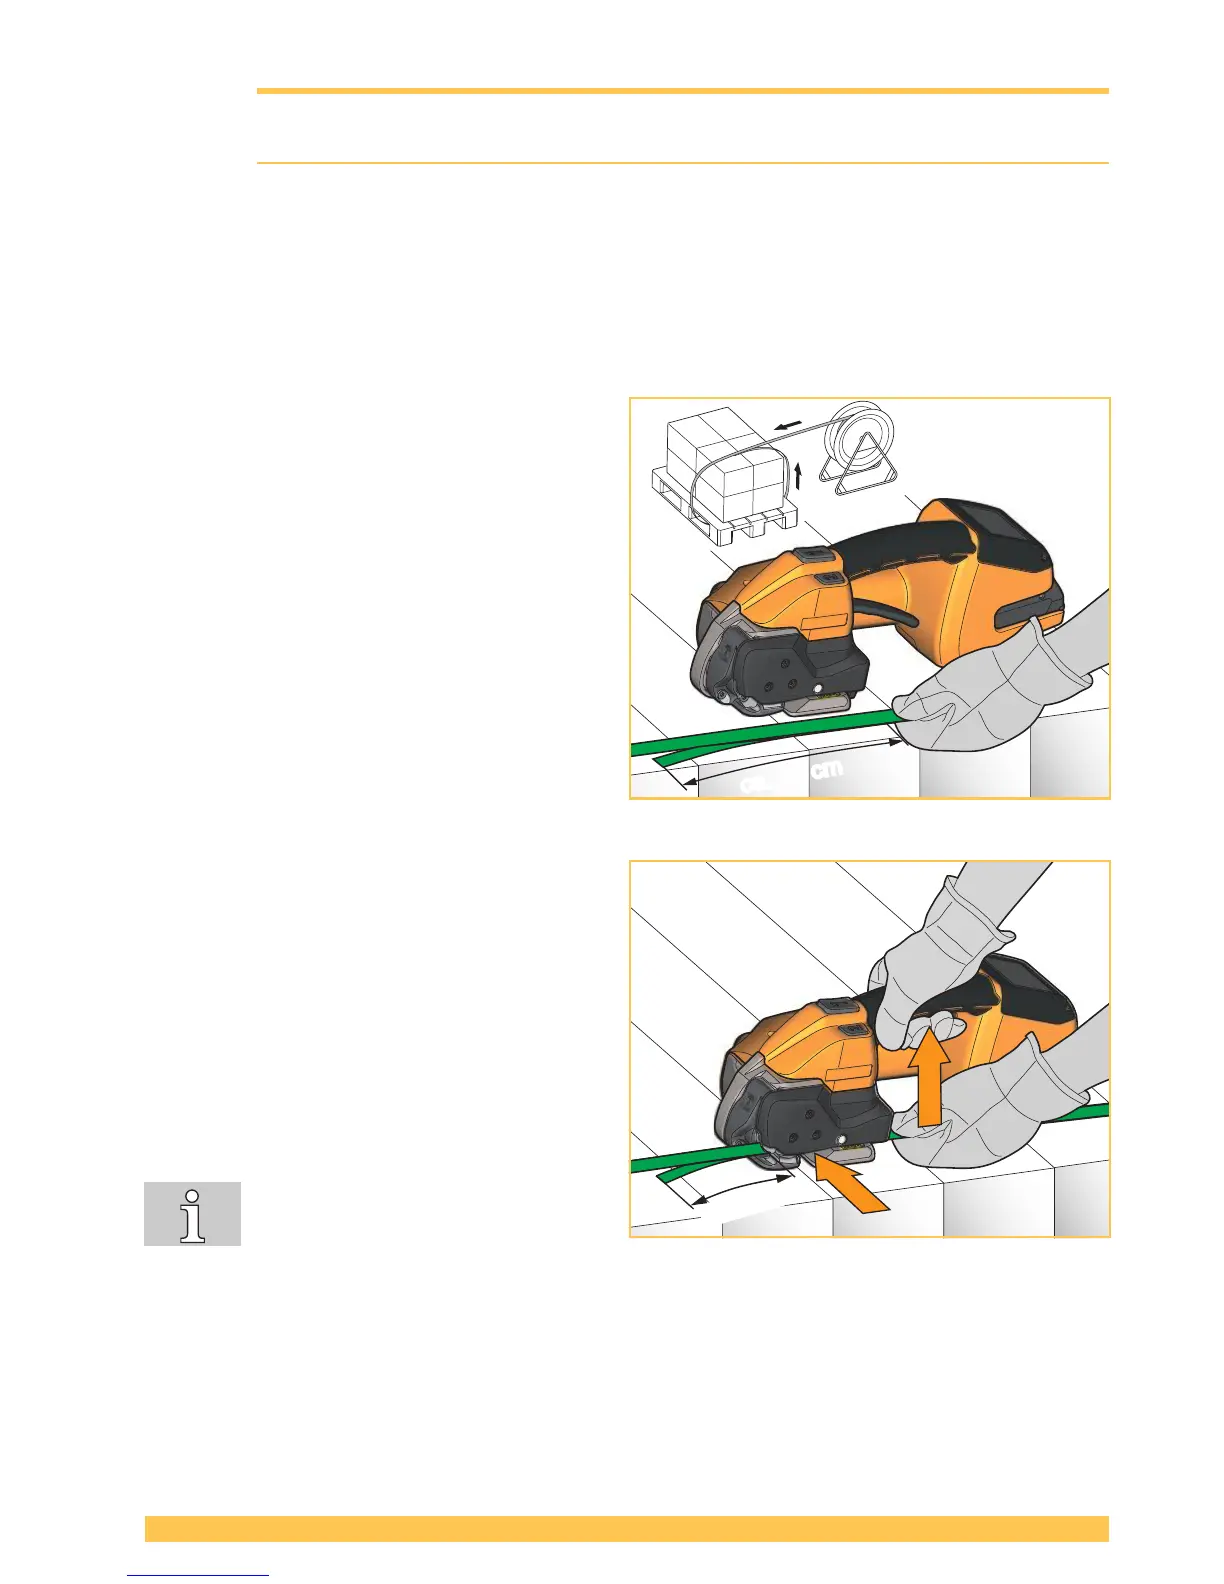
► Place the strap around the packaged goods.
► Grasp the straps at the top of the goods with
your left hand so that:
● The straps lie one above the other.
● The beginning of the strap lies underneath
and should project 15 cm (6”) beyond your
hand.
► Take the tool with your right hand.
► Lift rocker lever.
– Rocker of the tensioning device opens.
► Insert overlaid straps up to the end stop. The
strap coming from the dispenser lies above.
► Release rocker lever.
– The straps are clamped in the tensioning
device.
– The beginning of the strap should project
approx. 5 cm (2”).
If the strap is not inserted completely,
the strap guide indicator (Section 3.1,
item 9) shows a red eld. Insert the
strap completely. The strap guide indicator is black.
► Remove hands from the straps before tensioning!