14 15
C. LED Test
The LED Test Function verifies if the
1/M Readiness LED indicator lamps are
functioning properly.
1) When completed. Press any key to exit the
menu.
2) Double press ESC to return to previous
menu.
3.8 Vehicle Coverage
The scan tool is specially designed to work
with all OBD compliant vehicles, including
control area network (CAN), it is required by
EPA that all 1996 and newer vehicles (Cars
and light trucks) sold in the united states
must be OBD n compliant and this includes
all american, asian and European vehicles.
A small number of 1994 and 1995
model year gasoline vehicles are OBD
n compliant。To verify if a 1994 or 1995
vehicle is OBD compliant。 check the vehicle
emissions control information(VECI) Label,
which is located under the hood or by the
radiator of most vehicles . If the vehicle is
OBD II compliant, the label will designate
“OBD II Certified” Additionally, Government
regulations mandate that all OBD E compliant
vehicles must have a “common”sixteen-pin
Data Link Connector (DLC).
For the vehicle to be OBD compliant it must
have a 16-pin DLC (Data Link Connector)
under the dash and the vehicle emission
control information label must state that
the vehicle is OBD II compliant.
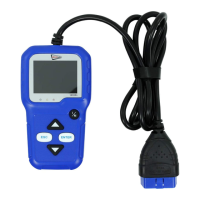
1) Use the UP/DOWN scroll button to select
Key Test from the Tool Self-Test menu,
and then press the OK button.
2) Press any key to start test« When you
press a key, the key name should be
observed on the display. If the key name
does not show up, then the key is not
functioning properly.
4. Operation
1) Turn the ignition off.
2) Locate the vehicle’s 16-pin Data Link
Connector (DLC).
3) Plug the OBD II cable into the vehicle’s
DLC.
4) Turn on the ignition and engine fully.
5) After finishing, press ESC button enter
Main Menu as following.
CAUTION: Don’t connect or disconnect any
test equipment with ignition on or engine
running.
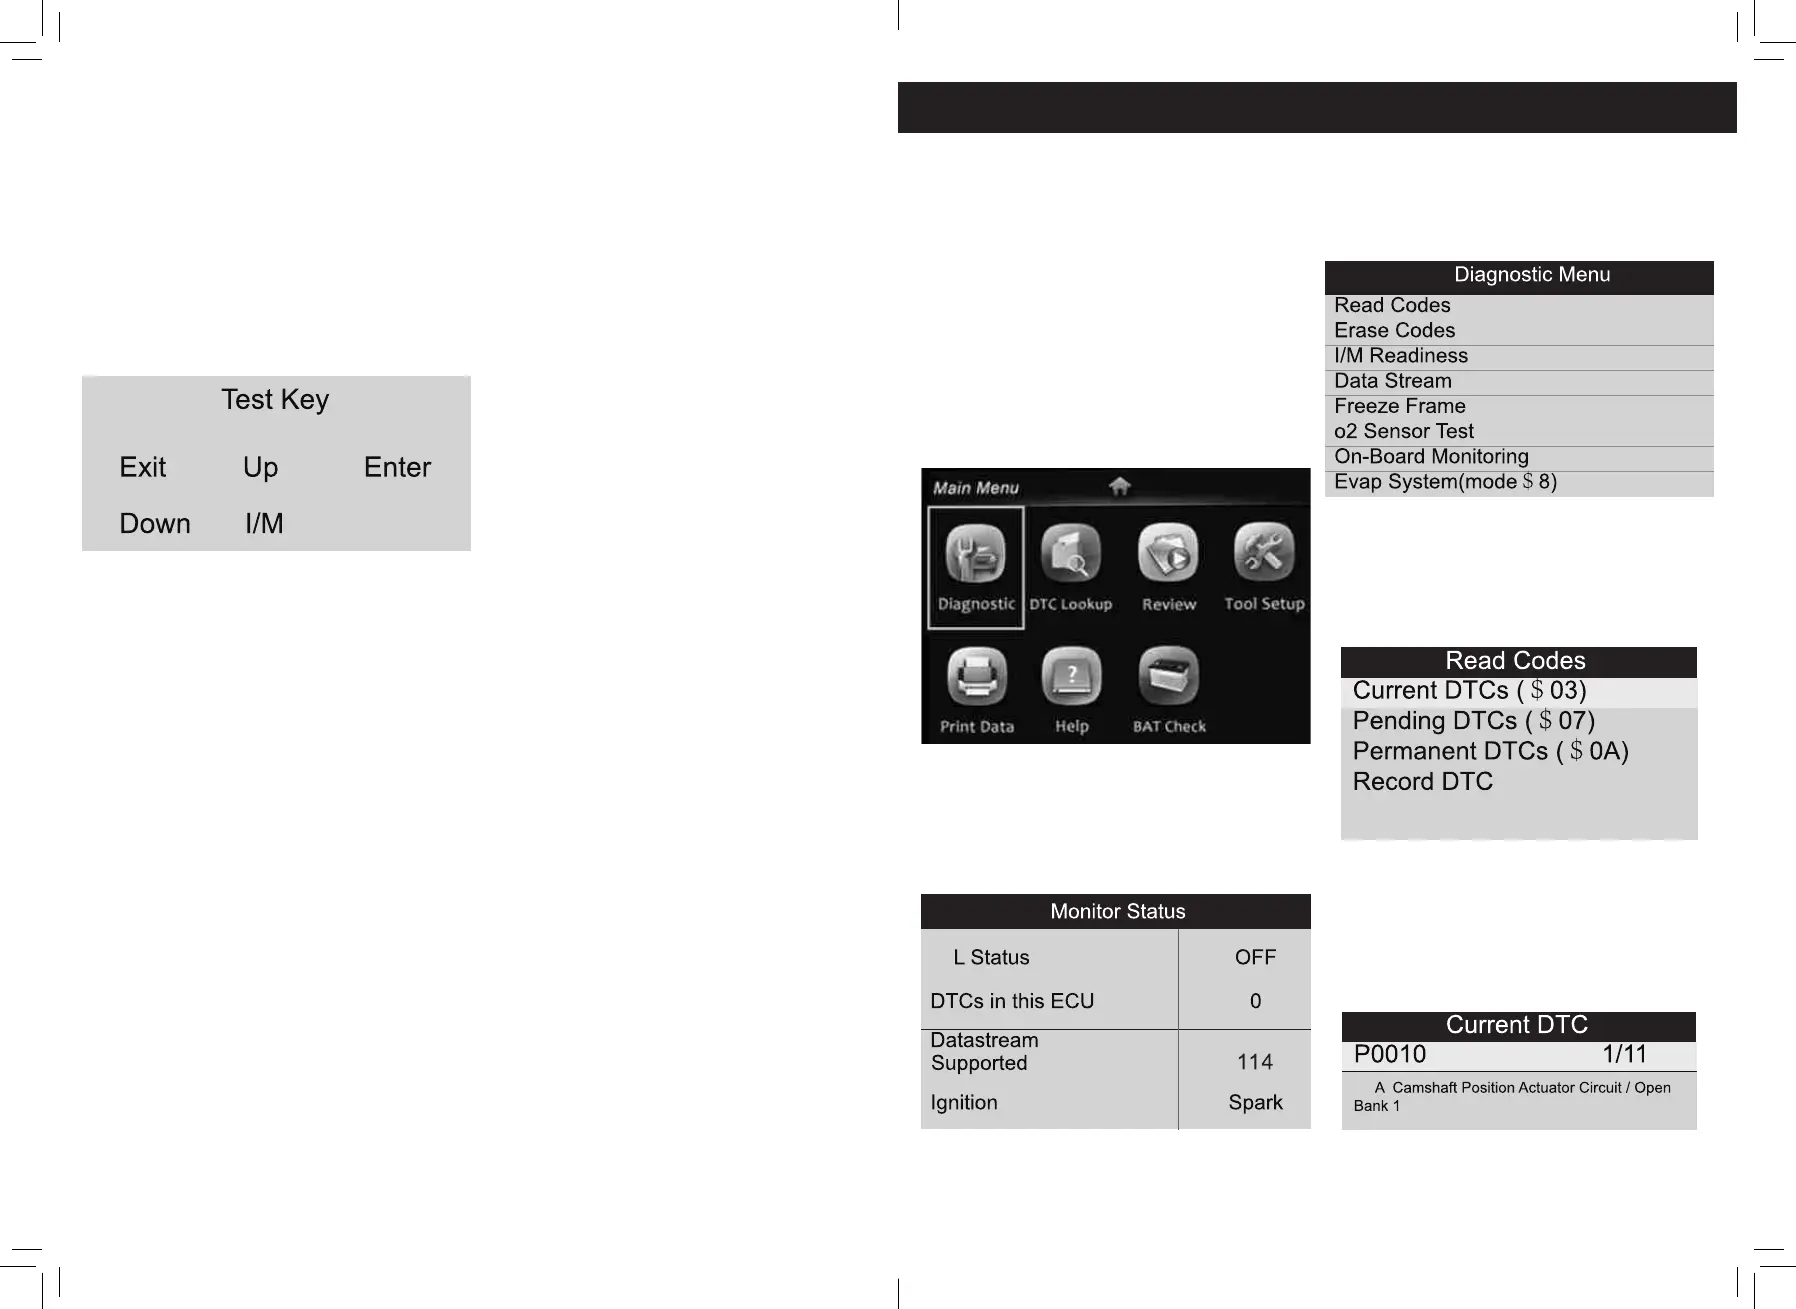
4.1 Diagnostic
Use UP/DOWN button to select [Diagnostic]
in Main Menu and press OK button。the
screen will display Monitor Status interface
as following:
Press ESC button to back to the Main Menu
of Diagnostic, the screen will display as
following:
4.1.1 Read Codes
Select [Read Codes] and press OK button in
Diagnostic Menu。If there are some codes,
the screen will display the codes as shown
below:
According to the above Figure to select
different item by pressing UP or DOWN and
press OK to confirm. Then You can user
DOWN key to view the next code. After
viewing all the codes, you can press ESC to
return to the Diagnostic Menu.