Manual English V16/04 page 27
Removing cranks
To remove a crank, proceed as follows:
- Hold the gear shift button with pliers and unscrew the tiny Allen screw
M3 with a 1.5-mm Allen wrench.
- Unscrew the button.
- Remove the axle bolt with a 14mm box spanner. Check, to make sure
that the washerunderneath the bolt didn’t remain in the axle hole.
- Insert the small tube from tool set Nr. 1 or 2, before using a standard
puller to remove the crank. (an M6-nut may do the job as well, if you
don’t have the original tool set).
Very important: If not using the small tube or an M6 nut, you will destroy
the shifting shaft when pushing with a standard puller!
If using a different crankarm not provided by the manufacturer, make sure
the hole has a depth of at least 8mm.
Please also make sure that the right-side crankarm is not wider than 25mm,
to prevent it from touching the spider when being tightened.
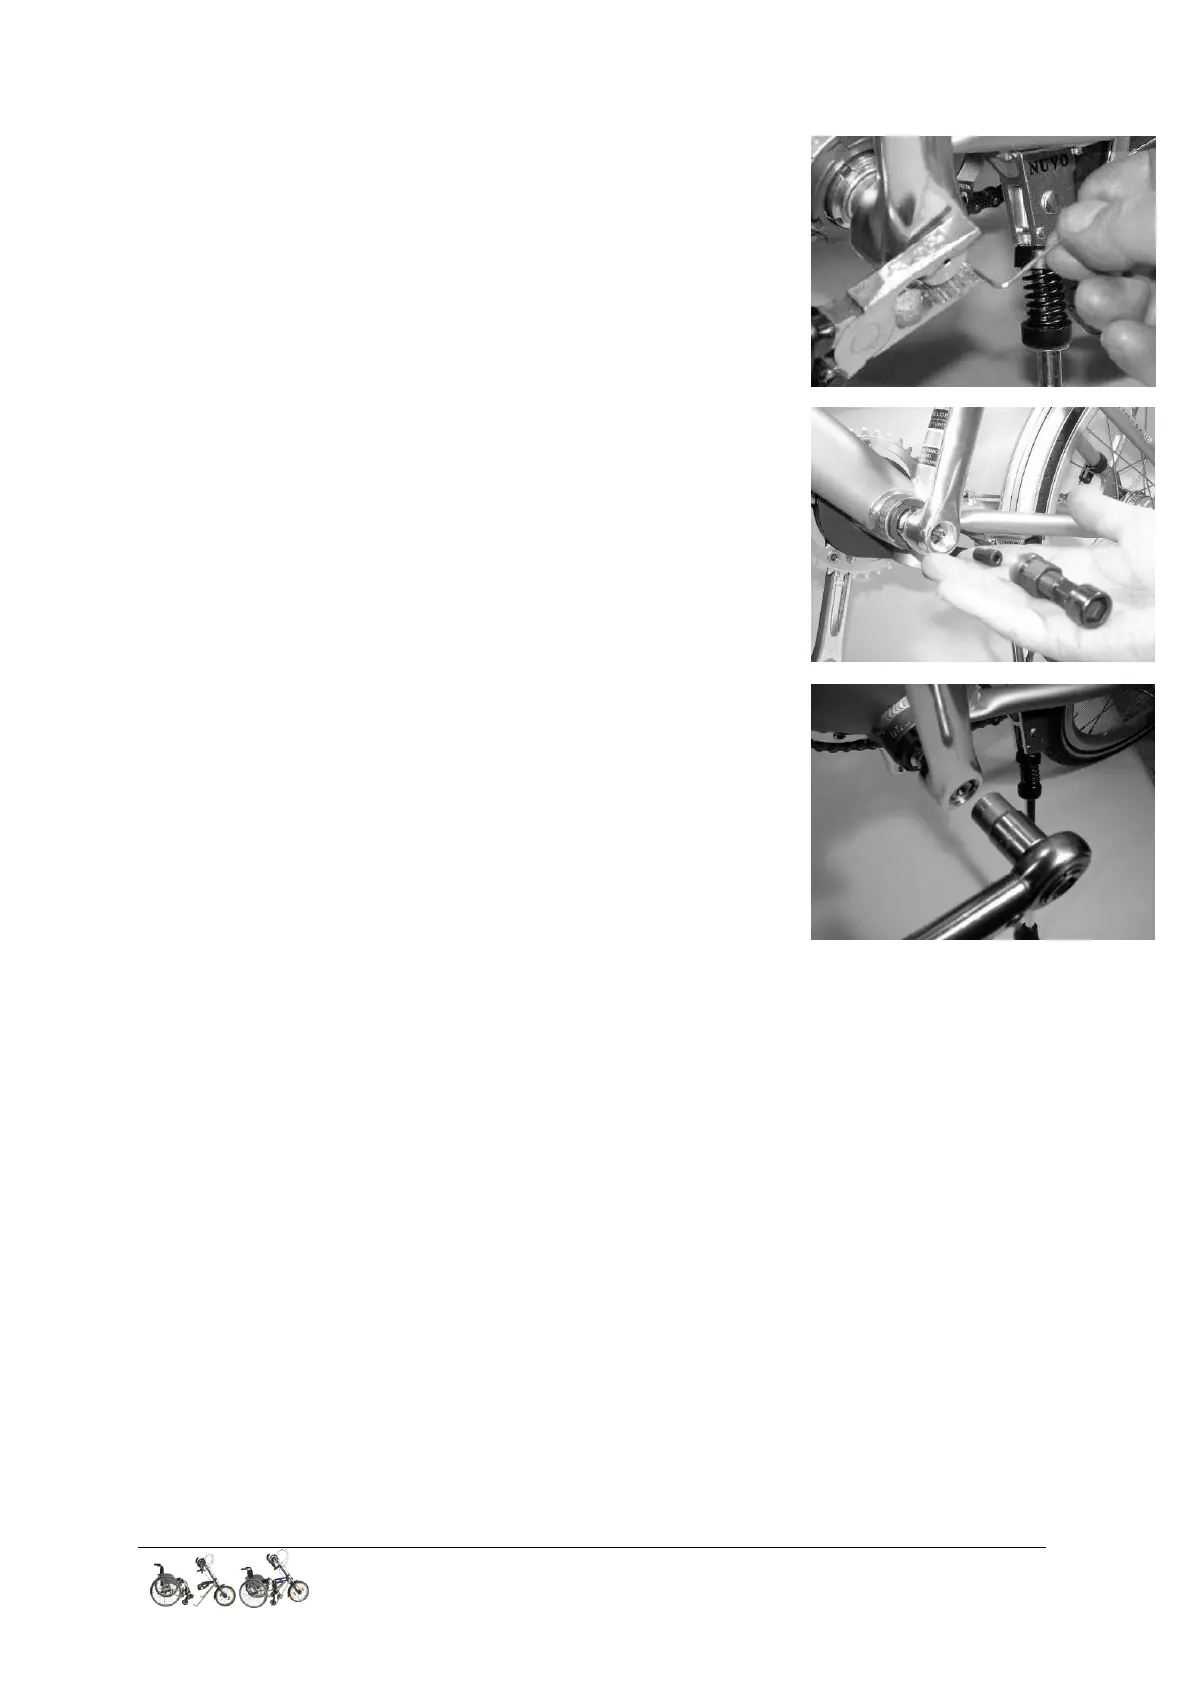
Hold the button with some pliers and unscrew the tiny M3 Allen screw
within the button with a 1.5-mm Allen wrench.
Unscrew the axle bolt with a 14mm box spanner.
Please make sure that the washer underneath the axle
bolt has been removed, too.
Very important: Always insert the small tube (part of our
tool sets Nr. 1 and 2) between axle and puller to prevent the shifting
shaft in the center of the axle from being destroyed by the puller.
 Loading...