PART 1 • English
4
n User-friendly remote control with coloured function buttons
n Low power consumption
n Mosaic function: 9 TV Channel in overview
Accessories:
n User’s Manual
n 1 Remote control unit
n 2x Batteries (AAA type)
NOTE: The batteries should not be recharged, disassembled, electrically short-circuited or
be mixed or used with other types of batteries.
2.0 YOUR RECEIVER
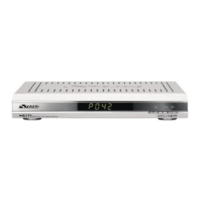
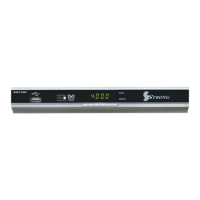
2.1 Front Panel
Figure 1
1. Power On/Off button
2. Channel Up/Down buttons
3. Mode indicator
The RED light indicates that the receiver is in STAND-BY mode.
The GREEN light indicates that the receiver is in AWAKE mode.
4. VFD display
In STAND-BY mode this indicates current time
In AWAKE mode this indicates current channel name
5. SD card slot
Insert your SD card to this slot to watch your photos, play MP3 files.
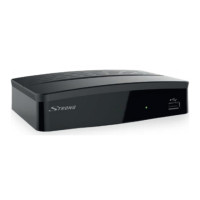
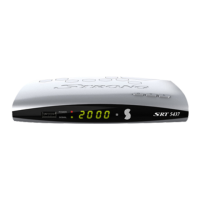
2.2 Rear Panel
Figure 2
1. SAT IN
Connect the digital signal from your LNB on the satellite dish to this connector.
2. SAT OUT
Gives you the possibility to connect an extra receiver (analogue or digital).
3.
ANT IN
To connect your aerial antenna or cable TV using coaxial cable.
4.
TO TV
If you do not use a SCART cable to connect your receiver to your TV, or if you have
connected a cable to the ANT input, you will have to use this connector to connect the
receiver to your TV by using a coaxial cable.
5. TV SCART Connector
To connect your receiver to your TV set using a SCART cable.