Torque item A
to 13 ± 2 ft-lb
Torque item B
to 13 ± 2 ft-lb
A
B
D
A
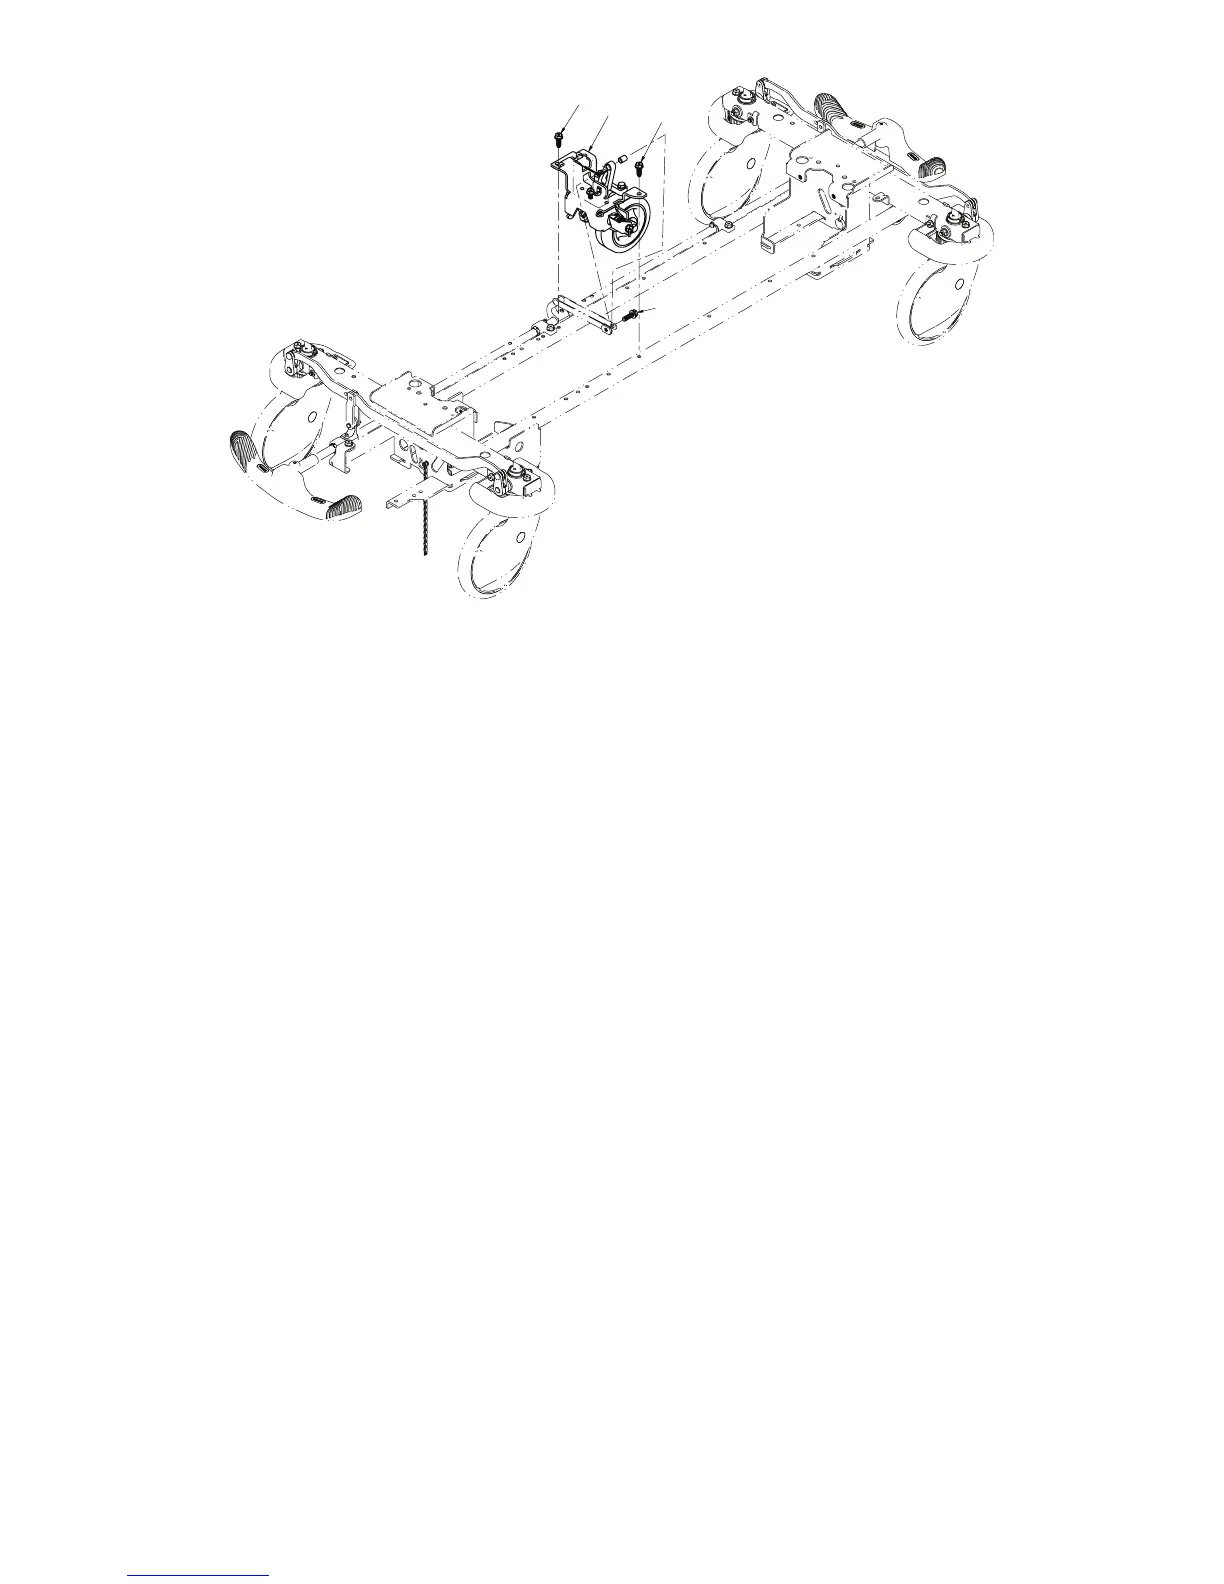
FFiigguurree 88 –– RReeppllaaccee tthhee ffiifftthh wwhheeeell aasssseemmbbllyy
JJaacckk rreeppllaacceemmeenntt,, hheeaadd eenndd
TToooollss RReeqquuiirreedd::
• 1/2” socket
• 3/8” drive ratchet
• 3/8” drive extension
• 3/8” drive torque wrench (ft-lb)
1. Apply the brake. Push on the product to make sure that the brake is locked.
2. Remove the litter from the product (
Litter top removal
(page 30)).
3. Lift the hood off of the base frame and set aside.
4. At the head end of the product, use a 1/2” socket with a 3/8” drive extension and a 3/8” drive ratchet, remove the two hex
washer head screws (B) that hold the jack and reservoir clamp (F) to the base frame and remove the clamp (Figure 9).
When you reinstall, torque the screws to 13 ± 2 ft-lb.
5. Lift up on the pump connecting rod and disconnect the pump piston from the connecting rod.
6. Disconnect the release pedal swivel from the pins on the release pedal weldment.
7. Remove the head end release rod from the release valve on the jack assembly.
8. Use a 1/2” socket with a 3/8” drive extension and a 3/8” drive ratchet to remove the two hex washer head screws (A) that
secure the jack base assembly to the base frame. When you reinstall, use a 3/8” drive torque wrench to torque the
screws to 13 ± 2 ft-lb.
9. Remove the jack assembly.
10.Position the supplied jack assembly on the base frame.
11.Install the hex washer head screws on the jack and reservoir clamp, but do not tighten them.
12.Reinstall the pump connecting rod and release rod.
13.Press the pump pedal to the floor to position the jack on the base frame.
14.Tighten the hex washer head screws (B) on the jack and reservoir clamp (F). Use a 3/8” drive torque wrench to torque
all hex washer head screws to 13 ± 2 ft-lb.
0747-109-002 Rev A.3
25 EN