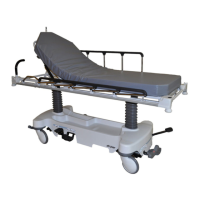
1. Apply the brake. Push on the product to make sure that the brake is locked.
2. Raise the base hood and support the base hood with bungee cords.
3. Disconnect the release pedal return springs (C) from the foot end release pedals (Figure 11).
4. Using needle nose pliers, remove the rue ring cotters (A) and the clevis pins (B) that connect the foot end release pedals
to the mounting bracket.
5. Rotate the pedals upward.
6. Using needle nose pliers, remove the rue ring cotters (D) that connect the head end and foot end release rods to the foot
end release pedals and remove the pedals.
7. Reverse steps to install the supplied pedals.
8. Verify proper operation before you return the product to service.
FFiigguurree 1111 –– RReeppllaaccee tthhee rreelleeaassee ppeeddaall
RReelleeaassee ppeeddaall rroodd rreeppllaacceemmeenntt,, ffoooott eenndd ((tthhrreeee--ssiiddeedd hhyyddrraauulliiccss))
TToooollss RReeqquuiirreedd::
• Needle nose pliers
• Bungee cords
1. Raise the hood and support the base hood with bungee cords.
2. Remove the foot end release pedal (see
Release pedal replacement, foot end (three-sided hydraulics)
(page 28)).
3. Remove the snap-in Nyliners that hold the foot end pedal release rods to the pedal mounting bracket.
4. Unsnap the foot end pedal release rods from the white plastic release rod brackets (A) (Figure 12).
5. Remove the rue ring cotters (B) from the studs (C) on the side control release pedal weldment (Figure 13).
6. Remove the foot end pedal release rods.
7. Reverse steps to install the release pedal rods.
0747-109-002 Rev A.3
29 EN