• 3/8” drive ratchet
• 3/8” drive torque wrench (ft-lb)
• 7/16-20 fine thread bolt
1. Apply the brake. Push on the product to make sure that the brake is locked.
2. Raise the product to the highest position.
3. Raise the Fowler backrest.
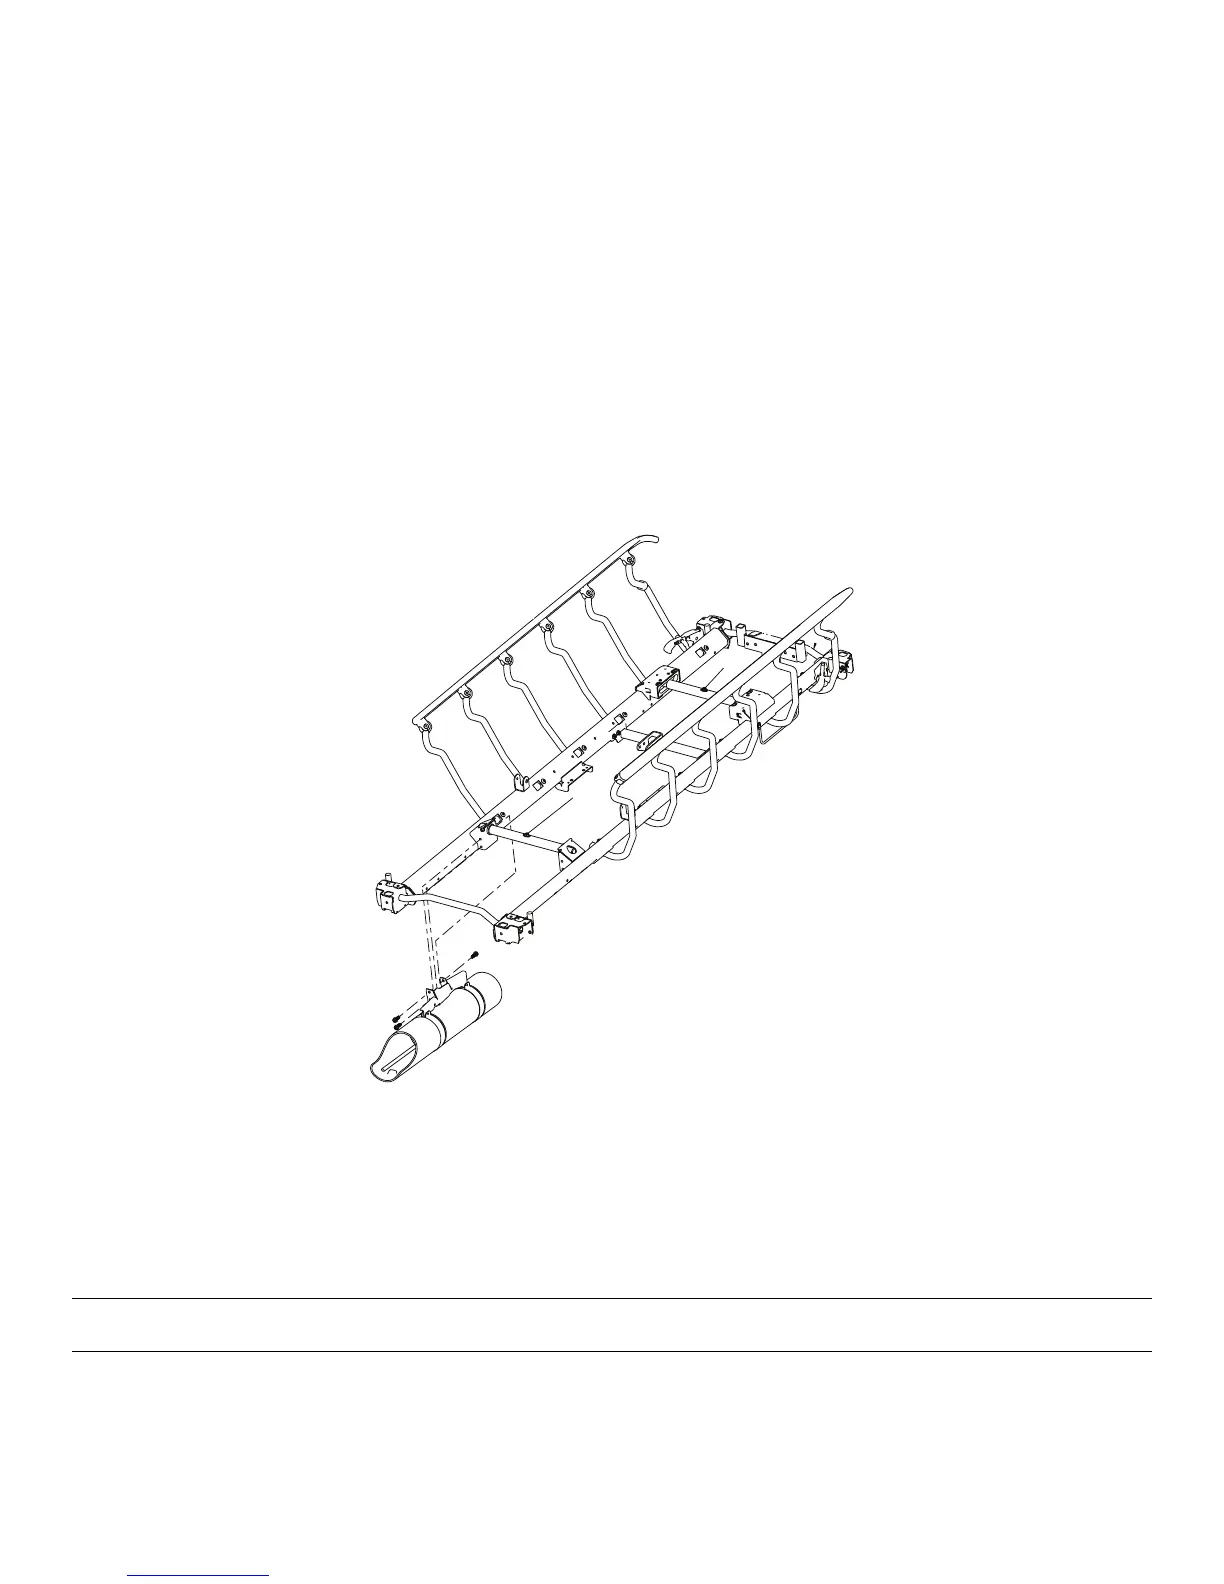
4. At the head end and the foot end, using a 1/2” socket with a 3/8” drive extension and a 3/8” drive ratchet, remove the two
hex washer head screws (A) that hold the jack support tubes to the jack shafts (Figure 14).
5. Insert a fine-thread 7/16-20 bolt far enough into the top of the jack supports to separate the litter top from the jack shaft.
6. Lift the litter off of the jack shafts and set the litter aside.
NNoottee -- Litter top removal requires two people.
7. Reverse steps to reinstall. Using a 3/8” drive torque wrench, torque the hex washer head screws on the support tube
weldments to 11 ± 5 ft-lb.
8. Verify proper operation before you return the product to service.
Torque item A
to 11 ±5 ft-lb
A
A
FFiigguurree 1144 –– LLiitttteerr ttoopp rreemmoovvaall
SSiiddeerraaiill llaattcchh aaddjjuussttmmeenntt
Tools required:
• 1/8” hex wrench
WWAARRNNIINNGG -- Always follow this procedure if the siderail latches must be adjusted. The siderail latches are preset at the
factory and do not need adjustment. If adjustment is not done properly, injury to the patient or operator could result.
1. Using a 1/8” hex wrench, adjust the hex screw located on the latch assembly opposite the latch.
2. Turn the screw:
a. Clockwise to decrease the amount of play in the latching mechanism
0747-109-002 Rev A.3
31 EN