SSeerrvviiccee
CCaasstteerr aasssseemmbbllyy rreeppllaacceemmeenntt
TToooollss rreeqquuiirreedd::
• 1/2” torque wrench (ft-lb)
• 3/4” combination wrench
• 3/4” socket
• Bungee cords
• Small jack
PPrroocceedduurree::
1. Raise the litter to the highest position.
2. Raise both siderails to the up and latched position.
3. Raise the base hood and support the base hood with bungee cords.
4. Put the brake/steer pedal in the neutral position.
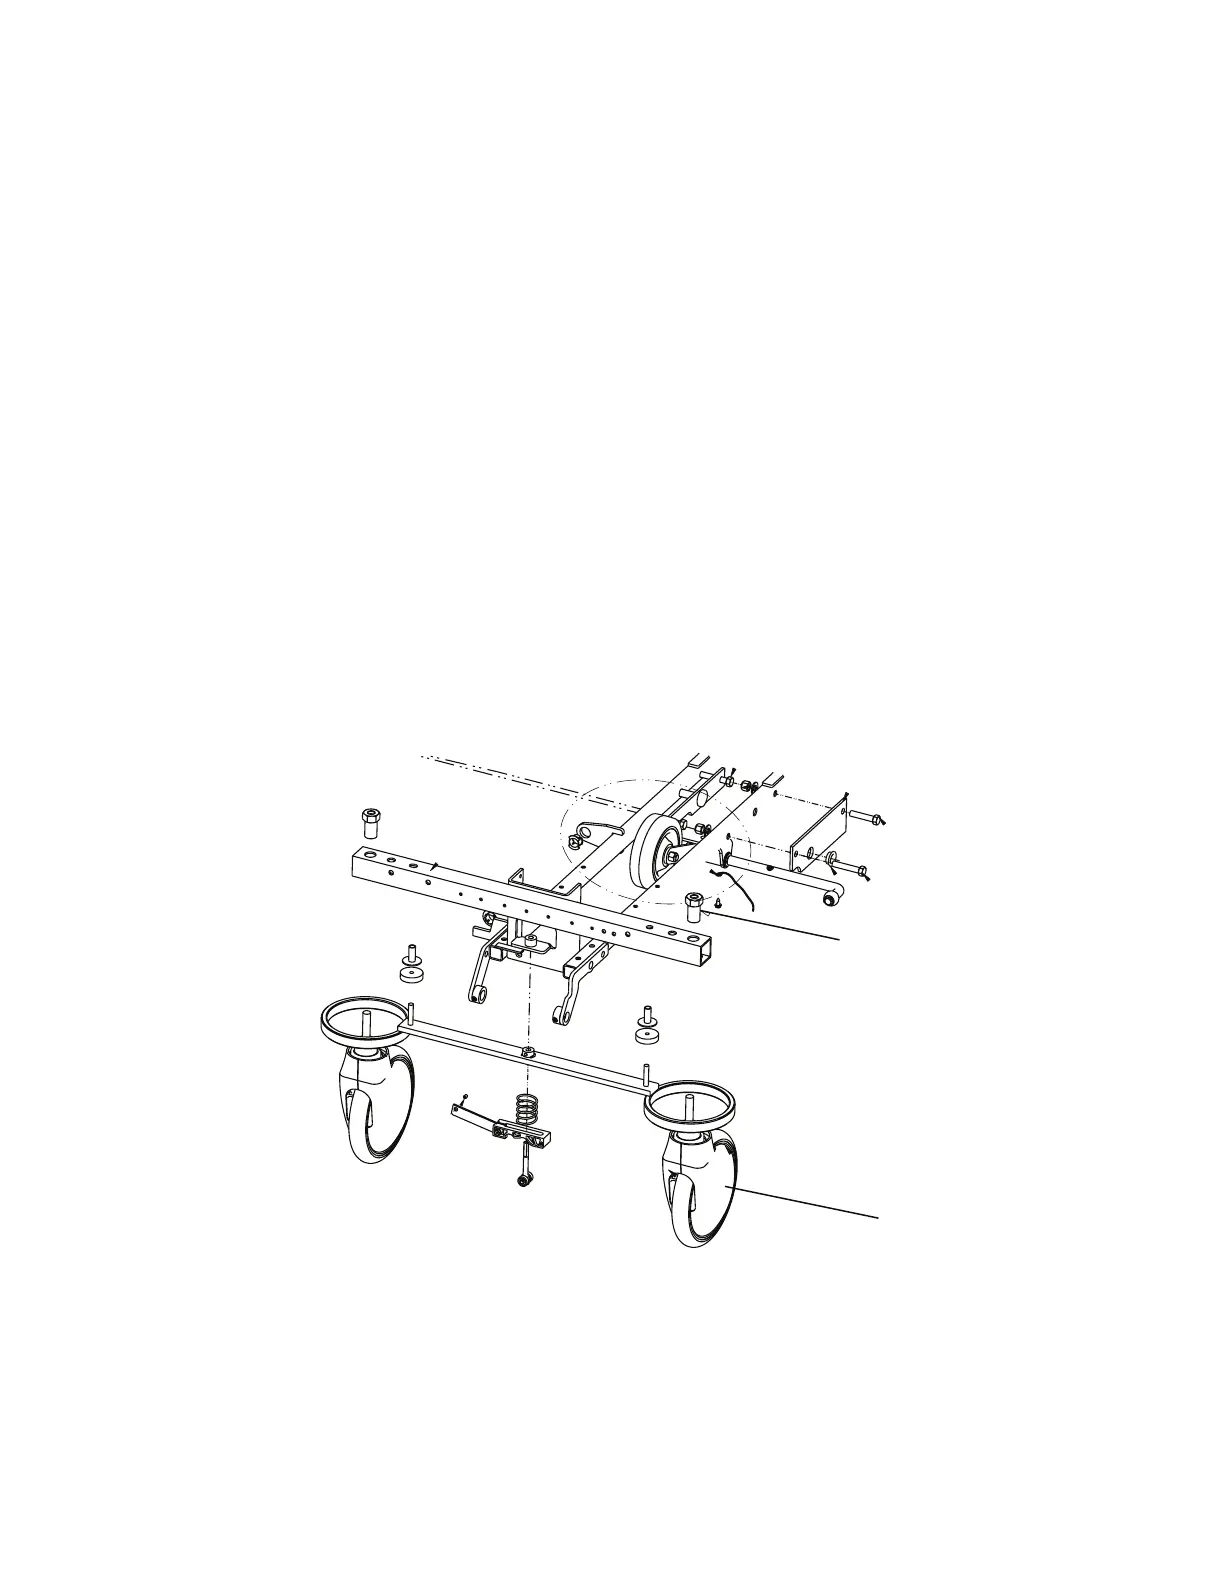
5. Using a 3/4” combination wrench and a 3/4” socket, remove the caster nut (A) that holds the caster (B) to the base frame
(Figure 2).
6. Using a small jack, raise the product until the caster falls out of the frame socket.
7. Install the supplied caster on the base frame and secure in place with the caster nut. When you reinstall the caster, use
a 1/2” drive torque wrench to torque the caster nut to 97.5 ± 7.5 ft-lb.
8. Verify proper operation before you return the product to service.
A
B
Torque item A
to 97.5 ± 7.5 ft-lb
FFiigguurree 22 –– CCaasstteerr aasssseemmbbllyy rreeppllaacceemmeenntt
CCaasstteerr ccoovveerr rreeppllaacceemmeenntt
TToooollss rreeqquuiirreedd::
• Large slotted screwdriver
1061-009-002 Rev A.0 9 EN

 Loading...


