FFiigguurree 33 –– RReeppllaacciinngg tthhee bbrraakkee ccaamm
BBrraakkee rriinngg rreeppllaacceemmeenntt
TToooollss rreeqquuiirreedd::
• 5/8” combination wrench
• 11/16” socket and ratchet
• 3/32” hex wrench
• Phillips screwdriver
• Large slotted screwdriver
• Small floor jack
• Needle nose pliers
• Bungee cords
TToooollss rreeqquuiirreedd::
1. Raise the litter to the highest position.
2. Raise the base hood and support the base hood with bungee cords.
3. Put the brake/steer pedal in the neutral position.
4. Using the small floor jack, lift the end of the base until the casters are approximately 12” off the floor.
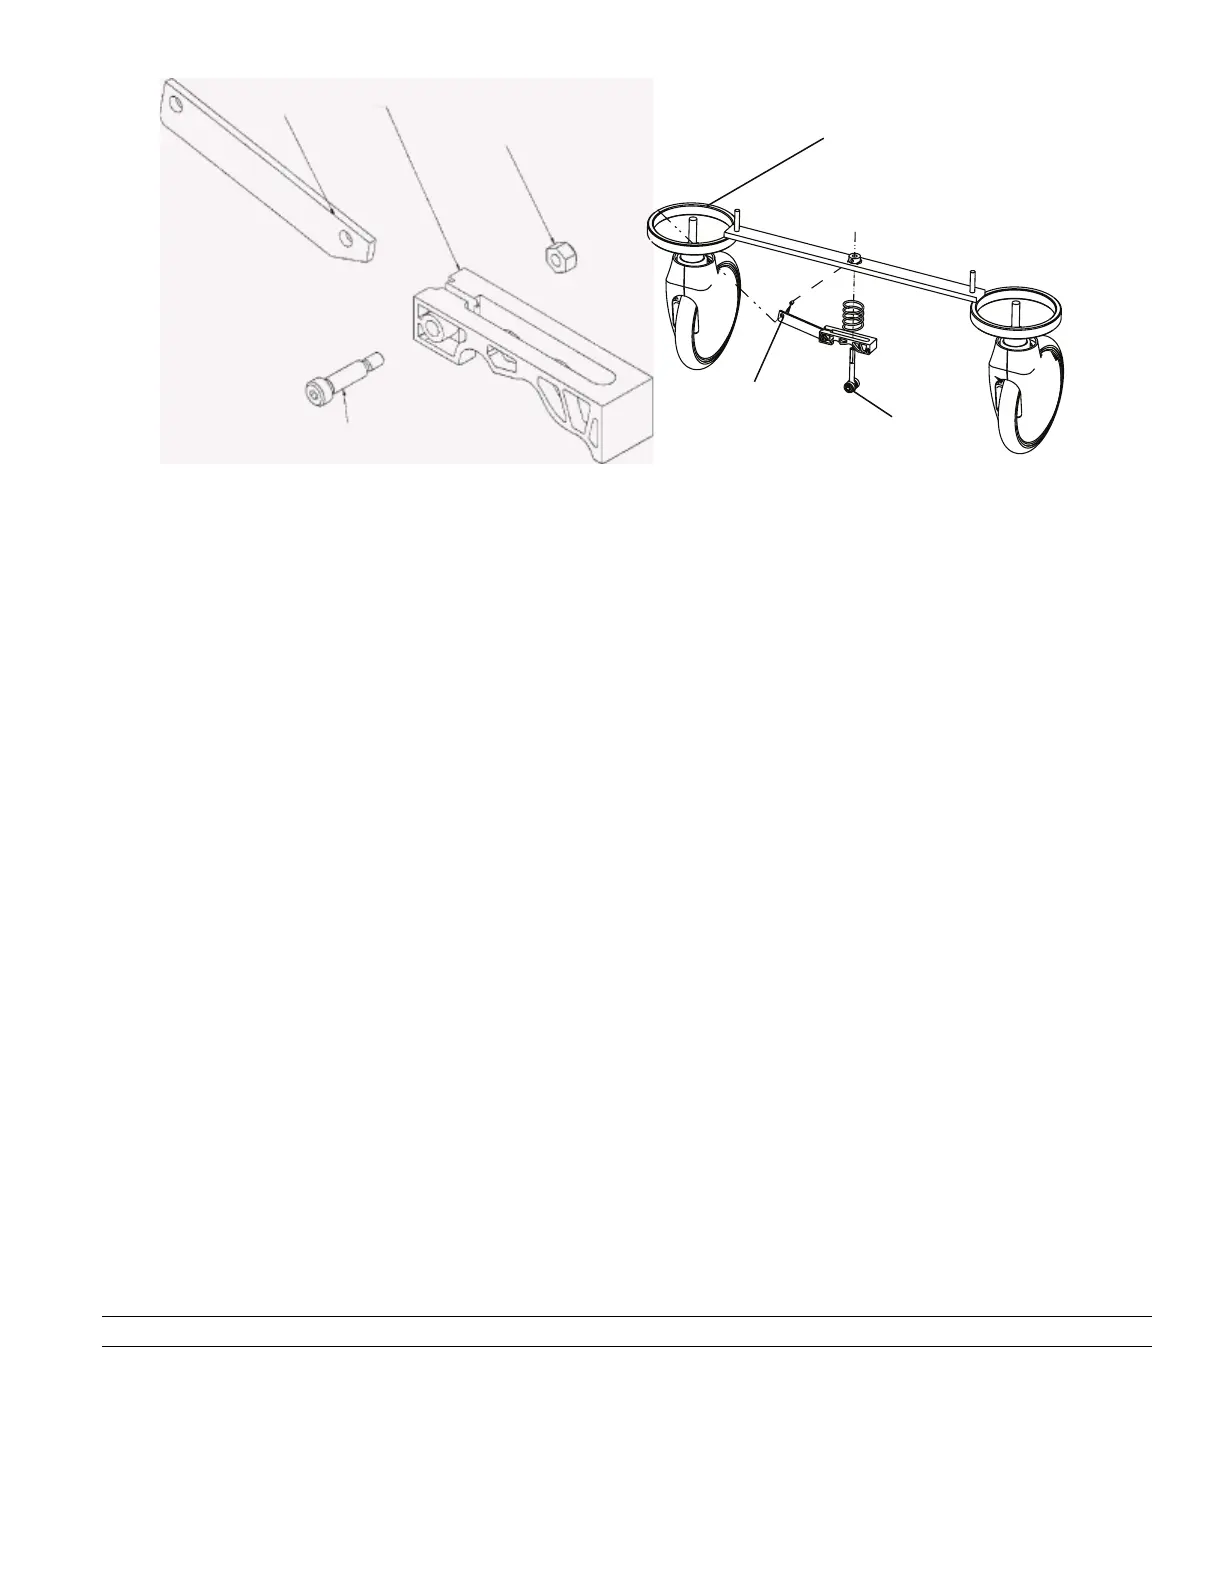
5. Using a 3/32” hex wrench, loosen the set screw (A) that holds the brake adjuster (B) to the brake ring (C) (Figure 4).
Turn the adjuster clockwise to remove the adjuster.
6. Remove the caster covers on both casters.
7. Remove one of the casters (see
Caster assembly replacement
(page 9)).
8. On the other caster, use an 11/16” socket and ratchet and a 5/8” combination wrench to remove the nut and bolt that
hold the wheel on the caster horn. Remove only the wheel.
9. Using needle nose pliers, squeeze and remove the compressed spring (D) between the brake cam (E) and the brake
ring (C) if you are working on the head end or foot end brake control (Figure 4).
WWAARRNNIINNGG -- Always use caution when you remove the compressed spring to avoid personal injury.
10.Lower the brake ring (C) and remove the brake ring from the base (Figure 4).
11.Remove the brake pads (F) and bushings (G) (Figure 4). Install the brake pads and bushings on the supplied brake
rings.
1061-009-002 Rev A.0 11 EN

 Loading...


