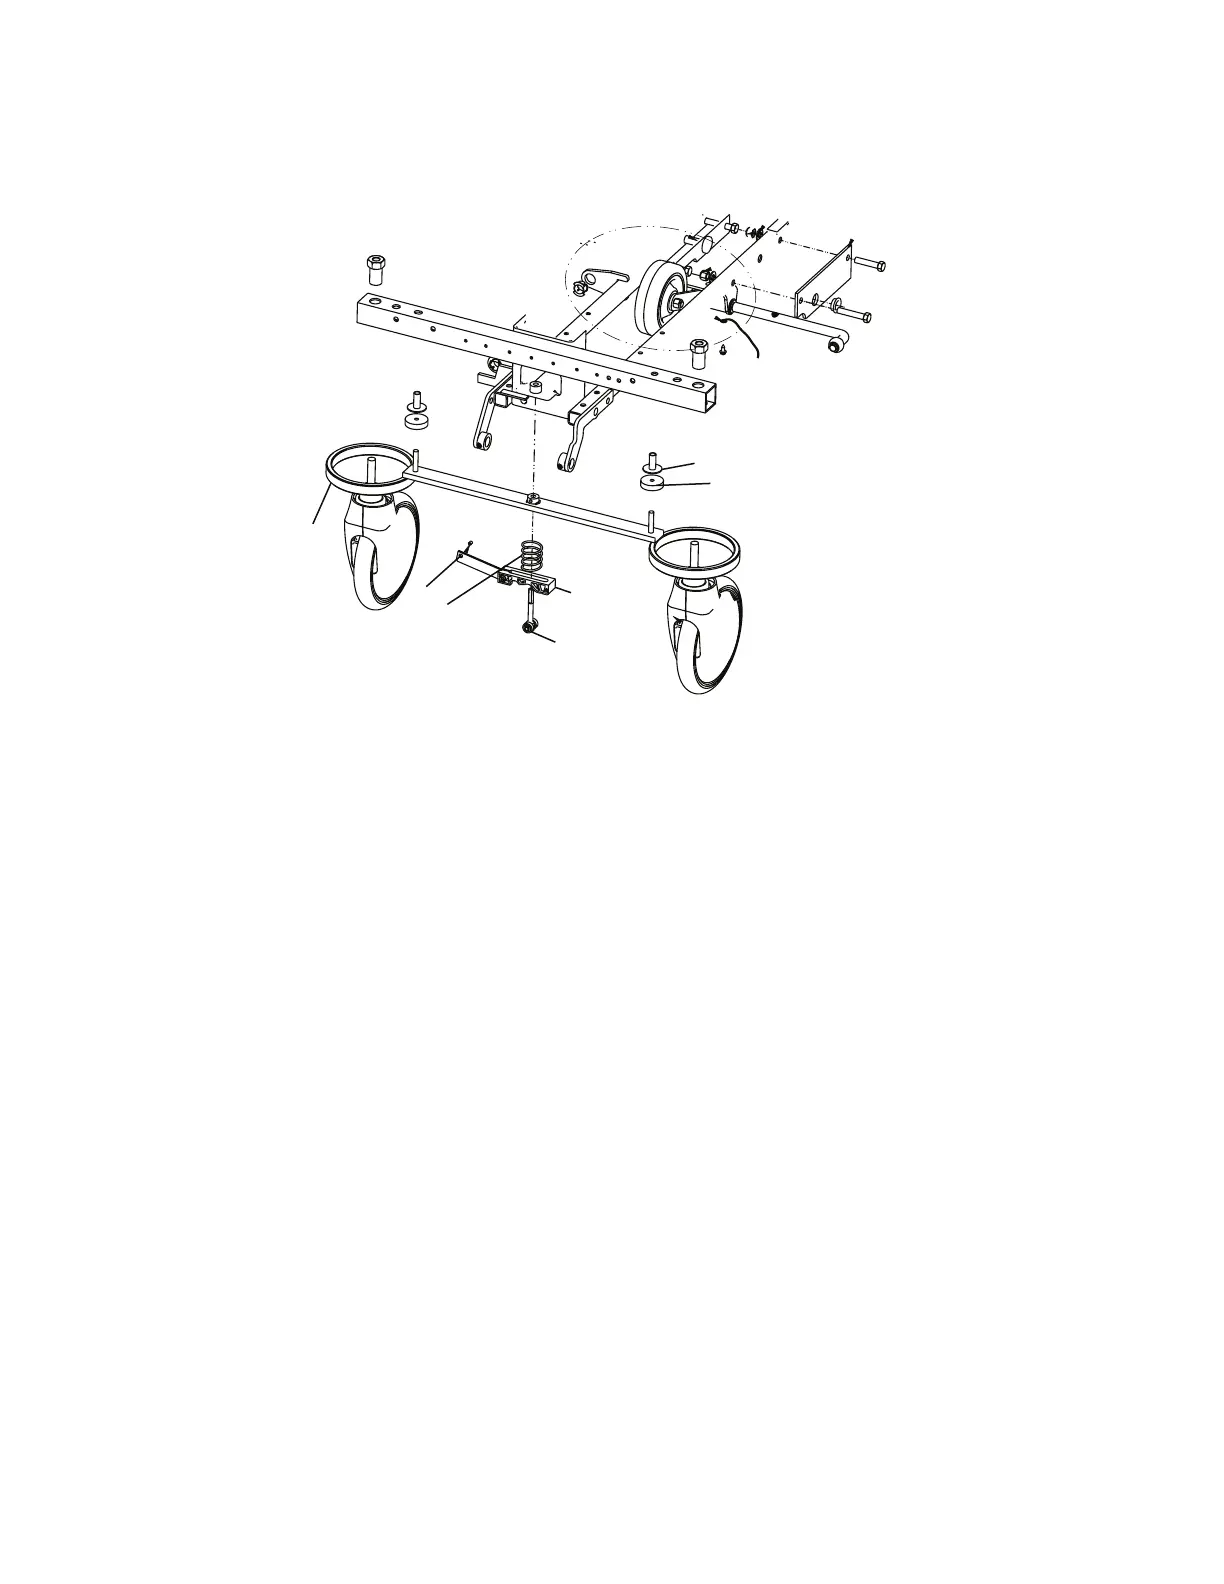
12.Reverse steps to install the supplied brake ring, caster, and wheel.
13.Apply and release the brakes to make sure that they work. Adjust as necessary (see
Brake adjustment
(page 12)).
14.Remove the bungee cords and lower the base hood.
15.Verify proper operation before you return the product to service.
FFiigguurree 44 –– BBrraakkee rriinngg rreeppllaacceemmeenntt
BBrraakkee aaddjjuussttmmeenntt
TToooollss rreeqquuiirreedd::
• 3/32” hex wrench
• Pry bar
PPrroocceedduurree::
NNoottee -- The flat on the thread of the stud must always be aligned with the set screw. The turn must be a full circle only.
1. Using a pry bar (A), compress the spring to relieve tension on the stud (Figure 5).
2. Using a 3/32” hex wrench, turn the set screw (B) one full turn counterclockwise to tighten the brake.
3. Using a 3/32” hex wrench, turn the set screw (B) one full turn clockwise to loosen the brake.
4. Verify proper operation before you return the product to service.
EN 12 1061-009-002 Rev A.0

 Loading...


