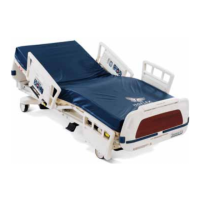
CCaasstteerr rreeppllaacceemmeenntt
CCAAUUTTIIOONN
• Always perform this procedure in a secure location with the floor jack secure to the base frame before you remove the
caster to prevent the risk of injury.
• Do not put your hands or feet below the caster when you remove or attach the caster to prevent the risk of injury.
TToooollss rreeqquuiirreedd::
• #2 Phillips screwdriver
• Small flat head screwdriver
• 5 mm hex wrench
• Small floor jack
PPrroocceedduurree::
1. On the footboard control panel, press EEnntteerr to access the SSeettttiinnggss menu.
2. Highlight SShhuuttddoowwnn and press EEnntteerr.
3. Unplug the power cord from the wall outlet.
4. Using a small flat head screwdriver, remove and save the four base cover screw caps.
5. Using a #2 Phillips screwdriver, remove and save the four screws that secure the base cover to the base frame.
Remove and save the base cover.
NNoottee -- Set the brakes to the neutral position.
6. Using a small floor jack, raise the base frame high enough to remove the caster.
7. Using a 5 mm hex wrench, remove and save the caster locating screw. Remove and discard the caster.
8. Reverse steps to reinstall.
NNoottee -- The caster stem has a red and green half. Face the red half of the caster stem toward the foot end of the bed.
9. Verify proper operation of the product before you return it to service.
MMaaiinn ccoonnttrrooll bbooaarrdd rreeppllaacceemmeenntt
TToooollss rreeqquuiirreedd::
• 5/32” hex driver
• #2 Phillips screwdriver
• 3/8” nut driver
• ESD system
PPrroocceedduurree::
1. Raise the product to the highest height position.
2. On the footboard control panel, press EEnntteerr to access the SSeettttiinnggss menu.
3. Highlight SShhuuttddoowwnn and press EEnntteerr.
4. Unplug the power cord from the wall outlet.
5. Push down on the brake pedal to apply the brake.
6. Using a 5/32” hex driver, remove the two screws and flat washers that secure the motion interrupt pan to the litter
weldment. Remove the motion interrupt pan.
7. Using a #2 Phillips screwdriver, remove the two screws from the power supply mounting bracket closest to the center of
the bed.
EN 26 5900-009-002 Rev A.0
 Loading...
