-22-
Priming
(Jet 40 and 90 Range)
Flooded suction installations see (4a).
Suction lift installations with footvalve and strainer see (4b).
Suction lift installation, self priming of suction hose.
This pump is capable of self priming the suction hose with liquid on installation. It is
recommended that the optional suction hose assembly is always used for this
application. First ensure both suction and delivery hose connections are airtight.
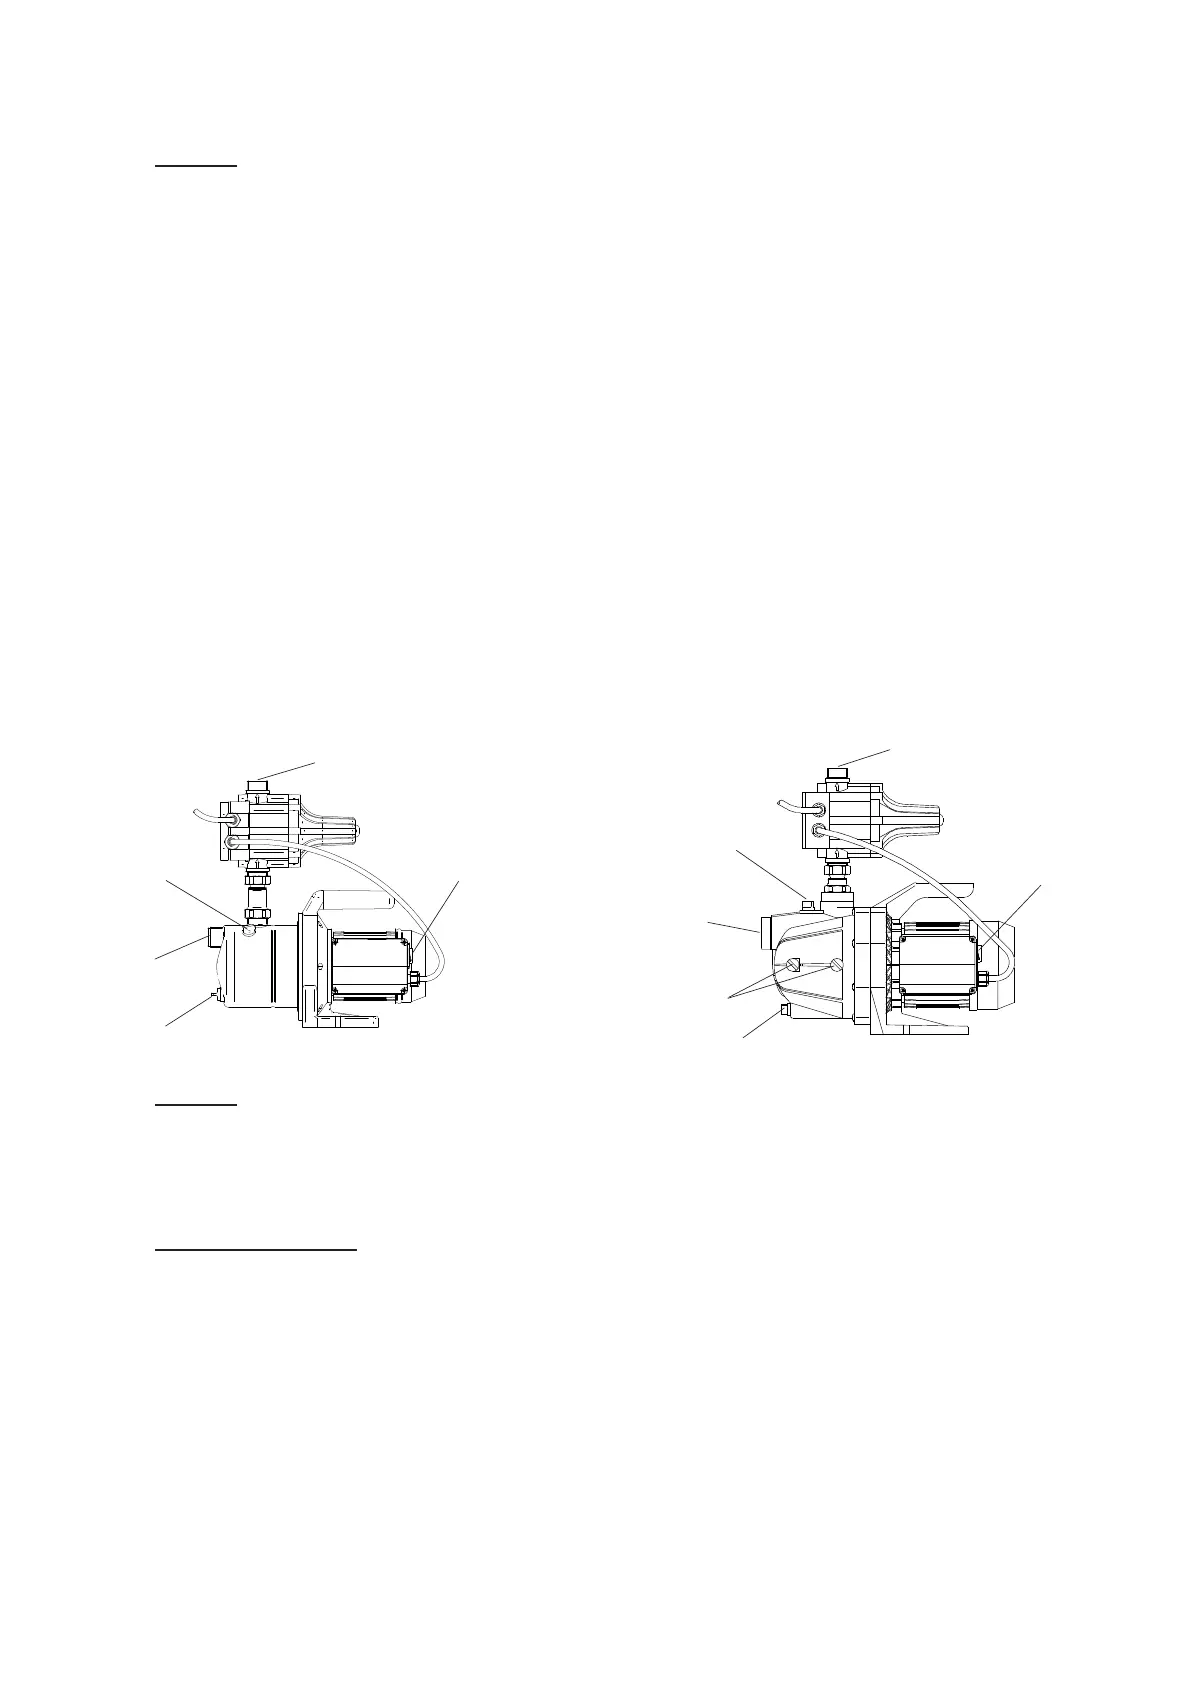
Remove the priming plug (Fig. 25) and fill the pump body with liquid, slowly allowing
the air to escape. Replace the plug.
Ensure the suction hose is fully submerged in the liquid source and the delivery hose
is open to enable the pump to vent air. Turn on the switch located on the pump
(Fig. 26) and turn on electricity supply. The pump will start and begin to prime the
suction pipework. If the (red) L.E.D failure light on the control module illuminates, this
indicates that the pump is out of liquid or priming has not been completed. Turn off
power, check liquid supply level in pump is still full, if OK, turn on power and keep the
control module RESTART button depressed until priming complete. The priming
procedure may need to be repeated if pump does not prime within 5 minutes of
starting.
Note: The amount of time required for priming will vary dependent on the height of
the suction lift.
Priming
(Diver 3 and 4 Range)
The pump should be fully submerged before starting, take care when submerging
the pump to ensure all air is purged from the casing. This is done by slowly
submerging the pump and gently agitating whilst doing so.
5. Starting The Pump
Turn on the electrical supply and the green L.E.D. 'power on' lights up. The yellow
L.E.D. lights up when the pump is running (Fig. 26). Note: On the Jet pump only,
there is an integral on/off switch mounted on the pump (Fig. 25) which must be
turned to the on position.
The pump will run until the system is completely charged and the maximum pressure
reached. All taps or outlets on the system need to be operated starting with the
highest outlet. This is to release air that may be trapped in the system. If the failure
(red) L.E.D. lights up, this indicates that the pump is out of liquid or priming is
incomplete. In the event of this happening, check liquid supply to pump. If all is in
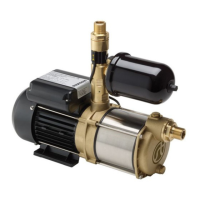
Outlet
Priming
Plug
On/Off
Switch
Inlet
Drain
Plug
JET 40 Boostamatic
Fig. 25
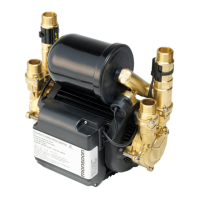
Gauge
Tappings
Outlet
Priming
Plug
On/Off
Switch
Inlet
Drain
Plug
JET 90 Boostamatic