SICHERHEIT / SAFETY
IV
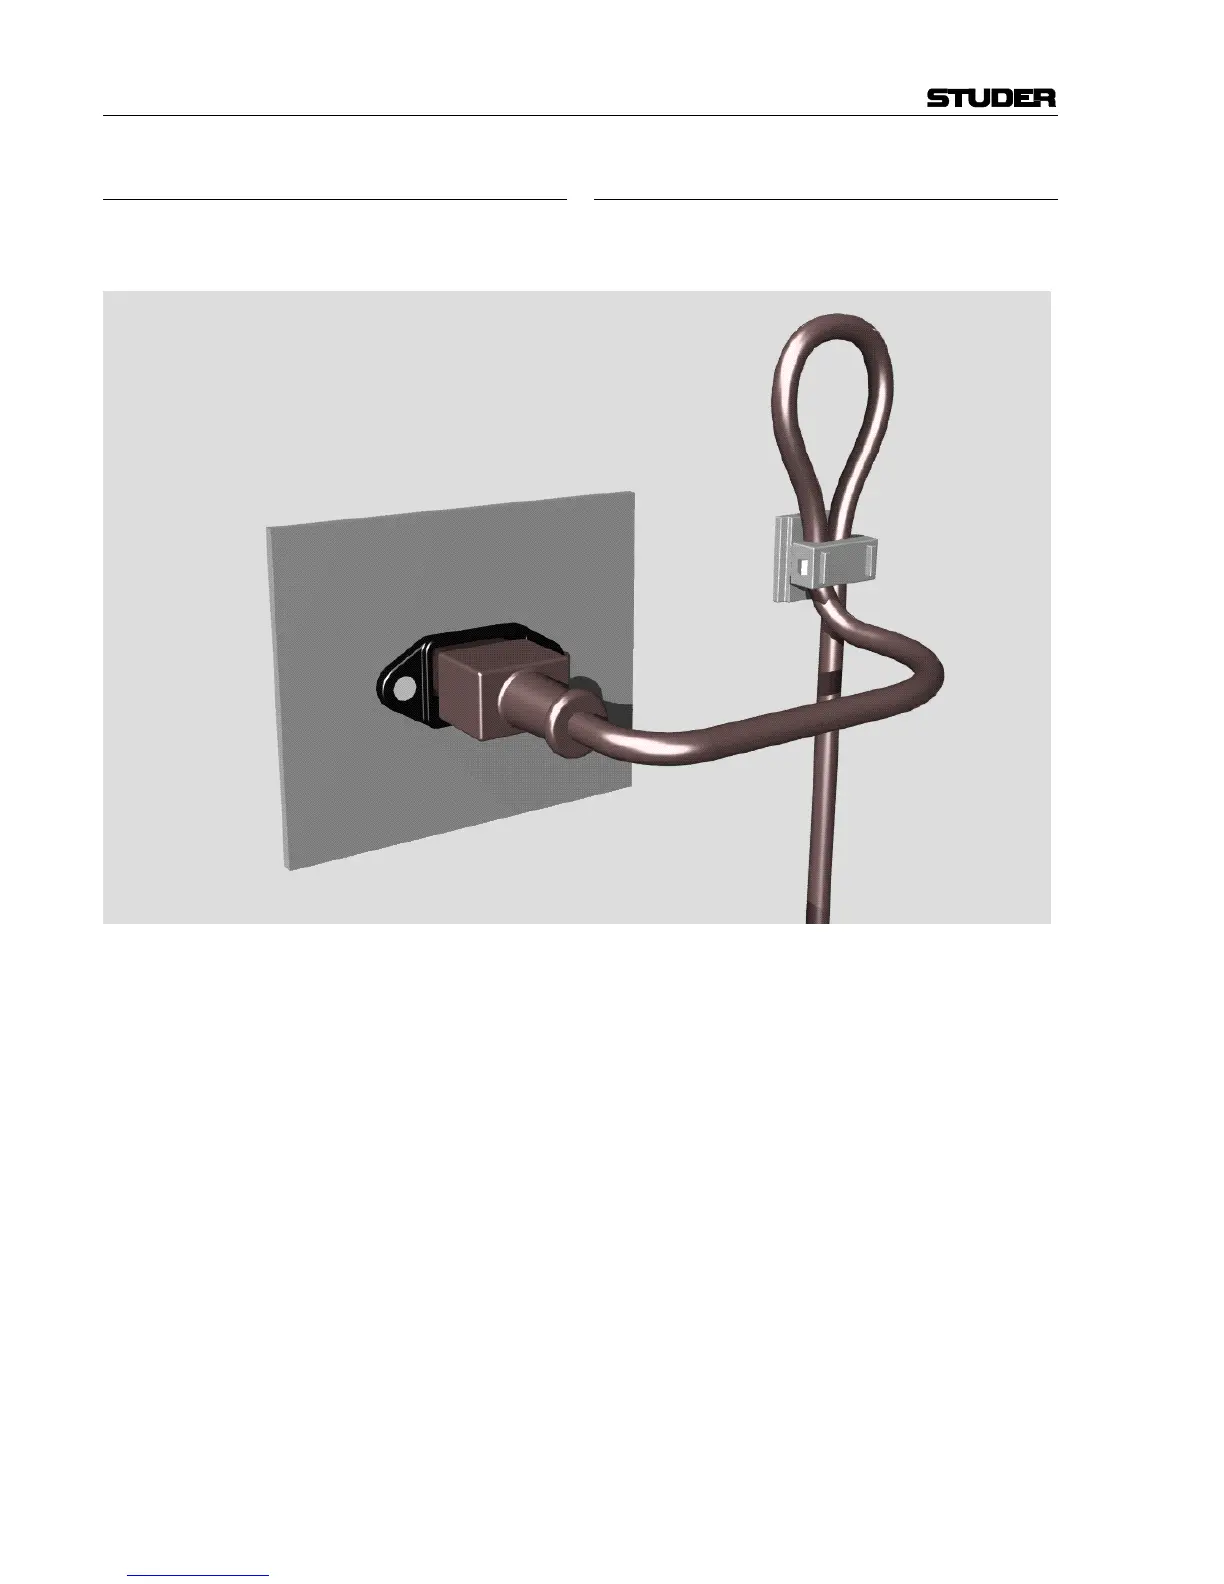
Zugentlastung für den Netzanschluss
Zum Verankern von Steckverbindungen ohne mechani-
sche Verriegelung (z.B. IEC-Kaltgerätedosen) empfehlen
wir die folgende Anordnung:
Vorgehen: Der mitgelieferte Kabelhalter ist selbstkle-
bend. Bitte beachten Sie bei der Montage die folgenden
Regeln:
1. Der Untergrund muss sauber, trocken und frei von
Fett, Öl und anderen Verunreinigungen sein. Tempe-
raturbereich für optimale Verklebung: 20...40° C.
2. Entfernen Sie die Schutzfolie auf der Rückseite des
Kabelhalters und bringen sie ihn mit kräftigem Druck
an der gewünschten Stelle an. Lassen sie ihn unbela-
stet so lange wie möglich ruhen – die maximale Kle-
bekraft ist erst nach rund 24 Stunden erreicht.
3. Die Stabilität des Kabelhalters wird erhöht, wenn Sie
ihn zusätzlich verschrauben. Zu diesem Zweck liegen
ihm eine selbstschneidende Schraube sowie eine M4-
Schraube mit Mutter bei.
4. Legen Sie das Kabel gemäss Figur in den Halter ein
und pressen Sie die Klemme kräftig auf, bis das Kabel
fixiert ist.
Mains connector strain relief
For anchoring connectors without a mechanical lock (e.g.
IEC mains connectors), we recommend the following
arrangement:
Procedure: The cable clamp shipped with your unit is
auto-adhesive. If mounting, please follow the rules be-
low:
1. The surface to be adhered to must be clean, dry, and
free from grease, oil or other contaminants. Best ap-
plication temperature range is 20...40° C.
2. Remove the plastic protective backing from the rear
side of the clamp and apply it firmly to the surface at
the desired position. Allow as much time as possible
for curing. The bond continues to develop for as long
as 24 hours.
3. For improved stability, the clamp can be fixed with a
screw. For this purpose, a self-tapping screw and an
M4 bolt and nut are included.
4. Place the cable into the clamp as shown in the illus-
tration above and firmly press down the internal top
cover until the cable is fixed.