7-62
Component Access / Removal
Built-In
Built-In
(600-
(600-
2
2
)
)
Series
Series
#3758407 - Revision B - August, 2006
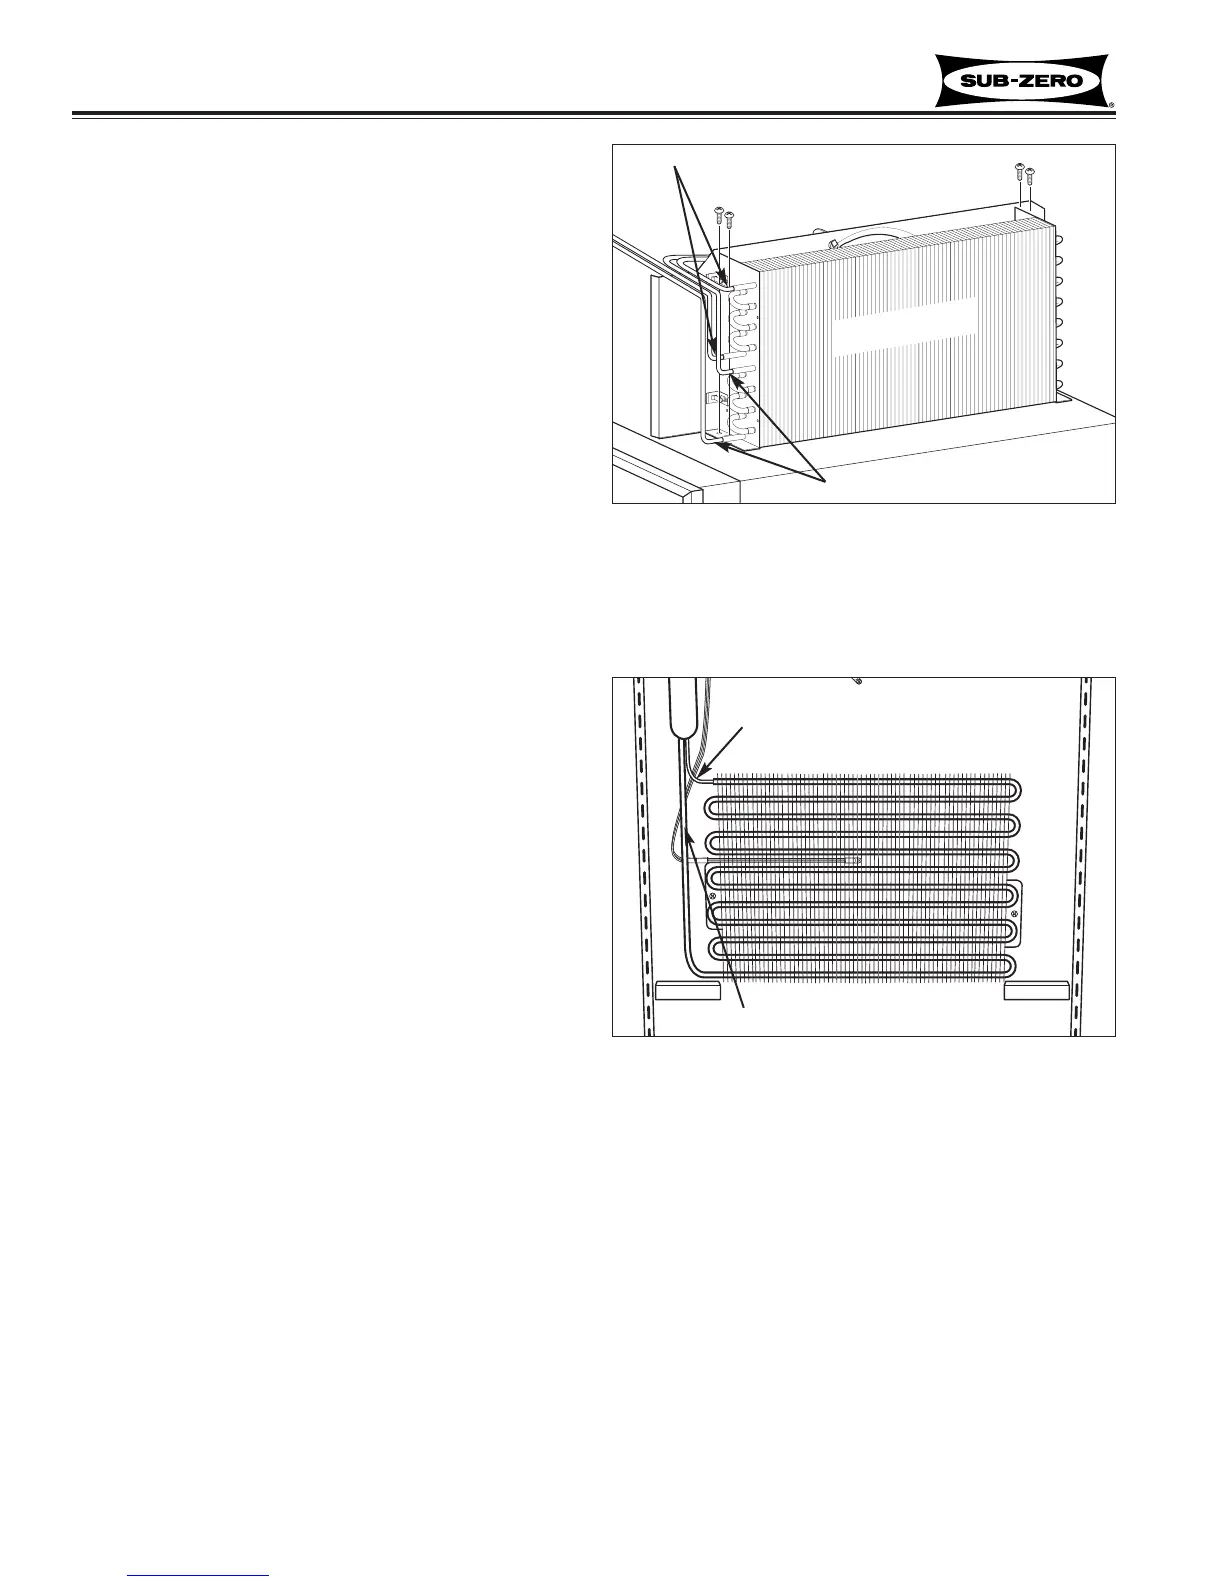
Condenser (All Models except 601’s)
NOTE: When replacing the condenser, both filter-driers
must also be replaced.
NOTE: It is necessary to pull the unit from its installa-
tion and remove the unit shroud in order to replace a
condenser.
After capturing the refrigerant from sealed system, (See
Figure 7-161):
1. Extract screws which hold condenser fan shroud to
condenser.
2. Using a tube cutter, cut condenser inlet and outlet.
NOTE: It is not recommended to sweat tubing
apart. Doing so will induce moisture into the sealed
system.
3. Extract condenser mounting screws which hold
condenser side brackets to top of unit.
4. Lift condenser off of unit
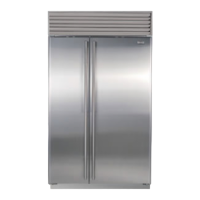
Evaporator (All Models except 601’s)
Evaporators are attached to rear walls, or ceilings with
screws, behind evaporator covers.
NOTE: When replacing an evaporator, the filter-drier
must also be replaced.
NOTE: When removing a freezer evaporator, the evap-
orator thermistor, defrost terminator and defrost heater
must also be removed and reused on new evaporator.
After capturing the refrigerant from the sealed system
(See Figure 7-162):
1. Extract screws which hold evaporator to rear wall or
ceiling of compartment.
2. Pull and rotate evaporator so heat exchanger is
accessible.
3. With a file, score a line around capillary tube, 1” or
less from evaporator inlet, then fatigue capillary
tube at this line until it separates.
4. With a tube-cutter, cut evaporator outlet 1” or less
from accumulator (if applicable), or 1” or less from
suction line connection point.
NOTE: It is not recommended to sweat tubing apart.
Doing so will induce moisture into the sealed system.
NOTE: After capillary tube is fatigue until it separates,
check tubing for internal burrs. If burrs exist, repeat
step 3 above..
Figure 7-161. Condenser
Cut
Cut
Condenser
Figure 7-162. Refrigerator Evaporator
NOTE: Freezer evaporator removal not illustrated.
Cut
Cut