subzero.com | 11
Alignment
LEVELING
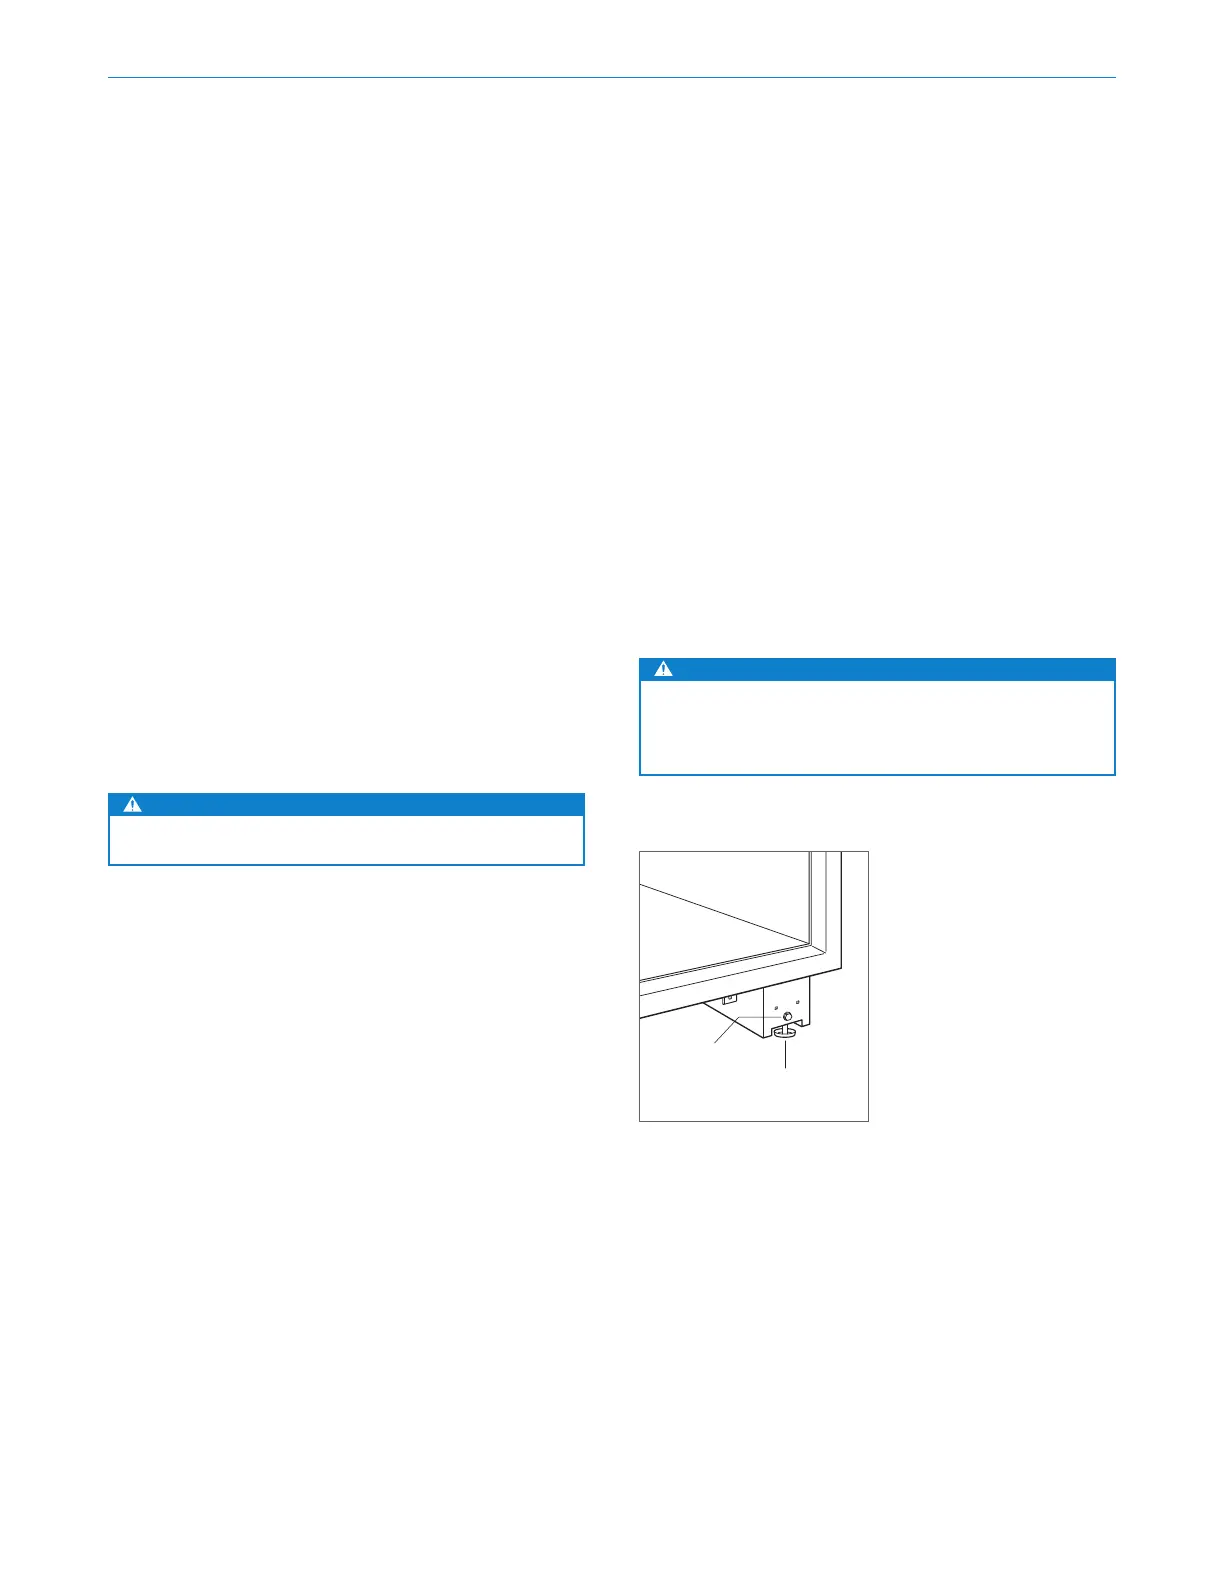
Once the unit is in position, turn the front leveling legs
clockwise to adjust the height. The rear height adjustment
can be made from the front of the roller base. Using a ⁄"
socket, turn the ⁄" hex bolt clockwise to raise the unit or
counterclockwise to lower. Use the lowest torque setting
when using a power drill. Do not turn the rear leveling legs
by hand. Refer to the illustration below.
When the unit is properly leveled, door and drawer adjust-
ments are less likely to be necessary.
IMPORTANT NOTE: Level the unit to the floor, not the sur-
rounding cabinetry. This could aect the operation of the
unit, such as door closing.
WARNING
To reduce the possibility of the unit tipping forward,
the front leveling legs must be in contact with the
floor.
FRONT
LEVELING LEG
REAR
ADJUSTMENT
Leveling
Water Line
Approximately 3' (.9 m) of ⁄" plastic tubing is connected
to the unit with a preassembled ⁄" compression connec-
tion under the unit. The water line fitting connection kit,
provided with the unit, contains a ⁄" compression union
fitting for connection to the household water line.
Purge the water line prior to final connection to the unit.
This will remove any debris that may be present in the
tubing from installing the new water line.
Place the sleeve and nut on the water line, and fasten
to the connection at the end of the tubing. Do not over
tighten. Check all water line fittings for leaks. Verify the
drain pan can be installed and removed without interfer-
ence with the water line.
IMPORTANT NOTE: If a reverse osmosis system is used, it
is recommended the water filtration system be bypassed
by removing the filter.
IMPORTANT NOTE: Water lines cannot be exposed to
freezing temperatures.
WARNING
Connect to potable water supply only.
Installation