SECTION 8 HORIZONTAL CLOSE COUPLED PUMP
159
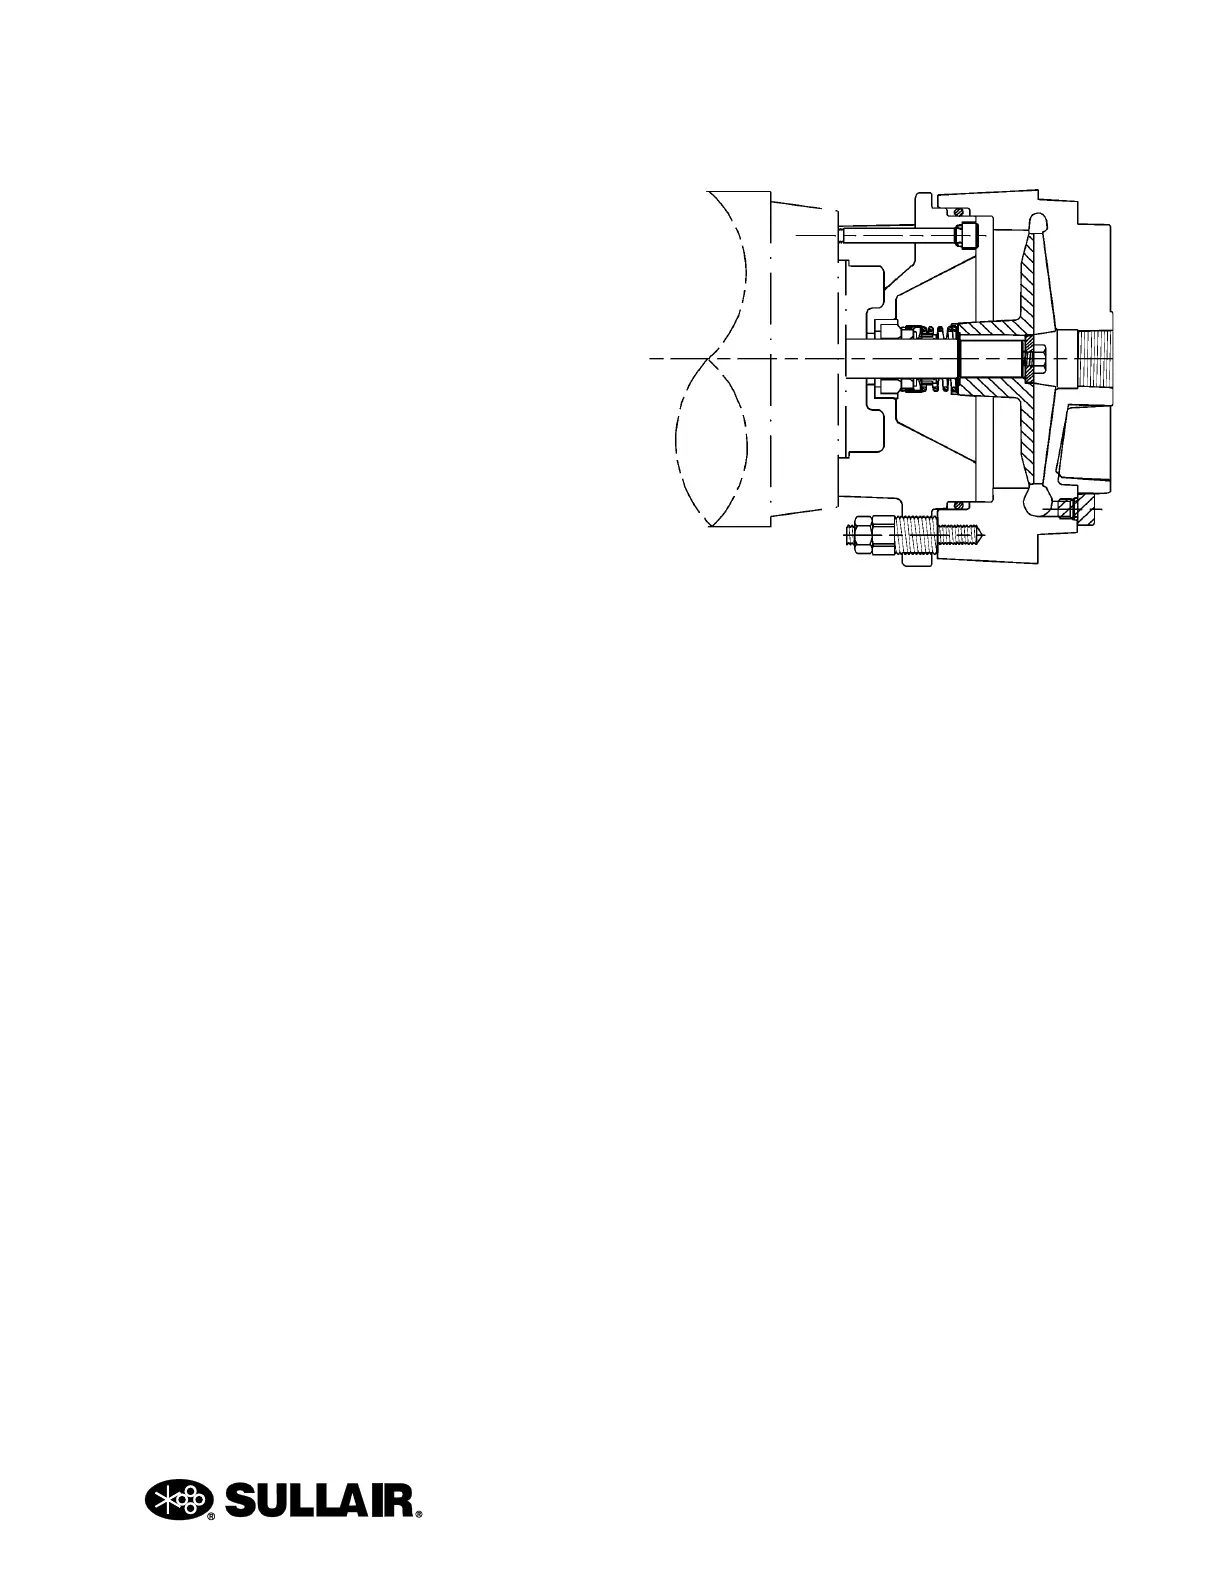
To disassemble the pump:
1. Remove all liquid from the pump.
2. Remove the casing (#108) by removing the
jam nuts (#20) from the casing studs (#5).
Slide the casing off and rest it on the studs.
3. Remove the impeller (#11) by removing the
10mm Bolt (#19) and washer (#41), then
sliding forward.(may require a gear puller)
4. Remove the snap ring (#4) from the shaft
using snap ring pliers.
5. Remove the impeller key (#23) from the
shaft.
6. Remove the rotating element from the shaft.
The element normally adheres tightly to the
shaft and some force may be necessary to
remove it. This is common and, if care is
taken, the element can be reassembled and
reused. It is recommended that a new
rotating element be used for reassembly.
DO NOT attempt to remove the seal using a
screwdriver or other sharp object. Extensive
damage to the shaft or element could occur.
7. 7. Remove the motor bracket. Loosen and
remove the four socket head screws (#33A)
with a 5 mm Allen wrench.
Note: The rotating element must be removed
before the motor bracket can be removed. It
is not necessary to remove the adjusting
screws # 33.
8. 8. Remove the seat portion of the seal from
the motor bracket.
a. Place the motor bracket face down on a flat
surface.
b. Look into the opening in the center of the
motor bracket, you will see a portion of the
seat.
c. Insert the 3/4” dowel and, very gently, tap the
seat until it drops out.
d. Care must be taken with the seats. They are
often a brittle material and are prone to
breakage. It is recommended that a new
replacement seat be installed during
reassembly.
8.2.3 INSPECTION OF COMPONENTS
Thoroughly clean all parts. All components should be
examined for wear and corrosion. Replace any parts
that show visible wear.
The “O” rings and other elastomeric components
should be replaced if they have been deformed or
cut.
If seal components must be reused, carefully inspect
for microscopic cracks and nicks. Scratches that
might be ignored elsewhere can produce leakage if
they are on seal carbons and seat wearing surfaces.
Cleanliness is imperative when working with
mechanical seals. Microscopic grit and particles
between seal faces can be, and often are, the cause
of early seal failures.
If the impeller can be rocked or wobbled on the shaft,
it is too loose and must be replaced.
Check the shaft for galling, pitting, and corrosion. If
the shaft is corroded where the seal elastomer
comes in contact with it, the motor must be replaced.
Surface corrosion must be removed so that seals can
slide freely during assembly. The shaft diameter
should be no smaller than .002” below the nominal
fractional seal sizes. Remove any nicks or burrs
which may have occurred during disassembly. Re-
clean parts as necessary.
8.2.4 REASSEMBLY
All parts should be visually inspected and cleaned or
replaced as outlined in Section 8.2.3 above.
 Loading...