Section 7
MAINTENANCE
42
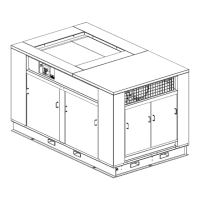
Figure 7---10 Compressor Hub Cutaway
C AU T ION
!
Dial indicator face readings should not be used
on journal bearing equipment due to the liberal
end float inherent in such a design.
Pa rallel Offset --- R e f e r t o F i g u r e 7 --- 7 . L a y a
straight edge squarely across the top of the flanges
of both shaft hubs as shown and also at a point 90_
away. This value must not exceed the installation
Parallel Offset indicated in Table 2. If a dial indicator
is used, compensate for sag and attache it on one
shaft and rotate the hub 360_ while taking readings
on the other hub male register outside diameter.
DO NOT exceed the installation Parallel Offset lim-
itsascalculated inTable 2.
STEP 3 --- INSTALLATION OF CENTER ASSEM-
B L Y --- Chec k the dr iv e bol ts ( s ee Figur e 7 --- 8 ) of
center assembly for proper torque per Table 2, be-
fore installation. Place the center assembly into po-
sition between the two (2) hubs. Dip adapter bolts
( s ee Figur e 7 --- 8 ) in S A E 3 0 o il and inser t bol ts with
lockwashers through hub flange holes and engage
tapped holes in each adaptor. Tighten adapter
bol ts to r ec ommended tor que per Tabl e 2 . A f ter
torquing all adapter bolts, recheck the alignment.
STEP 4 --- INSTALLATION OF SHRINK DISC
R e f e r t o F i g u r e s 7 --- 9 a n d 7 --- 1 0 . S h r i n k d i s c s a r e
supplied ready for installation. Therefore, they
should not be disassembled prior to initial installa-
tion.
INSTALLATION SEQUENCE
1. Remove spacers placed between collars for pro-
tection during transportation.
2. Take any three locking screws forming the points
of an equilateral triangle (e.g. screw 1, 5 and 9 in
Figur e 7 --- 9 ) and tighten them sl ightl y until the
inner ring can still just be turned.
3. Slide shrink disc over the hub. The hub outside
surface can be greased.
WA R N I N G
!
Never tighten locking screws before shaft is inside
the hub.
4. Degrease the hub bore and shaft seat.
5. Insert shaft or slide hub over the shaft.
6. Tighten all locking screws gradually and all the
way around (not in diametrically opposite se-
quenc e; s ee Figur e 7 --- 1 0 ) .
Several passes are required until all screws are
torqued to specified tightening torque of 42 ft.---lbs.
(57 Nm). Check tightening torque (42 ft.---lbs. [57
Nm]) with a torque wrench. Both collars must re-
main in equal distance.
REMOVAL
Shrink disc removal procedure is similar to installa-
tion.
1. Gradually release locking screws all the way
around. Initially each screw should be released
T A B L E 2 --- R e f e r t o F i g u r e 7 --- 8
INSTALLATION DATA (400, 500 and 600HP/300, 375 and 450KW)
Max. Operating Misalignment
Tightening
To rq u e
f t . --- l b s . / N m
Coupling
Gap
Pa rallel
Offset
(inches/cm)
Angular
inches/cm
28 in. 7.0 ± .015 in. .005 in. .005 in.
(I) Angular misalignment in inches equals maximum A minus minimum B as
s h o w n i n F i g u r e 7 --- 6 . DO NOT exceed values in Table above .
(I)
Coupling
degrees
.5
Bolt
Description
Adaptor Bolt
Drive Bolt
(oiled)
169 ft---lbs.
(inches/cm)
17.8 ± .04 cm38 cm
229 Nm
.01 cm .01 cm
 Loading...