EasyManuals Logo

Sungrow COM100D User Manual

Sungrow COM100D
42 pages
To Next Page IconTo Next Page
To Previous Page IconTo Previous Page
Page #18 background imageLoading...
Page #18 background image
5 Mechanical Installation User Manual
14
Metal Surface
Step 1 Select an appropriate installation
surface.
Step 2 Mark positions for drilling holes with
a marker.
Step 3 Drill the holes with a drill according
to the marks made before.
φ8
Step 4 Fix the COM100 onto the
installation surface with the
enclosed fasteners.
Step 5 Check and ensure that the
COM100 is firmly in place.
5.4.2 Pole-Mounting (Optional)
The COM100 can be installed in the pole-mounting manner which should be
specified when you place an order. Sungrow will design according to actual
installation conditions.
Accessories supplied with the COM100 include matching screw assembly, nuts,
brackets, clamps, etc.
The installation procedure is as follows:
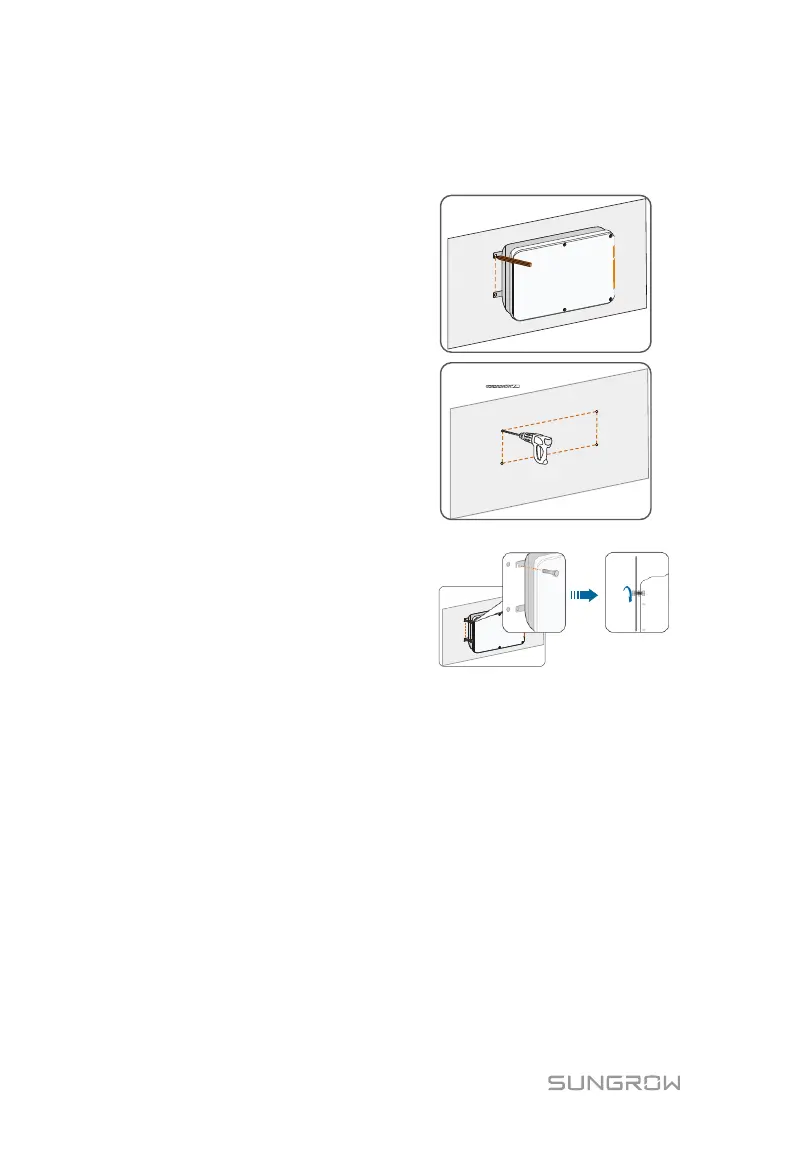
Step 1 Anchor the COM100 to the mounting-brackets by using the screw
assembly via the mounting ears, as shown in the figure below.

Questions and Answers:

Question and Answer IconNeed help?

Do you have a question about the Sungrow COM100D and is the answer not in the manual?

Sungrow COM100D Specifications

General IconGeneral
BrandSungrow
ModelCOM100D
CategoryConference System
LanguageEnglish

Related product manuals