5
We value your experience using Sunny Health and Fitness products. For assistance with parts or
troubleshooting, please contact us at support@sunnyhealthfitness.com or 1-877-90SUNNY (877-
907-8669).
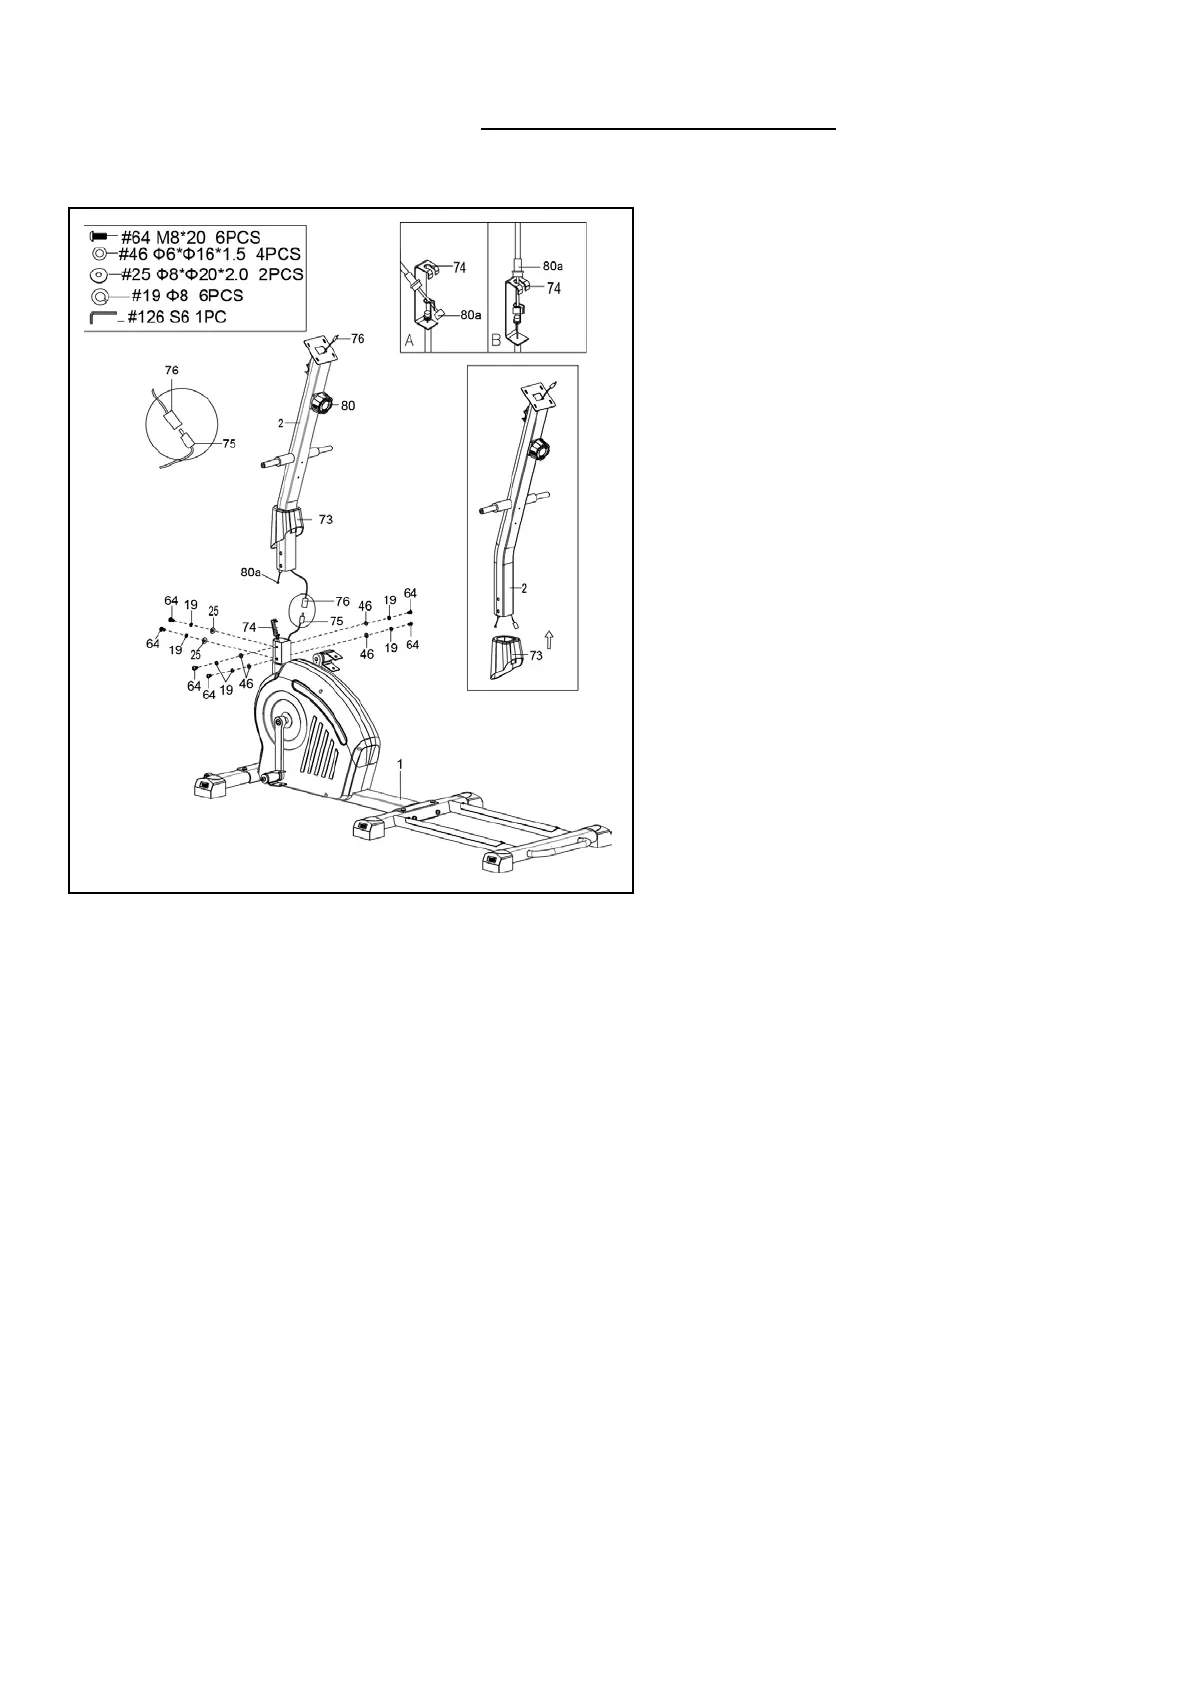
Remove 6 Bolts (No. 64), 4 Washers (No.
46),2 Big Arc Washers (No. 25) and 6
Spring Washers (No. 19) from the Main
Frame (No. 1) with Allen Wrench (No.
126).
Attach the Decorative Cover (No. 73) into
the Front Post (No. 2)
CAUTION: Please make sure the Tension
Control Knob (No. 80) is at the lowest
resistance level (level 1, all the way to the
left) before you connect any wires together.
Attach the Tension Control Wire (No. 80a)
into the metal bracket of Tension Wire (No.
74) as shown in drawing A. Then, pull
Tension Control Wire (No. 80a) upward
and insert it into the slot of metal bracket of
Tension Wire (No. 74)
drawing B. Make sure the metal fitting on
Tension Control Wire (No. 80a) is secured
in the metal bracket.
Connect the Extension Sensor Wire (No.
76) with Sensor Wire (No. 75). Insert the
connecting wires into Front Post (No. 2).
Attach the Front Post (No. 2) to the Main
Frame (No. 1) with 6 Bolts (No. 64), 4
Washers (No. 46),2 Big Arc Washers
(No. 25) and 6 Spring Washers (No. 19)
that were removed. Tighten and secure with
Allen Wrench (No. 126).
Lower the Decorative Cover (No. 73) to fit
in the Main Frame (No. 1).
NOTE: Be careful not to pinch any wires
when attaching Front Post (No. 2) to Main
Frame (No. 1).