10
4) Belt cover
A. Insert the head groove of belt cover support screw② into
the lower grooves of the belt cover “A”①. Fix the belt
cover onto the machine body and the top cover with two
belt cover fixing screws③.
B. After placing the belt cover “B”② into the belt cover “A”
①, secure it onto the machine body using three belt cover
fixing screws.
5) Program unit (thread trimming type)
A. Use four fixing screws③ to attach the bracket② onto the
program unit①.
B. Fasten the bracket② onto the machine body, using two
fixing screws④ and washers⑤.
③
①
②
③
④
⑤
②
②
①
[ Fig. 4 ]
[ Fig. 5 ]
[ Fig. 6 ]
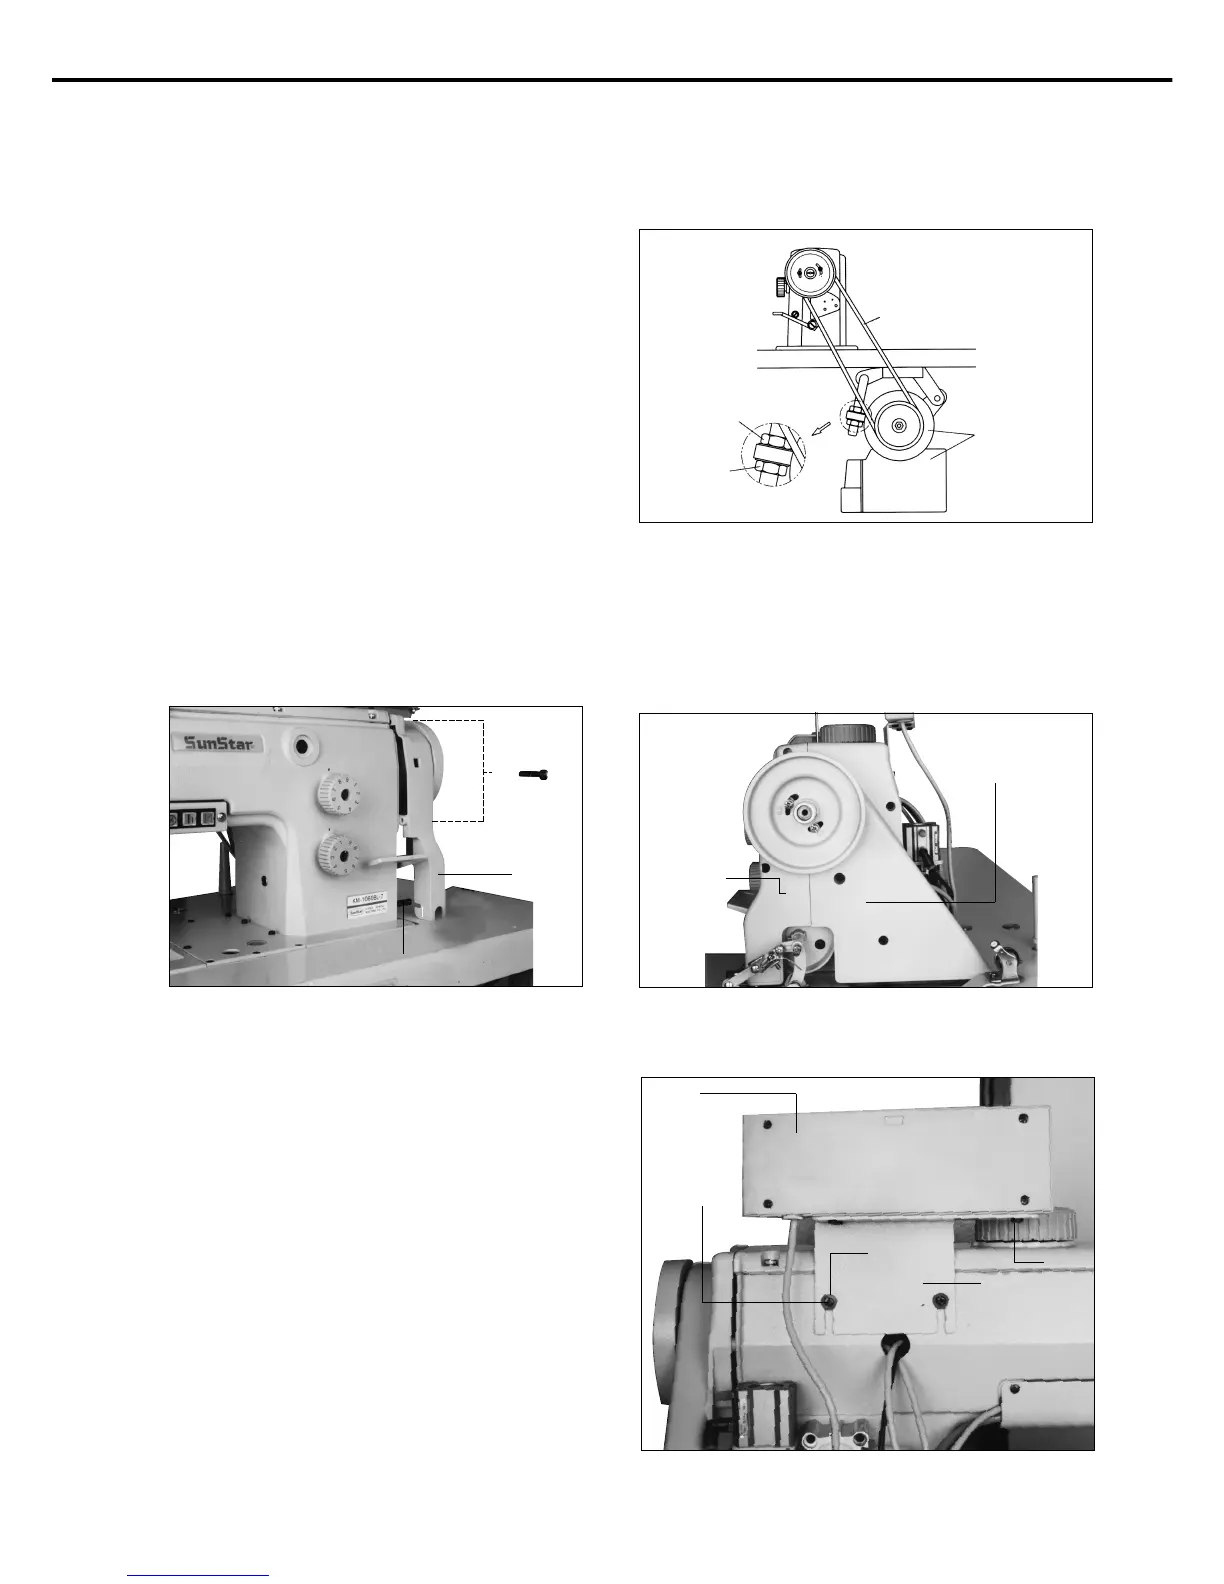
3) Belt tension adjuster
After installing the motor③, slacken both fixing nuts① and②
just enough to give adequate tension to belt④. Firmly tighten
the fixing nuts① and② consecutively.
①
④
③
②
[ Fig. 3 ]
①