28
(2) Assembly
A. Replace the chip discharge guide (lower)⑫ with the one fit for the desired cutting width and fix it with the auxiliary
screw⑪ on the auxiliary needle plate⑩.
B. Fix the auxiliary needle plate⑩ using two fixing screws⑨ on the bed.
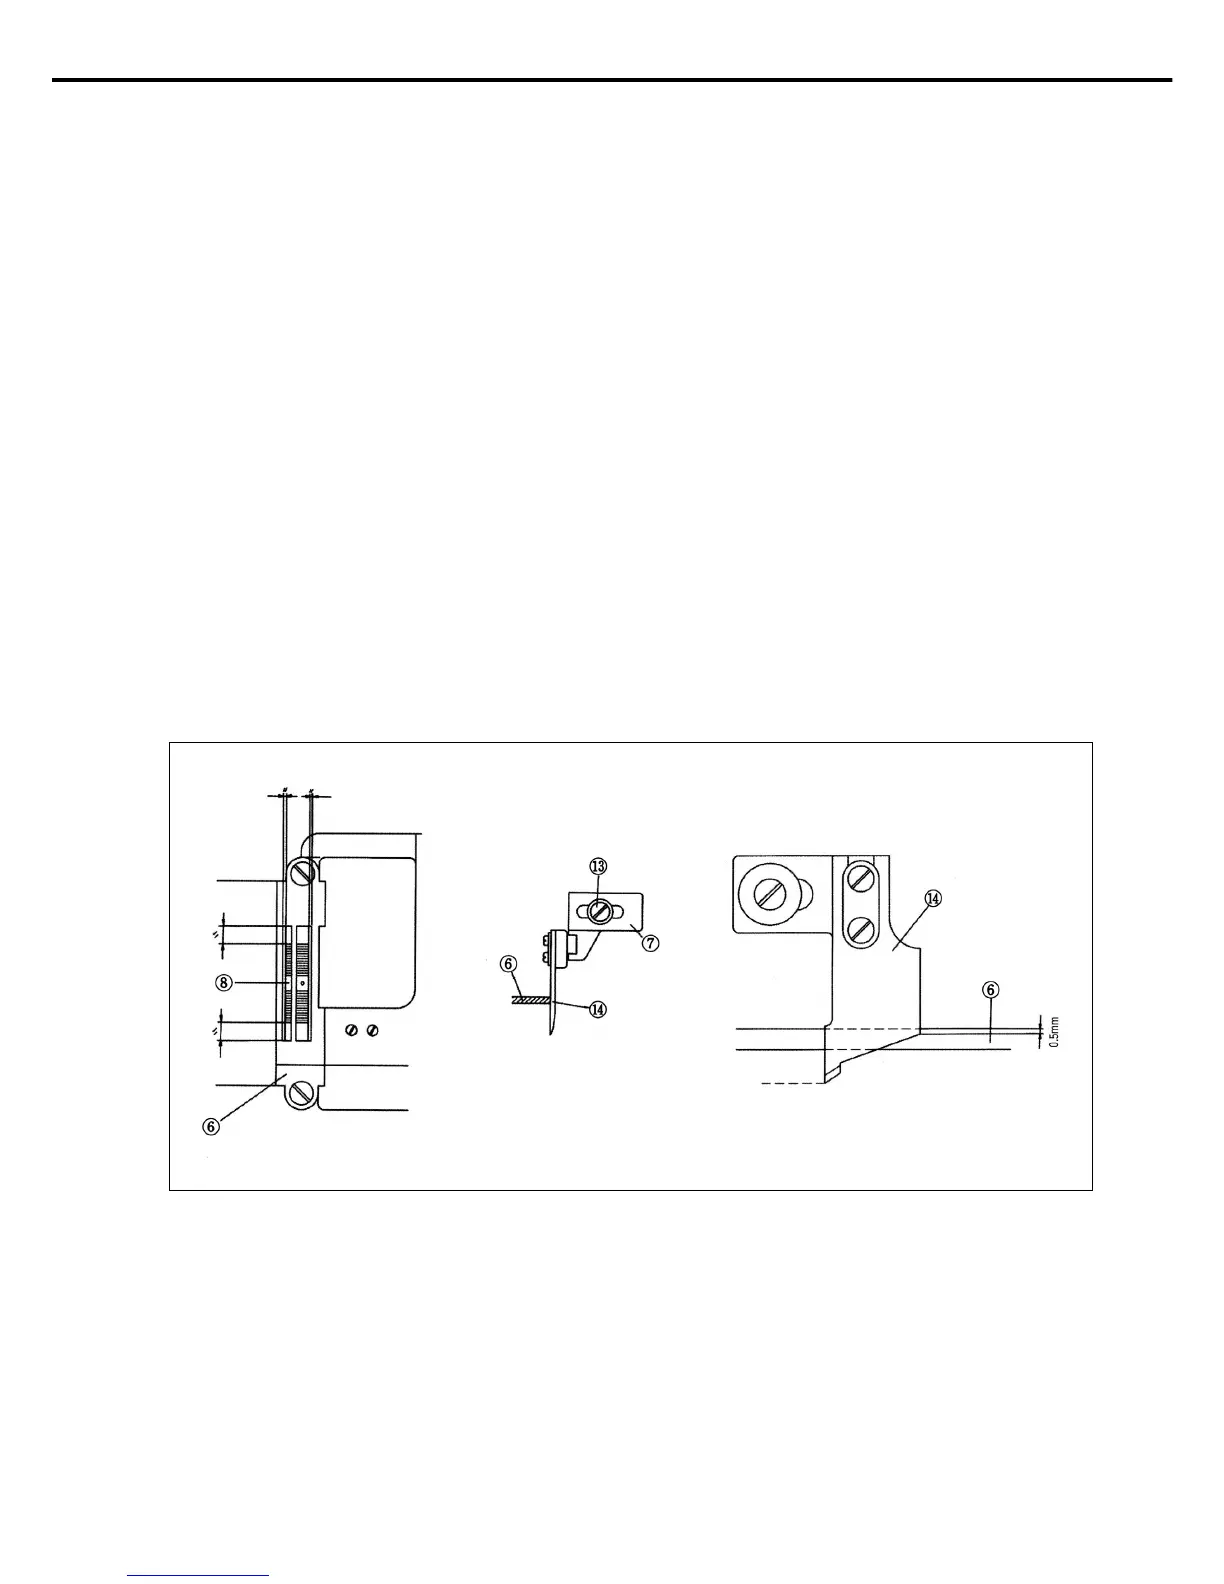
C. Fix the feed dog⑧ using the fixing screw⑦.
D. Fix the needle plate⑥ on the bed using two fixing screws⑤.
※ Turn the pulley manually to check whether the space between the feed dog and needle plate during feed doge
movement is equal in all directions. Then, adjust the knife frame to adjust the knife position.
※ Move the chip discharge guide (lower)⑫ to the left and right so that it is placed 0.05mm from the knife plate side
⑥. Then, use the fixing screw⑪ to fix the position.
E. Adjust the knife frame so that the pressure of the knife⑭ and the needle plate side⑥ is appropriate. Then, tighten the
fixing screw. (Refer to the explanation about knife position adjustment.)
F. Attach the presser foot④ and tighten the fixing screw③.
G. Fix the needle② with the fixing screw①.
H. Adjust the knife position adjusting plate⑦ to get the desired cutting width and tighten the fixing screw⑧ after
adjustment.
※ After assembly, refer to the knife position adjustment instructions on page 24 and readjust.
[Fig. 53]
 Loading...


