27
22) Use of Chip Discharge Guide and Auxiliary Needle Plate (KM-506/530 Series)
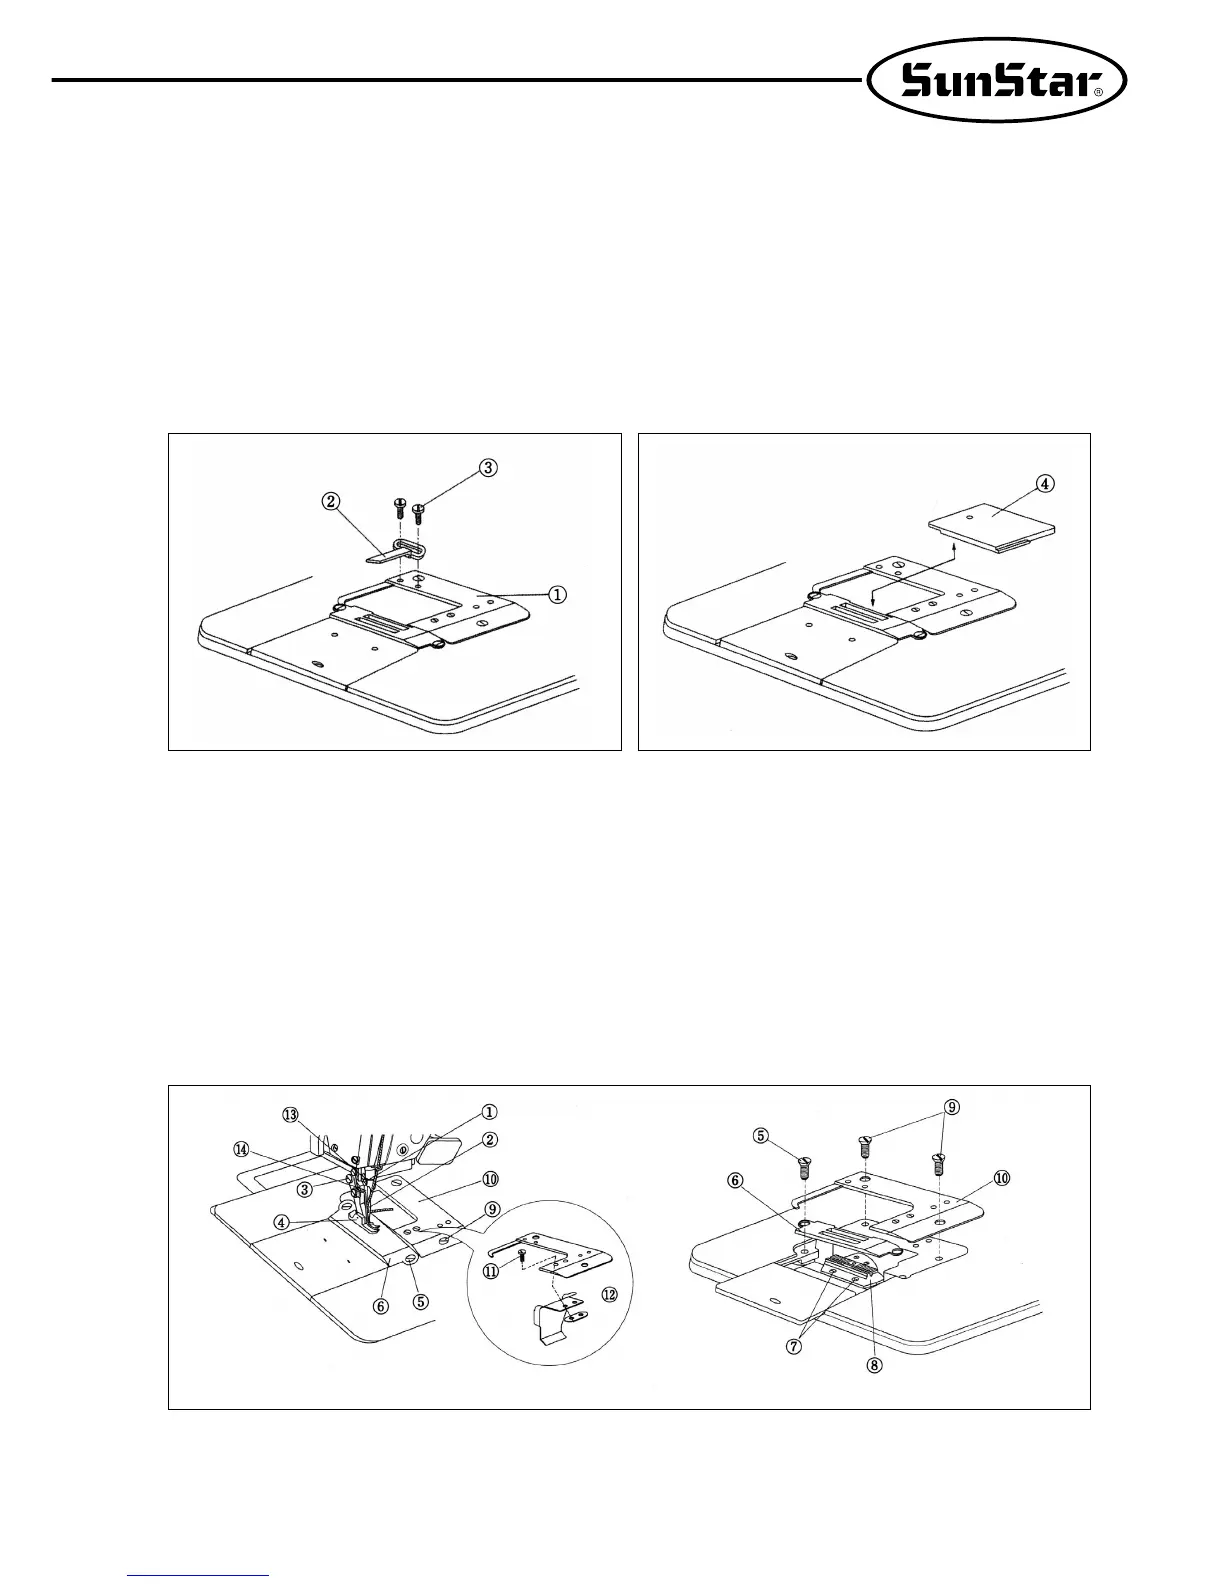
(1) When Cutting and Sewing Simultaneously
When cutting and sewing are done at the same time, attach the chip discharge guide②, which is provided in the accessory
box, to the auxiliary needle plate① with fixing screws③. (See Fig. 50)
(2) When Sewing Only
When sewing is done alone without cutting, remove the chip discharge guide(upper)② and the insert the auxiliary needle
plate cover④, which is provided in the accessory box, into the chip discharge groove in the auxiliary needle plate. (See
Fig. 51)
[Fig. 50] [Fig. 51]
(1) Disassembly
A. Loosen the needle fixing screw① and remove the needle②.
B. Loosen the presser foot fixing screw③ and separate the presser foot④.
C. Loosen the needle plate fixing screw⑤ and separate the needle plate⑥.
D. Loosen the feed dog fixing screw⑦ and separate the feed dog⑧.
E. Loosen the auxiliary needle plate fixing screw⑨ and separate the auxiliary needle plate⑩.
F. Loosen the chip discharge guide(lower) fixing screw⑪ from the separated auxiliary needle plate⑨ and separate the
chip discharge guide⑫.
G. Loosen the knife fixing screw⑬ and separate the knife⑭.
23) Change of Cutting Width
[Fig. 52]
 Loading...


