15
Caution
▶ Always turn off the power when mounting a needle.
▶ If the operator mistakenly steps on the pedal while the power is on, the machine will start automatically
and can result in physical injuries.
▶ When using clutch motor, be aware that the motor will continue to rotate for a while even after the
power is switched off due to inertia.
▶ Start to work on the sewing machine only after the motor has come to a complete stop.
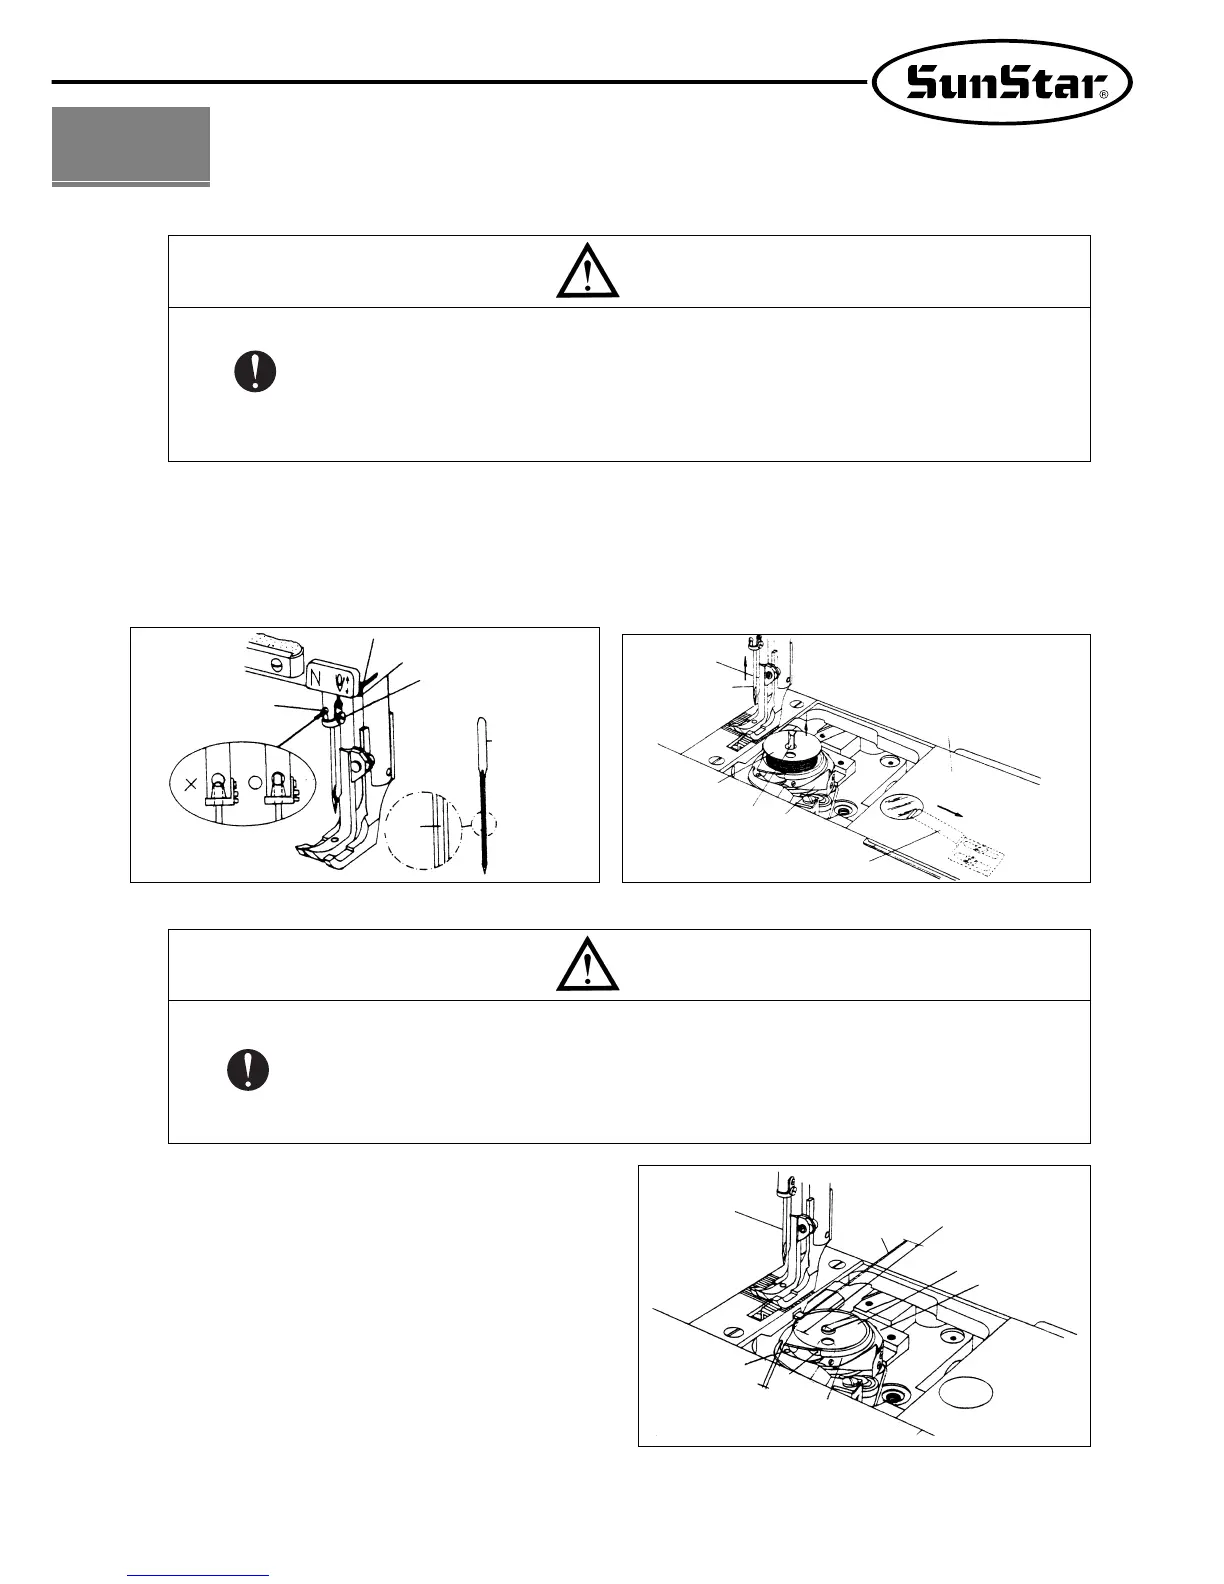
1) Inserting the needle
As in Figure 21, place the upper end of the needle closely
adhered to the upper side of the stopper hole ②, with the
needle groove ① facing left. Fix the needle with a fixing
screw ③. (See Figure 21)
2) Removing bobbin
Place the needle ① in the highest position.
And then as in Figure 22, after pressing the slide plate
stopper ⑤, open the slide plate ④ and lift the bobbin
holder ⑦ to remove the bobbin ⑧. (See Figure 22)
3
Adjustment of the Machine
3) Winding the lower thread
Insert the bobbin ⑧ into the hook ⑥. As seen in Figure 23,
insert the thread through part of the hook and pull it out
from the end of the lower thread tension adjustment plate
⑨. And then pull the thread through the clearance ⑪
between the hook ⑥ and opener ⑩. The adequate length of
the pulled-out lower thread on the slide plate④ is 50 mm.
Caution
▶ Turn off the power when adjusting the lower thread tension.
▶ If the operator mistakenly steps on the pedal, the machine will start automatically and can cause physical
injuries.
▶ When using the clutch motor, be aware that the motor will continue to rotate for a while after the power is
switched off due to inertia.
▶ Start to work only after the motor has come to a complete stop.
[Figure 23]
[Figure 22][Figure 21]
Lower thread
③
②
①
About 50 mm
⑩
⑪
⑨
⑧
⑥
①
⑧
⑦
⑥
⑤
④
groove