9
Caution
▶ Installation of the machine should be performed by a trained engineer.
▶ Any electrical wiring must be performed by a qualified technician or agent.
▶ The machine weighs over 38 kg. At least 2 persons should carry out the installing work.
▶ Plug in after the installation is complete. If the operator mistakenly steps down on the pedal with the plug
in, the machine will start automatically and can cause physical injuries.
▶ Connect the ground (earth) wire. An unstable connection may result in an electric shock or a
malfunction.
▶ Place the belt cover on top of the machine.
▶ Use both hands when bending the machine backwards or returning it to the normal position. Using only
one hand can lead to severe hand injuries due to the weight of the machine.
2
Installation
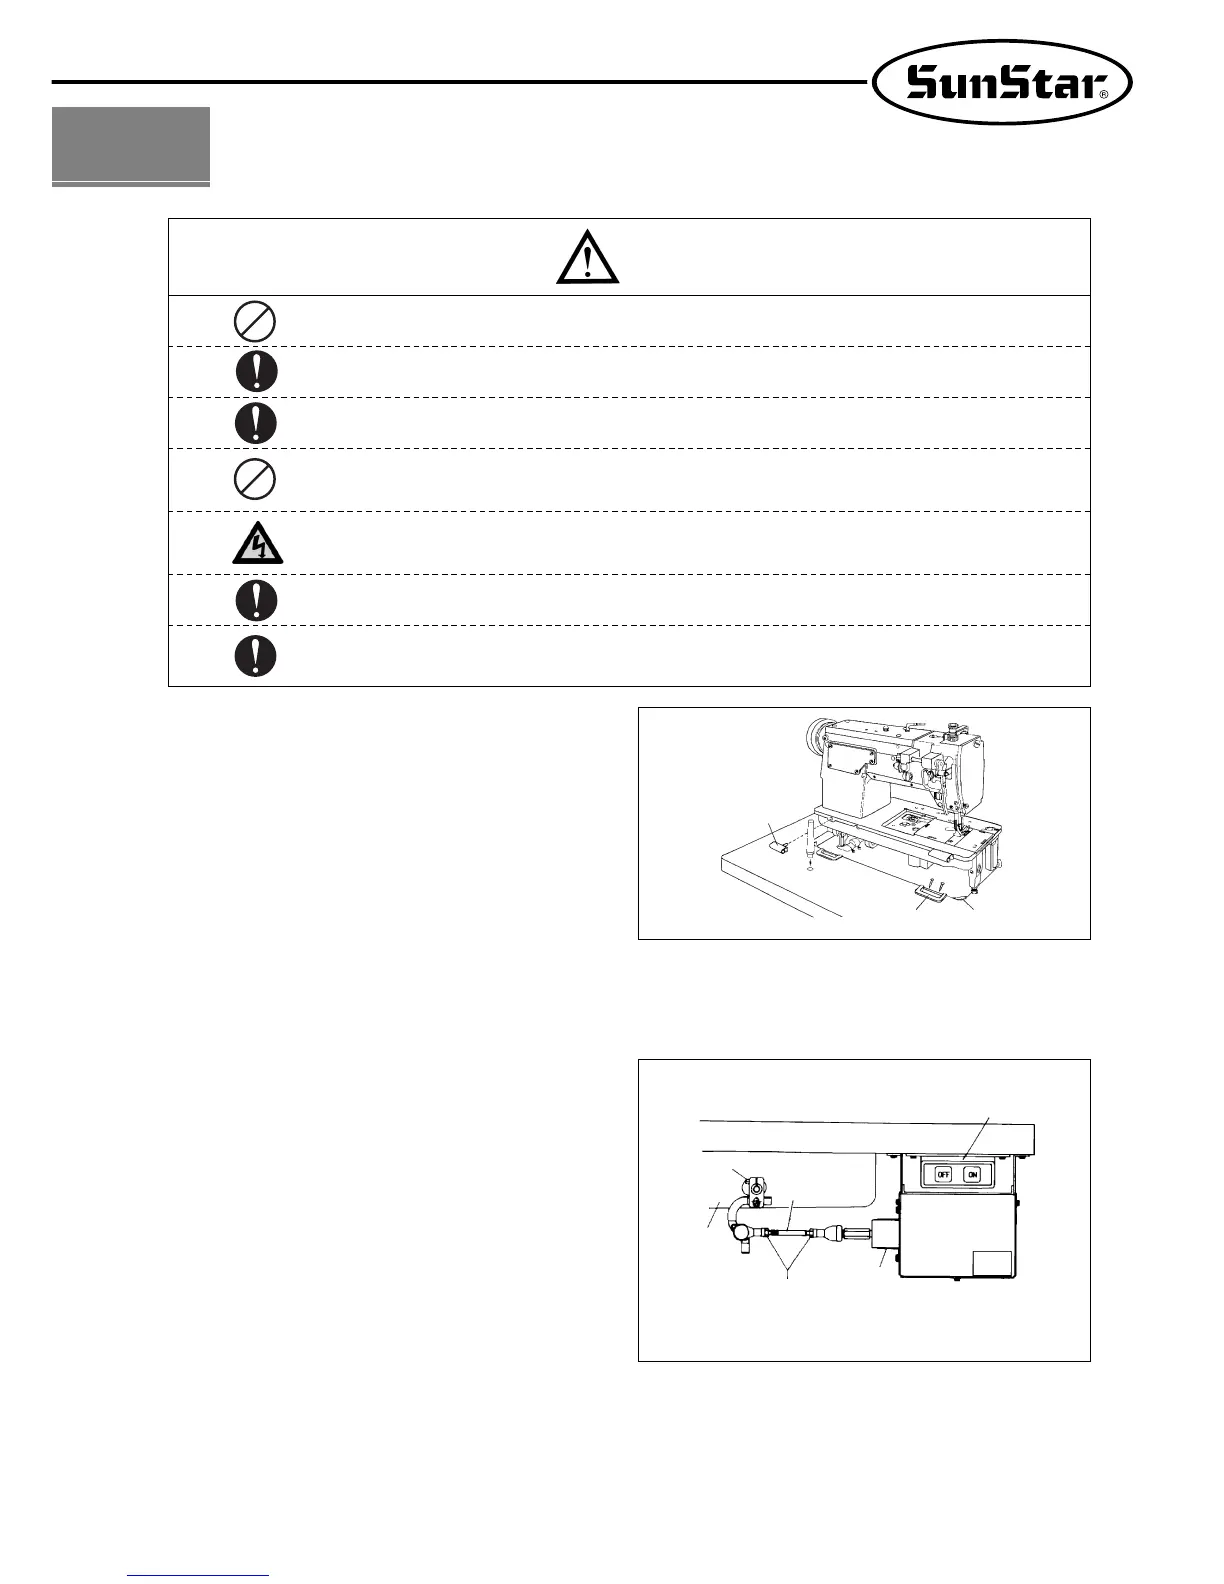
1) Installation of machine head
※ Insert two machine head hinges ① into the bed holes.
After aligning it with the rubber hinge ②, stand the
machine on the rubber cushion ③ that is in the direction
of the user. (See Figure 1)
2) Installation of knee lifting solenoid and power switch box
(for automatic thread trimming)
(The place where the knee lifting solenoid box should be assembled is also included.)
⑴ When attaching the power switch box ⑥, refer to Figure
2 to make sure that it is placed at the very center of the
solenoid bracket.
⑵
After attaching the solenoid onto the table, unfasten the
screw ④ to adjust the center of middle linking bar ① and
the center of solenoid shaft ② in parallel position with the
lower side of the table ③. After the adjustment is over,
fasten the screw tightly. (See Figure 2: An assembling
position diagram can be found inside the solenoid box.)
⑶ The presser foot height of the sewing machine can be
adjusted after unfastening the fixing nut ⑤ and then
turning the middle linking bar ① clockwise to raise and
counterclockwise to lower. After finishing the
adjustment, tightly fasten the fixing nut ⑤.
⑷ According to the installation position of knee-lifting
solenoid, the operation noise, operation load and presser
foot elevation range may differ. Please assemble so that
the machine will operate smoothly.
[Figure 1]
[Figure 2]
①
③
②
⑥
②
⑤
①
Oil fan
④
③
Table