18
Caution
▶ After disassembling and adjusting a safety device, always place it back to the original position and
check whether it functions as intended.
▶ Use both hands when pushing the machine backward or returning it to the original position. Due to
the weight of the machine, your hand can get stuck in the machine if you should slip.
▶ When adjusting the machine with the switch on, be sure to pay extreme caution.
▶ Only trained engineers must perform troubleshooting or inspection of the machine.
▶ For electrical repair or inspection, consult with qualified technicians or agent.
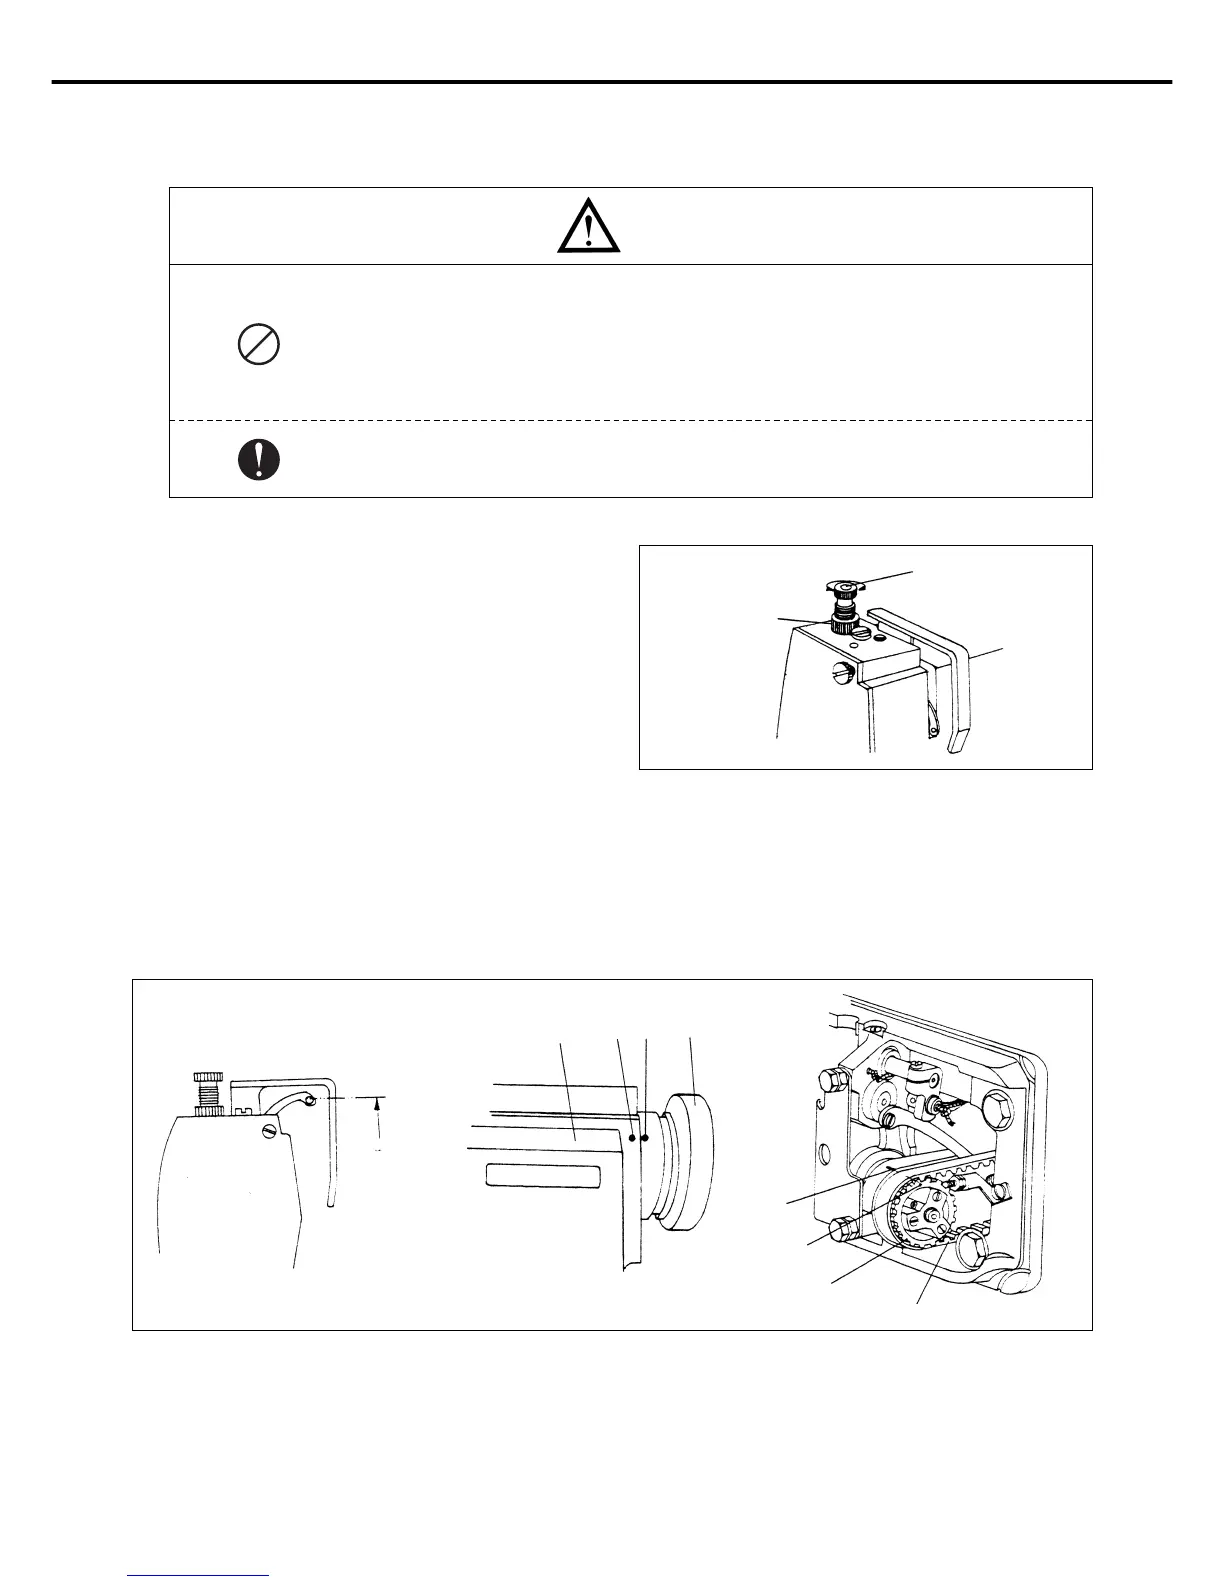
6) Adjusting the tension of the presser foot
As in Figure 31, turning the pressure adjustment screw ①
clockwise makes the presser foot tension stronger, and
turning counter clockwise makes it weaker.
After adjusting, make sure to tighten the fixing nut ②.
[Figure 31]
①
②
③
The highest position of
thread take up lever
⑦
⑥
②
⑧
⑨
④
①
Weaker
Stronger
7) Adjusting the needle and feed dog timing
⑴ After removing the needle, lay down the machine on its back and remove the timing belt ①. Turn the pulley ② to
coincide the ① highest point ⑥ of the thread take up marked on the pulley with the base point ⑦ marked on the arm③.
In this state, turn the timing (lower) pulley④ to adjust the baseline⑧ on the bed to the baseline⑨ of the timing (lower)
pulley. Then put the belt⑧. (See Figure 32)
[Figure 32]