30
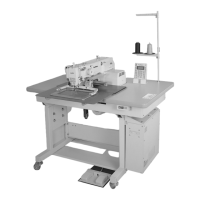
6.13.2) How to set up Y-axis Origin
1) Separate a bed cover (right).
2) Move the center of work clamp foot to be placed on the center of Y-axis.
3) As seen in the figure, unfasten the bolts of Y-sensor plate and let the end of Y-sensor plate locate on the center of
sensor, then fasten the bolts with screw-driver.
6.14) How to adjust the feeding plate
1) Select Pattern No. “0”at the operation box.
2) Press [Ready] key to ascend the button clamp that the
machine can return to the origin.
3) Align the center of the feed plate① with the center of the
needle plate cover② by adjusting the feed plate①.
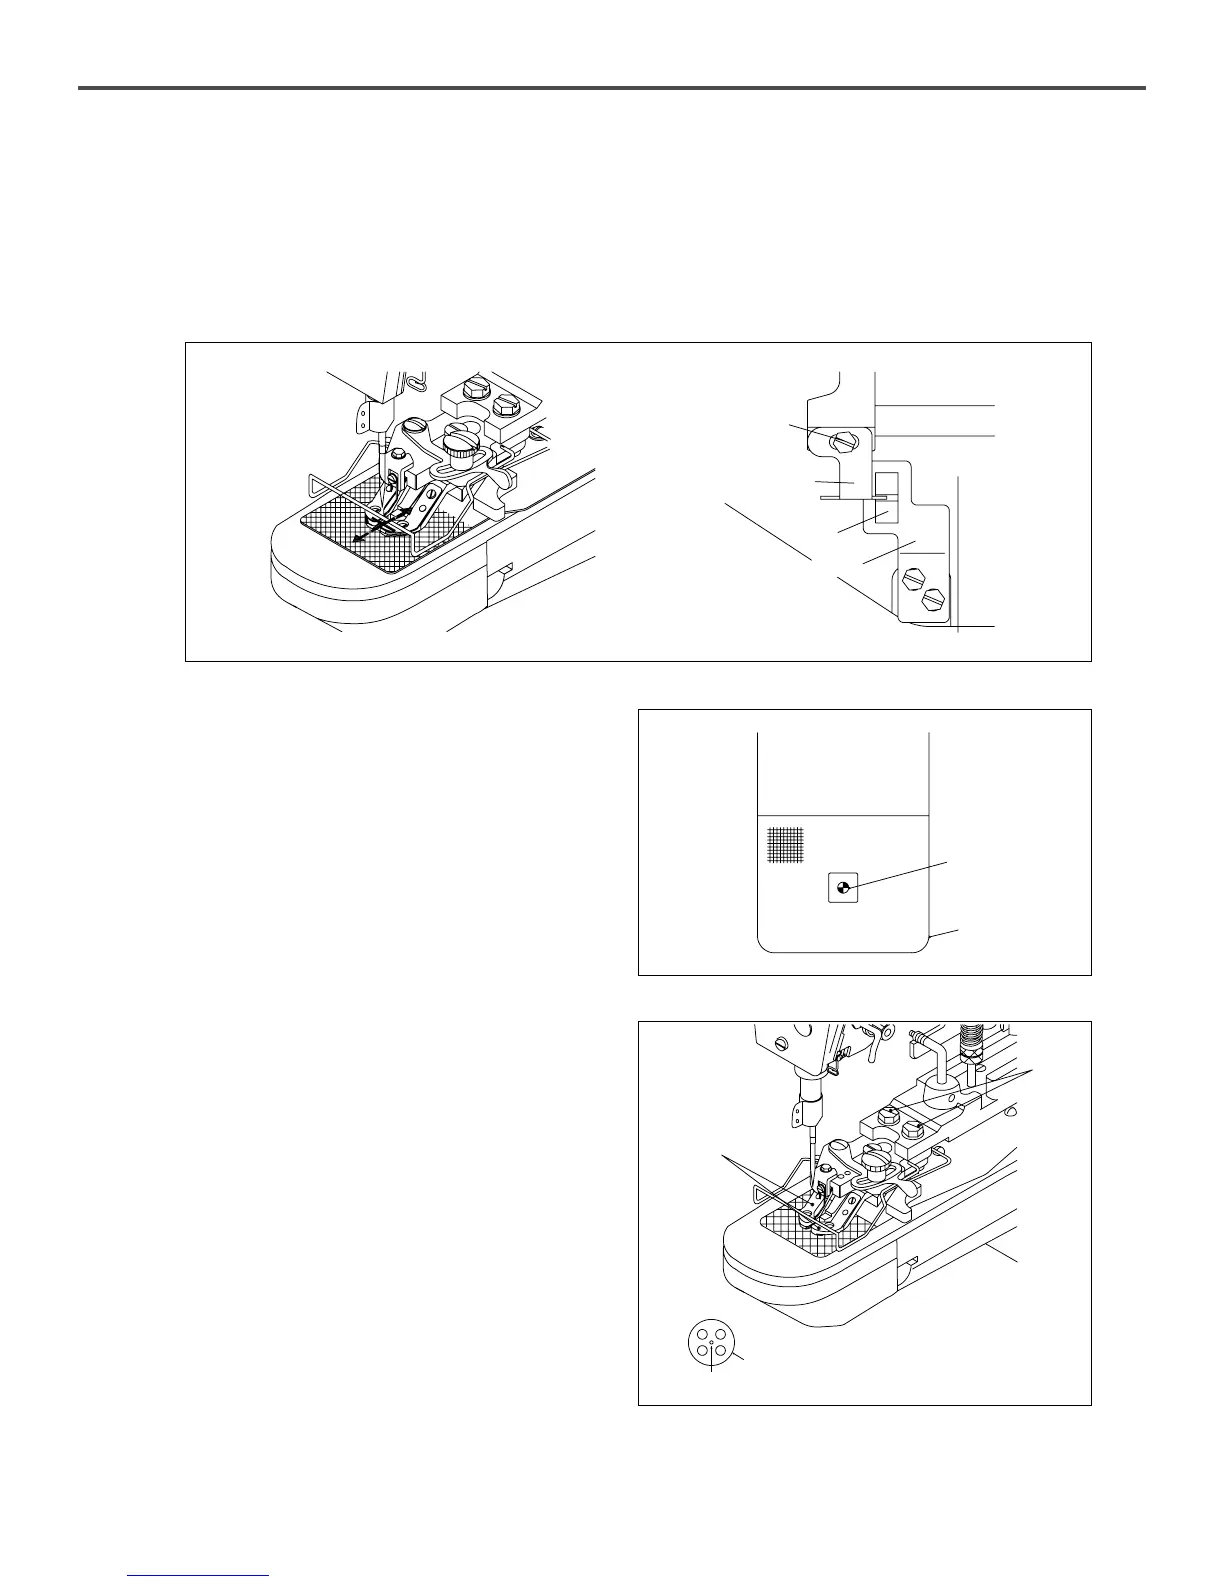
6.15) Checking the setting position of button
clamp
1) Select Pattern No. “0”at the operation box.
2) Press [Ready] key to ascend the button clamp that the
machine can return to the origin.
3) Insert the button into the button clamp①.
4) Press the button clam of Step 1 to descend its holder. At
this time, turn the pulley for the error message [“Er 03”]
to display on the LCD.
5) If the needle point does not insert into the button’s
center, loosen the fixed screw② of the button clamp
bracket, and fix it that the needle point can be inserted
into the button’s center.
6) After adjusting, check the pattern form that the needle is
exactly inserted into the button hole.
Tightening
Screw
Y-Sensor
Y-Sensor Bracket
Y-Sensor Plate
②
①
Needle point conform
Button
①
②