Questions? Call or Text +1-801-658-0015 • 7
e Micro Welder Experts
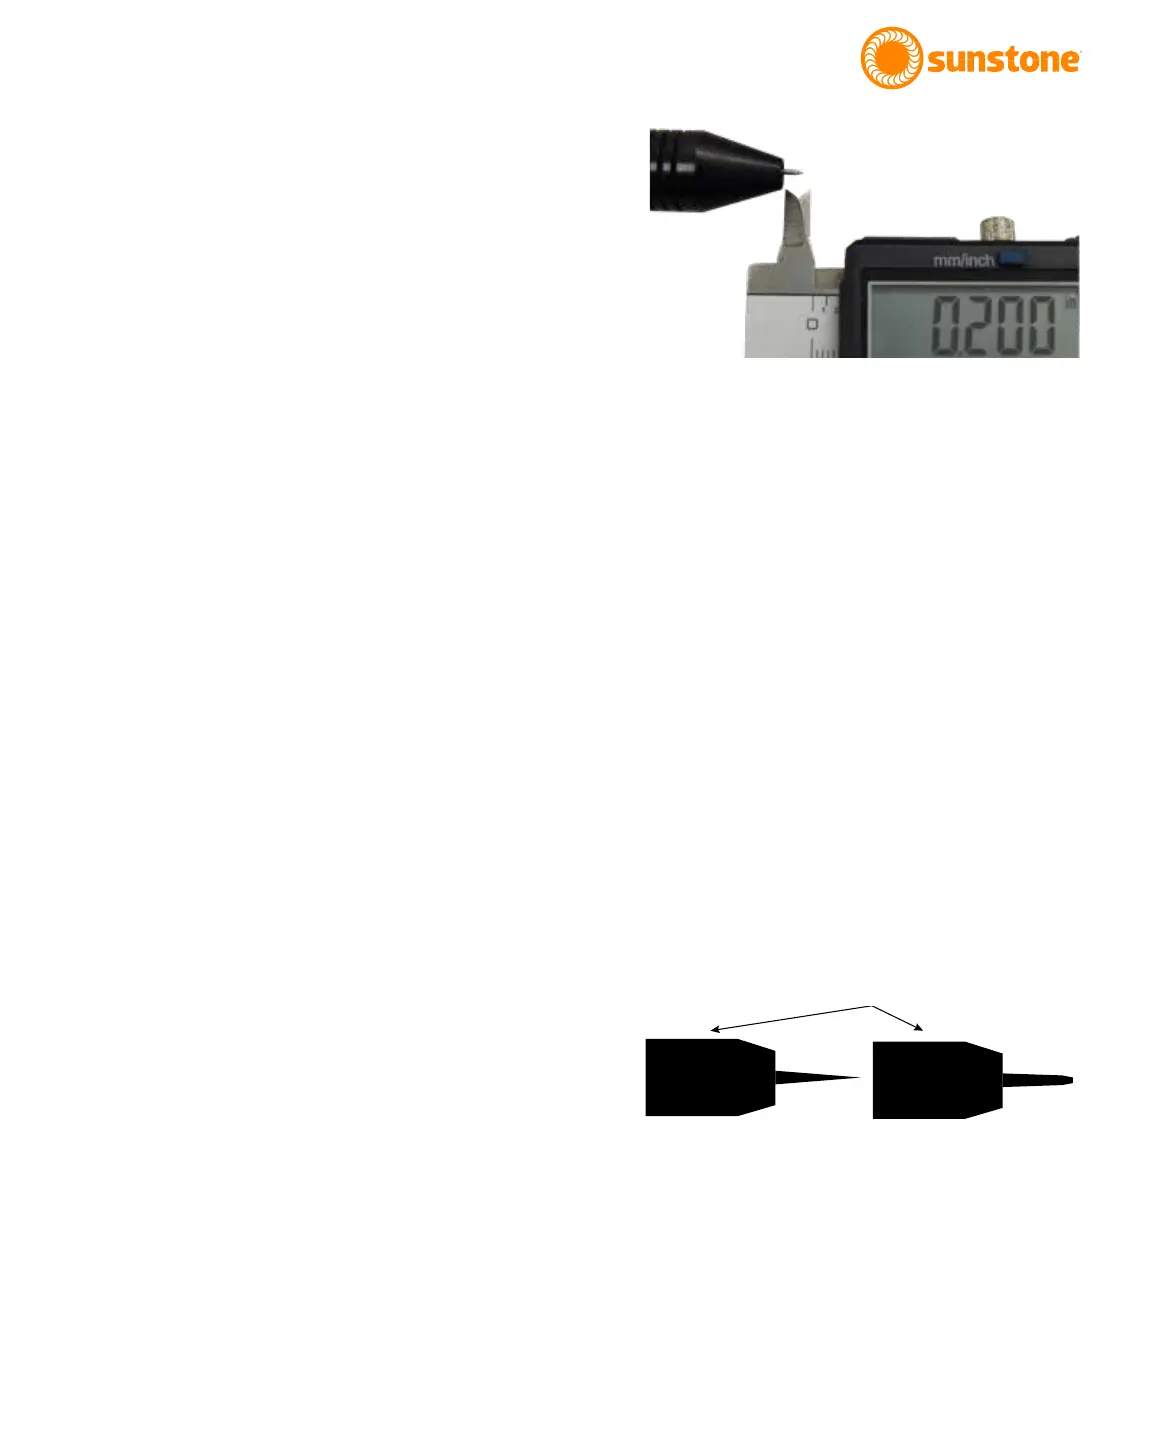
Figure 7.1. Electrodes should protrude past the stylus hull 1/8
to 1/4 inch (3.175 to 6.35mm).
side of the Stylus Hull (E) that helps measure
the electrode length. Place the end of the
Stylus Hull (E) against the Collet Cap (C), then
make sure the Electrode (D) extends as indi-
cated. See Figure 6.3.
• There should be between 0.6 - 0.7 inch (1.5 –
2cm) of the Electrode (D) protruding from the
Stylus Shaft (A). This will allow the Electrode
enough room to stick out from the Stylus Shaft
once the Stylus Hull (E) is placed back on the
Stylus Shaft.
• Lock the Electrode (D) into place by hand tight-
ening the Collet Cap (C) in a clockwise direction.
• Replace the Stylus Hull (E) by pushing it in until
you feel it snap back into place. The Electrode
(D) should protrude from the Stylus Hull (E) by
1/8 – 1/4 inch (3.175 – 6.35mm after the Stylus
Hull is snapped back into place). See Figure 7.1.
Electrode Care
WORKPIECE ELECTRODE PRESSURE
Touch the workpiece to the electrode with very light
pressure. Too much pressure will cause the workpiece
to stick to the electrode and cause the electrode to
become contaminated (workpiece material on the elec-
trode). Sunstone recommends cleaning or changing the
electrode when it sticks to the workpiece.
WHEN TO SHARPEN THE ELECTRODE
The majority of applications are best accomplished
using a sharp electrode tip. See Figure 7.2. A sharp tip
improves arc initiation and helps focus the arc properly.
It is recommended that you pay close attention to the
electrode condition. An electrode that appears to be
dark colored or covered with material from previous
welds can lead to inconsistent welding and poor igni-
tion of the weld arc. When this occurs, simply sharpen
the electrode with the included diamond disk. The
diamond disk can be attached to a rotary tool. Follow
these steps for sharpening the electrode:
Example of a Sharp
Electrode Tip
Example of a Flat
Electrode Tip
Figure 7.2.
Stylus Hull