Zapp Plus User Manual
How to Connect the Basic Cables
With Auto Darkening Lens
The Zapp Plus cable connections vary. If you pur-
chased the darkening lens or the microscope, ca-
bling needs change slightly. The darkening lens or
microscope will automatically darken when the weld
takes place, which allows the operator to have a view
during the welding process. Reference Figure 10.1 and
follow these instructions for easy setup:
• Remove the welder and Darkening Lens System
-
space.
• Plug the female end of the power cable into
the AC Power port (C) on the back of the power
supply. Then connect the male end into an AC
power supply. The Zapp Plus has an internal
switching power supply that can accept both
120 and 240VAC.
•
(A) on the back of the welder. It may wiggle
when connected, but should not come out if
pulled on.
• Insert the RJ45 Darkening Lens cable (from the
back of the Darkening Lens System or “ADL”)
into the Shutter port (E) on the front of the
welder. If using a microscope, see page 5 for
instructions.
• Note: Basic ADL is hard wired into the
auto-darkening lens. Upgraded ADL requires 2
connections: 1) Shutter Port on the welder, and
2) RJ45 Port on back of ADL.
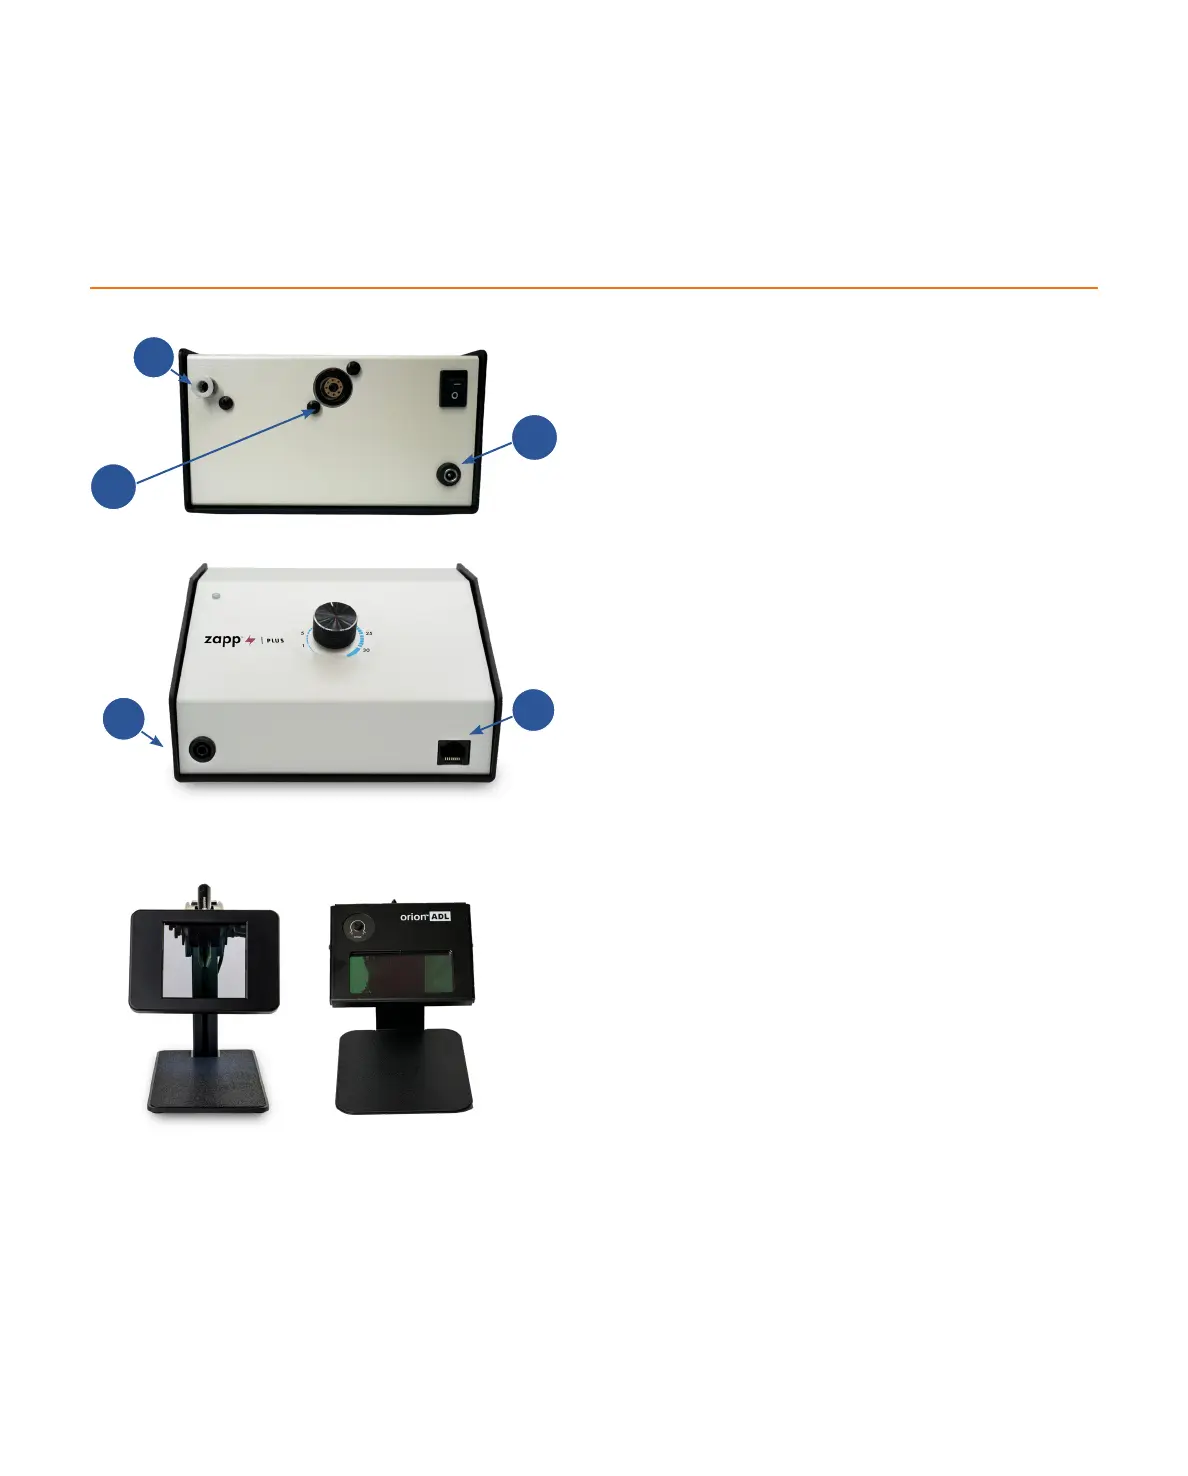
Figure 10.1. The back panel of the Zapp Plus. Argon
Gas Port (A). Stylus Port (B). Power Port (C).
Figure 10.3. Upgraded Auto Darkening Lens (Left) and
Regular Auto Darkening Lens (Right).
Appendix A
Figure 10.2. The back panel of the Zapp Plus.
Grounding Port (D). Shutter Port (E).
D
E
10 • Questions? Call or Text +1-801-658-0015
B
A
C