Questions? Call or Text +1-801-658-0015 • 15
Figure 15.1. Turn this knob to adjust microscope
focus. You’ll nd one knob on each side of the
microscope arm.
How to Adjust Microscope Focus
• Twist the knob on the microscope forward and
backward to lower and raise the head. This
will allow you to focus the microscope on the
welding stylus. See Figure 15.1.
•
to help judge the correct focus location. Focus
the microscope until the texture on the skin of
How to Place the Welding Stylus
• If using a microscope with the Zapp Plus,
insert the Welding Stylus into the holder at the
bottom of the Microscope Arm Assembly as
shown in Figure 15.2.
• The tubing can be routed up and through the
removable cable guide portion of the Micro-
scope Arm Assembly if desired.
• For now, position the Welding Stylus such that
only the smaller diameter portion protrudes
from the holder, as shown in Figure 15.2. Then,
tighten the thumb screw on the bottom of the
stylus holder to hold it in place.
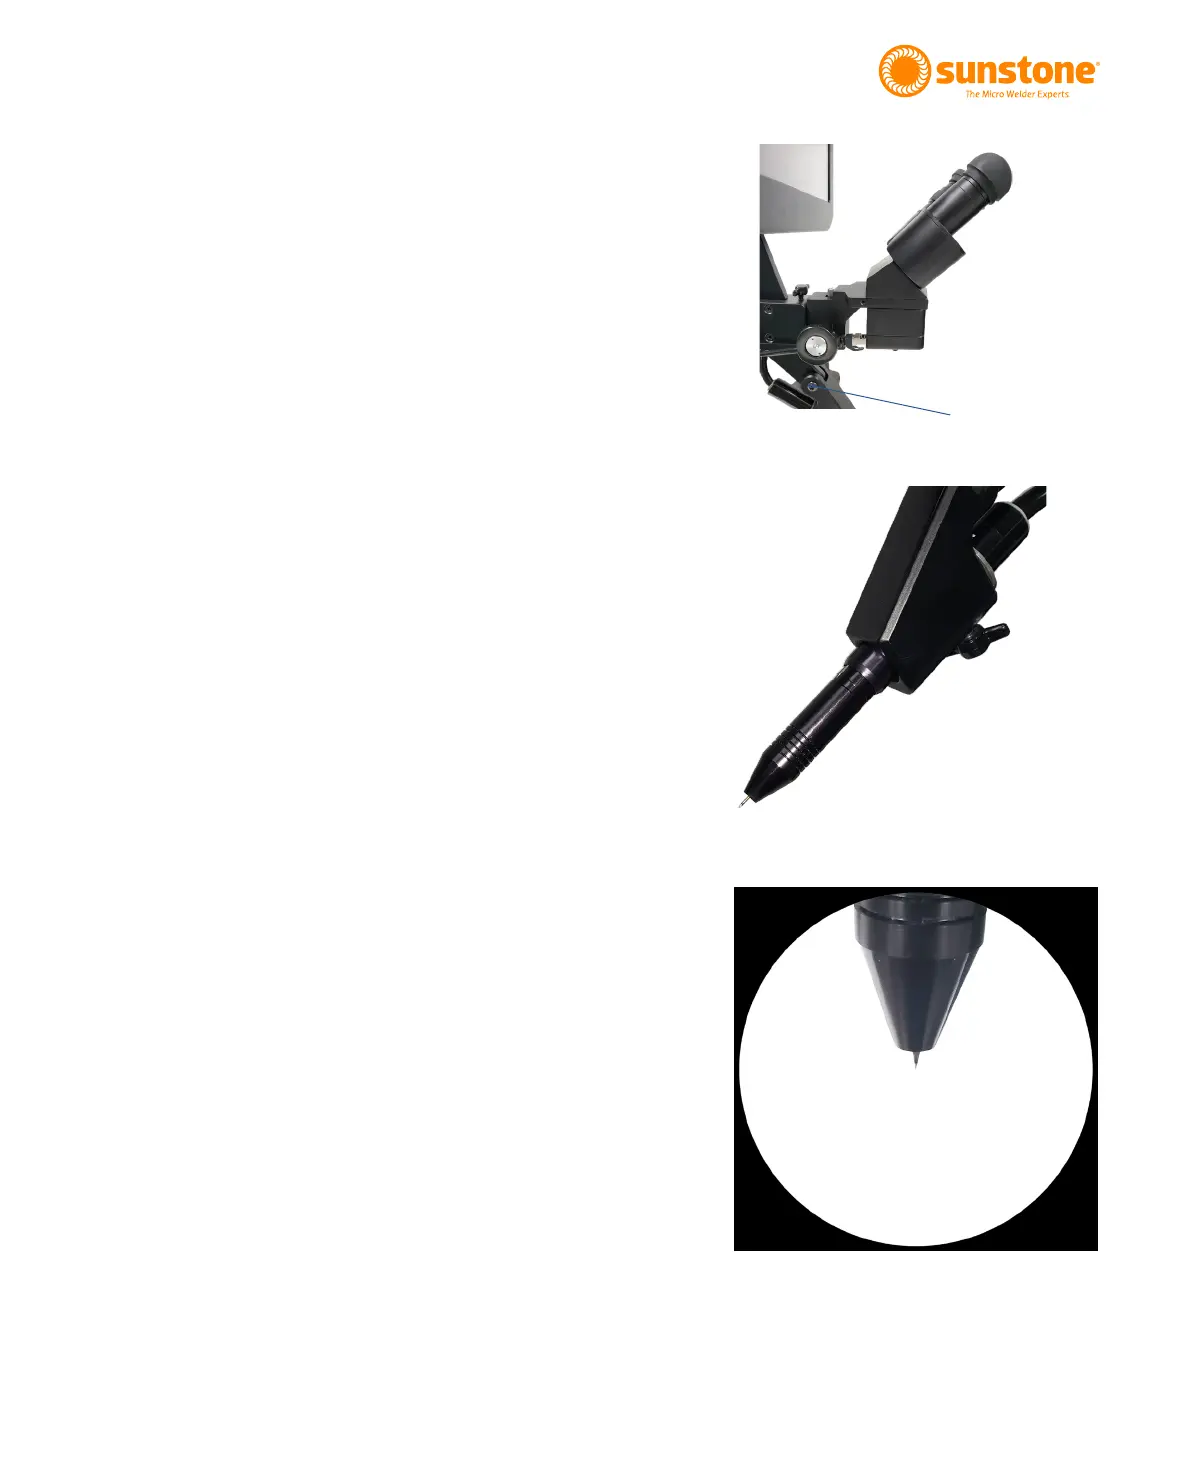
• Adjust the stylus holder to approximately a
45-degree angle as shown in Figure 15.2 (the
stylus should be angled down).
• Fine tune the position of the Welding Stylus
while looking through the microscope: Loosen
the thumb screw on the bottom side of the
stylus holder and slide the Welding Stylus
forward and backward until the tip of the
Welding Stylus is in the center of your focus.
See the example in Figure 15.3.
Figure 15.2. Stylus mounting for microscope.
Figure 15.3. Only a small portion of the
electrode should extrude from the holder.