Questions? Call or Text +1-801-658-0015 • 1
The Zapp Plus does not require the use of any lens or microscope. Always wear proper eye protection when you
•
• Plug the male end of the power cable into the AC Power port (C) on the back of the power supply. Then
connect the female end into an AC power supply. The Zapp Plus Plus has an internal switching power
supply that can accept both 120 and 240VAC.
•
connected, but should not come out if pulled on.
• Connect the alligator clip to the grounding port (D) on the front panel.
• Connect the stylus to the back of the welder (B).
Electrode Setup
The Zapp Plus comes standard with a 1.0mm electrode collet and three (3) 1.0mm electrodes. The 1.0mm elec-
0.5mm electrodes.
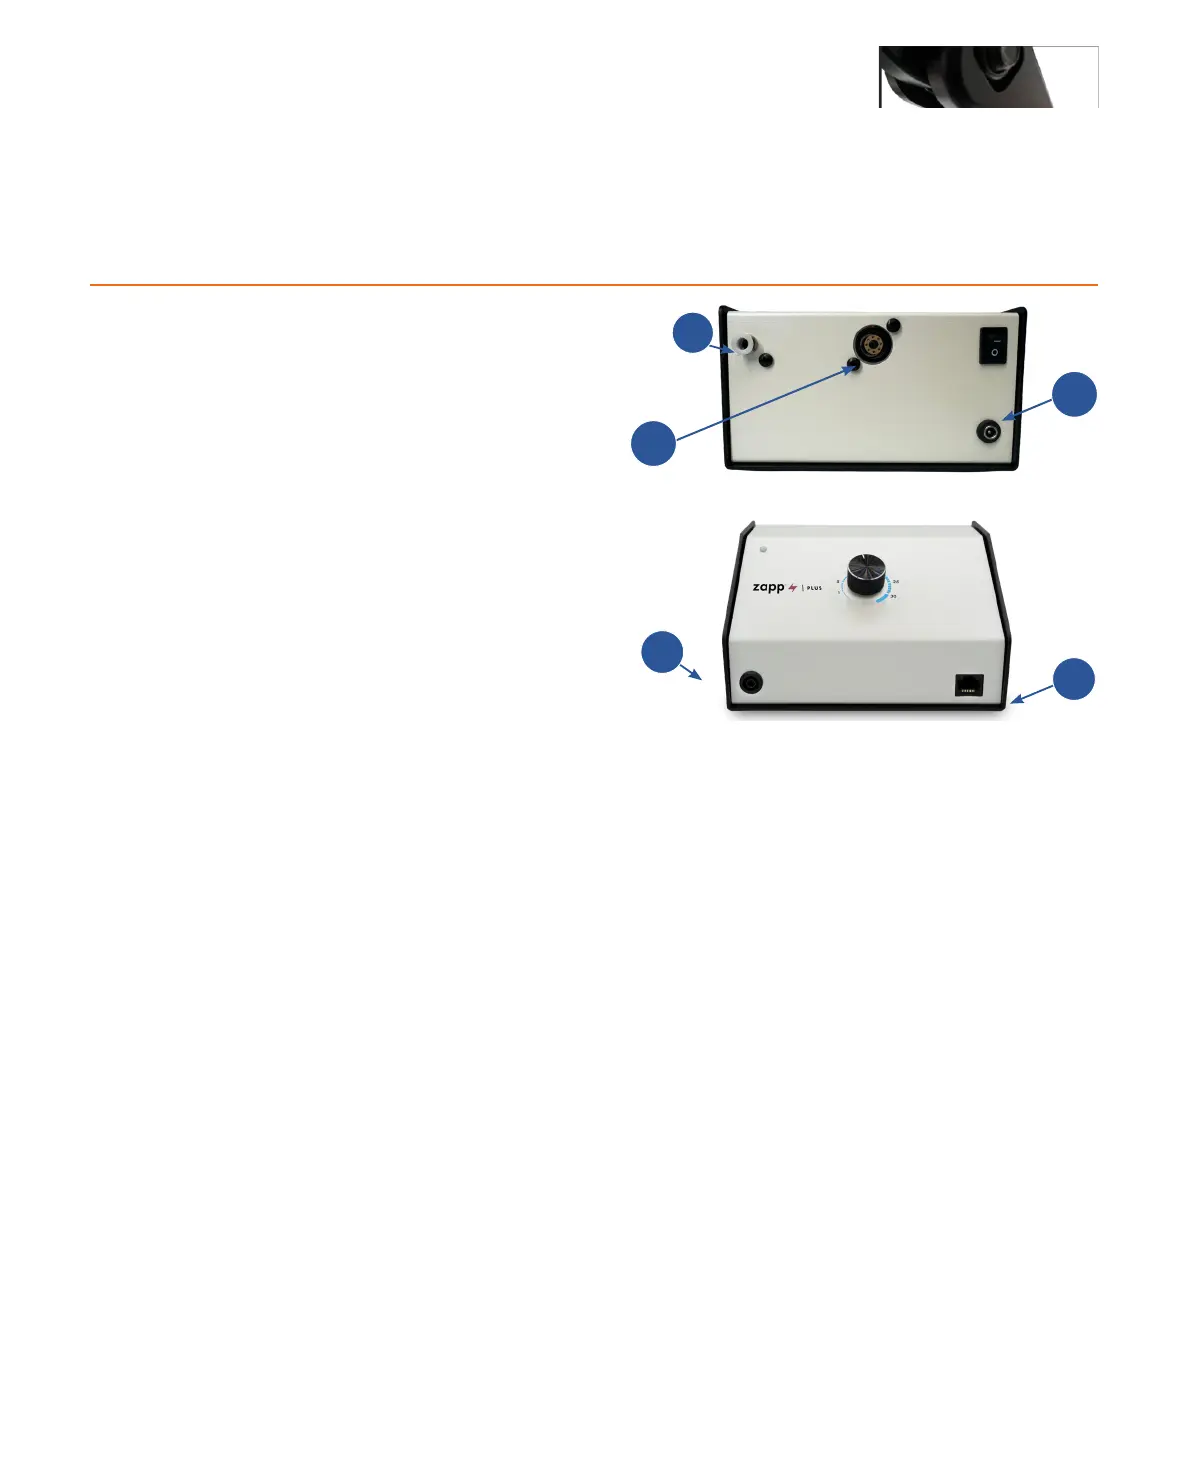
Figure 1.1. The back panel of the Zapp Plus. Argon Gas
Port (A). Stylus Port (B). Power Port (C).
Figure 1.2. The back panel of the Zapp Plus. Grounding
Port (D). Shutter Port (E).
D
E
What is in the Box
(1) Zapp Plus Welder/Power Supply and Stylus Hand Piece
(1) Zapp Plus Welder Power Cord (2 pieces)
(1) Alligator Clip
(1) Precision Grounding Clip
(1) Shielding Gas Hose
(1) Electrode Vial (three 1.0 mm Electrodes)
(1) Metal sample card
(1) Pair of shaded welding glasses
How to Connect the Basic Cables
Welder Setup & Assembly
B
A
C